Table of Contents
Advertisement
Dual MOSFET keying circuit will key
transmitters up to 60 V, positive or
negative
Simple, convenient pushbutton interface
with Morse code prompts
Eight 127-character message memories
can be chained together for longer
messages
Works with any dual lever iambic paddle,
single lever keyer paddle or straight key
Dot and dash memories, automatic timing
and element spacing
Easy message entry using your paddle
Simple feature setup with no paddle
needed
Auto straight key detect, all message
memories available with straight key
"Bug" mode allows automatic dots with
manually formed dashes
Speed adjustable from 5 WPM to 60 WPM
via menu OR speed control potentiometer
Speed control can be set to your preferred
speed range
Dual-Set Speed allows quick QRS/QRQ
and return to favorite speed
Adjustable weight
Variable pitch audio sidetone
QRSS mode with 1-255 second dots
Ultra PicoKeyer
Ultra PicoKeyer
Morse Code Memory Keyer
27 January 2017 (Firmware V2.2)
Curtis "A" or "B", "bug" and Ultimatic
keying modes
Variable letter spacing
Tune mode with 50% or 100% duty cycle for
easy tuneup
Beacon mode with repeat delay up to 255
seconds and optional power-on auto start
MCW mode for sending audio Morse over
voice radios
Memory "pause" command with automatic
resume allows manual insertion of RST etc.
into message
Auto-incrementing QSO / serial number can
be embedded in memory messages, with or
without leading zeros
Paddle switching - select left or right handed
operation
Transmitter QSK delay compensation
Memory and parameter settings retained with
power off
Low voltage - from as low as 2.5 V to 3.5 V
Low current - typically under 1 mA when
keying, with automatic extreme low current
sleep mode
All controls and connectors on board
Two MYCALL memories for storing your
callsign or other information
Page 1 of 21
Advertisement
Table of Contents

Summary of Contents for HamGadgets Ultra PicoKeyer
- Page 1 Ultra PicoKeyer Morse Code Memory Keyer Curtis “A” or “B”, “bug” and Ultimatic Dual MOSFET keying circuit will key transmitters up to 60 V, positive or keying modes negative Variable letter spacing Simple, convenient pushbutton interface...
- Page 2 Operating the Ultra PicoKeyer Once your Ultra PicoKeyer is assembled, mounted in the cabinet and has the battery installed, it’s time to connect your paddles and transmitter or transceiver and take a little time to read this manual to learn how to use your PicoKeyer’s features.
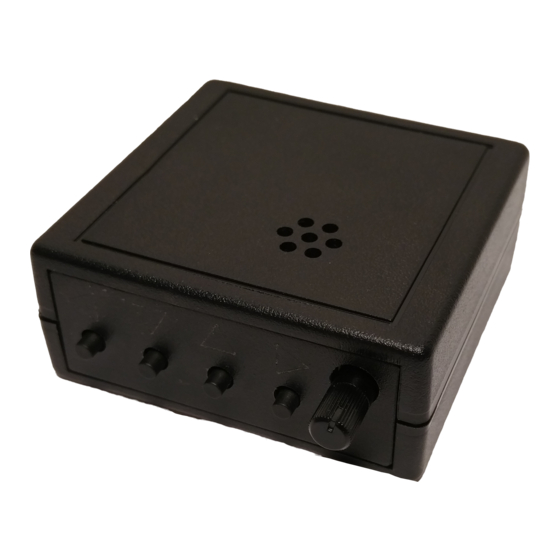
- Page 3 The Ultra PicoKeyer has four memories, controlled by the four pushbuttons on the front panel. Operating these buttons is very simple and straightforward, and their use is as you might expect from a modern electronic device.
- Page 4 When playing back a message in setup mode you will hear the command itself, not its effect – message chaining, QSO numbers, pause and beacon mode are inactive while in setup mode. For example, you will Ultra PicoKeyer 27 January 2017 (Firmware V2.2)
- Page 5 To insert the contents of a MYCALL message, insert the command /Y, /Y1 or /Y2. /Y or /Y1 will send MYCALL #1; /Y2 will send MYCALL #2. Ultra PicoKeyer 27 January 2017 (Firmware V2.2) Page 5 of 21...
-
Page 6: Battery And External Power
The battery in your Ultra PicoKeyer should last for a long time – anywhere from several months to several years. Battery life depends on a few factors: ... - Page 7 If you prefer, you can use a 3.5 mm stereo plug to connect an external device for sidetone. This will disconnect the on-board speaker. The PIC processor chip used in the Ultra PicoKeyer can drive small ear buds or headphones with 32 ohms or greater impedance.
- Page 8 Using Your Keyer with a Handheld or FM Rig (“MCW” Mode) One of the unique features of your Ultra PicoKeyer is MCW mode (menu option “T” for sidetone, select “M” for MCW). In this mode, the keying output can be used to trigger the PTT input of a VHF or UHF handie-talkie or FM mobile rig, allowing you to use your FM rig for Morse code.
-
Page 9: About Setup Mode
▼and ▲ buttons to change settings. “?” means you’re in setup mode, and “did dit” means you’re back in normal operating mode. Using the Ultra PicoKeyer’s setup mode is very simple and intuitive, with only a few very simple things to remember. - Page 10 Speed may be set from 5 WPM to 60 WPM. If you want to return to the default 13 WPM setting, simply press and release buttons 2 and 3 at the same time. Ultra PicoKeyer 27 January 2017 (Firmware V2.2)
- Page 11 Beacon delay: The keyer sends the current default beacon delay in seconds. Use the ▲ (Default: 15 and ▼ buttons to set the delay between beacon transmissions from 0 to 255 seconds. Ultra PicoKeyer 27 January 2017 (Firmware V2.2) Page 11 of 21...
- Page 12 MENU is always sent in long mode regardless. VERS Firmware version: The keyer sends the version number of its internal firmware program. This is informational and cannot be changed. Ultra PicoKeyer 27 January 2017 (Firmware V2.2) Page 12 of 21...
-
Page 13: Before You Start
Before You Start Your Ultra PicoKeyer kit was designed with the beginning kit builder in mind. With just a little care and practice, even a first time kit builder can complete the project in a relatively short time. You will need to gather a few tools and supplies together before beginning to assemble your kit. - Page 14 Just soldering the pins on the bottom of the board like any other through- hole part is enough. Ultra PicoKeyer 27 January 2017 (Firmware V2.2) Page 14 of 21...
- Page 15 Don’t spend too much time soldering the speaker or it may be damaged. Ultra PicoKeyer 27 January 2017 (Firmware V2.2) Page 15 of 21...
- Page 16 0.01 μF (marked 103). Be careful while testing this! much audio can damage your hearing. If you intend to use earphones or headphones, try it with the earphones or headphones OUT of your ears first. Ultra PicoKeyer 27 January 2017 (Firmware V2.2) Page 16 of 21...
- Page 17 You may need to trim the cut-off component leads a little closer to the board to get everything to fit right. Ultra PicoKeyer 27 January 2017 (Firmware V2.2) Page 17 of 21...
-
Page 18: Support Information
Support Information Warranty & Support Your Ultra PicoKeyer Kit is guaranteed against defects for one year from date of purchase. This warranty does not cover damage due to improper modification, improper soldering or wiring, overvoltage, static damage or other misuse or abuse. That said, if you have problems please contact me via email to arrange for an exchange or replacement part. - Page 19 Check to see if you need to adjust the fit of your keyer in the cabinet. It’s usually either a button or the seed pot not installed correctly, or leaving the cut-off leads too long on the bottom of the board. Ultra PicoKeyer 27 January 2017 (Firmware V2.2)
-
Page 20: Schematic Diagram
Schematic Diagram Ultra PicoKeyer 27 January 2017 (Firmware V2.2) Page 20 of 21... -
Page 21: Firmware Version History
Added ~ 32 second timeout to setup menu. 2017/01/27 Paddle re-scan using middle buttons will now announce "P" for PADDLE or "K" for KEY. Added BANK 2 with four more memory slots, and BANK/BK menu. Ultra PicoKeyer 27 January 2017 (Firmware V2.2) Page 21 of 21...
Need help?
Do you have a question about the Ultra PicoKeyer and is the answer not in the manual?
Questions and answers