Table of Contents
Advertisement
USER MANUAL
AFTER SALES SUPPORT:
WWW.SPTOOLS.COM
IMPORTANT
ALL PERSONS WHO ARE TO USE THIS EQUIPMENT MUST THOROUGHLY READ
AND UNDERSTAND THIS INSTRUCTION MANUAL PRIOR TO OPERATION.
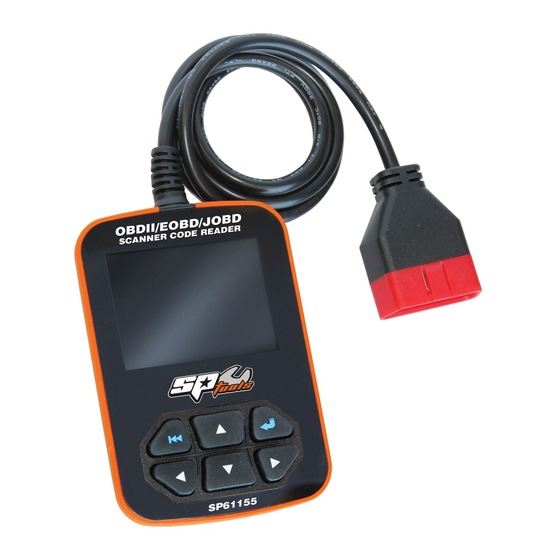
SP61155
SCANNER CODE
READER CAN
OBDII/EOBD/JOBD
RETAIN THESE INSTRUCTIONS
AND ATTACH RECEIPT TO
MANUAL FOR FUTURE
NOTE: Proof of purchase must be retained by
the customer as it will be required in the
event of a claim under warranty.
AUSTRALIA: Visit the website's contact page to get in
touch with your local service department.
INTERNATIONAL: Use the county selector to get in touch
with your service department in your country or region.
REFERENCE
Advertisement
Table of Contents

Related Manuals for SP tools SP61155

Summary of Contents for SP tools SP61155
- Page 1 USER MANUAL SP61155 SCANNER CODE READER CAN OBDII/EOBD/JOBD RETAIN THESE INSTRUCTIONS AND ATTACH RECEIPT TO MANUAL FOR FUTURE REFERENCE NOTE: Proof of purchase must be retained by the customer as it will be required in the event of a claim under warranty.
-
Page 2: Table Of Contents
CONTENTS Introduction Safety Precautions and Warnings General Information 2.1 On-Board Diagnostics (OBD) II 2.2 Diagnostic Trouble Codes (DTCs) 2.3 Location of the Data Link Connector (DLC) 2.4 OBD II Readiness Monitors 2.5 OBD II Monitor Readiness Status 2.6 OBD II Definitions 3. -
Page 3: Introduction
INTRODUCTUCTION 1. Safety Precautions and Warnings To prevent personal injury or damage to vehicles and/or the scan tool, read this instruction manual first and observe the following safety precautions at a minimum whenever working on a vehicle: 1. Always perform automotive testing in a safe environment. 2. -
Page 4: Diagnostic Trouble Codes (Dtcs)
2.2 Diagnostic Trouble Codes (DTCs) OBD II Diagnostic Trouble Codes are codes that are stored by the onboard computer diagnostic system in response to a problem found in the vehicle. These codes identify a particular problem area and are intended to provide you with a guide as to where a fault might be occurring within a vehicle. -
Page 5: Obd Ii Monitor Readiness Status
Continuous Monitors -- Some of the vehicle components or systems are continuously tested by the vehicle's OBD II system, while others are tested only under specific vehicle operating conditions. The continuously monitored components listed below are always ready: 1. Misfire 2. -
Page 6: Using The Scan Tool
DTC -- Diagnostic Trouble Codes (DTC) that identify which section of the emission control system has malfunctioned. Enabling Criteria --Also termed Enabling Conditions. They are the vehicle-specific events or conditions that must occur within the engine before the various monitors will set,or run. Some monitors require the vehicle to follow a prescribed "drive cycle"... -
Page 7: Specifications
1. LCD DISPLAY -- Indicates test results. 2. ENTER BUTTON--Confirms a selection (or action) from a menu. 3. ESC BUTTON -- Returns to previous menu. 4/5. UP/DOWN BUTTONs-- Move cursor up or down for selection. 6/7. RIGHT/LEFT BUTTONs -- Move cursor right or left for selection; Or turn page up or down when more than one page is displayed. - Page 8 1). Select language: Selects desired language. Choose [Language] and press [ENTER], the screen will display the interface as shown below: You can press [UP] [DOWN] key to select any language and press [ENTER] The system will convert to the chosen language interface at once. 2).
-
Page 9: Vehicle Coverage
4). Time and Date: Set Time and Date. Choose [Time and Date] and press [ENTER], the screen will display the interface as shown below: Press [UP] or [DOWN] to change input, press [LEFT] or [RIGHT] to select position, then press [ENTER] to confirm. 5). -
Page 10: Operation
4. OPERATION 4.1 Connection 1). Turn the ignition off. 2). Locate the vehicle 3). Plug the OBDII cable into the vehicle 4). Turn the ignition on. Engine can be off or running. After finishing, press [ENTER] button to enter Main Menu as following picture: CAUTION: Don't connect or disconnect any test equipment with ignition on engine running. - Page 11 4.2.1 Read Codes Select [Read Codes] and press [ENTER] in Diagnostic Menu. If there are some codes, the screen will display the codes as shown below: According to the above figure to select different item by pressing [UP] or [DOWN] and press [ENTER] to confirm.
- Page 12 4.2.2 Erase Codes Select [Erase Codes], the screen will display the interface as shown below: Press [ENTER] to erase DTC shown below: According to the above figure to press [ENTER] and the screen will display the interface as shown on the next page: Notes: Before performing this function, make sure to retrieve and record the trouble codes.
- Page 13 4.2.3 I/M Readiness I/M refers to Inspection and Maintenance that is legislated by the Government to meet federal clean-air standards. I/M Readiness indicates if or not the various emissions-related systems on the vehicle operating properly and ready for I/M testing. The purpose of the I/M Readiness Monitor Status is to indicate which of the vehicle described in Chapter 2.5), and which ones have not yet run and completed testing and diagnosis of their designated sections of the vehicle system.
- Page 14 4.2.4 Data Stream Press [UP] or [DOWN] button to select Data Stream in Main Menu interface and then press [ENTER] button to confirm, the screen will display the interface as shown below: Select [View All Items] and press [ENTER] button, the screen will display the interface as shown below: You can use [LEFT] [RIGHT] button to view other data streams.
- Page 15 You can use [UP] [DOWN] button to select data stream items, and press [LEFT] [RIGHT] button to turn page, the screen will display the interface as shown on the next page: After selected items and press [ESC], the screen will display the interface as shown below: Press [ESC] to return to Diagnostic Menu.
- Page 16 You can use [UP] [DOWN] button to select single data stream items to view item of live data with a graph, and press [ENTER] button, the screen will display the interface as shown below: Note: There are four lines with different colour: red, green, blue, black, they stand for different data-stream chosen.
- Page 17 4.2.6 O2 sensor test The results of O2 sensor test are not live values but instead the results of the ECU live sensor screens such as Graph Screen. Not all test values are applicable to all vehicles. Therefore, the list generated will vary depending on vehicle. In addition, not all vehicles support the Oxygen Sensors screen.
- Page 18 4.2.7 On-board monitor test This function can be utilized to read the results of on-board diagnostic monitoring tests for specific components/systems. Select [On-board Monitoring] in main menu and press [ENTER] and the screen will display as shown below: You can use [UP] [DOWN] button to select an item and press [ENTER], the screen will display as shown below: Press [ESC] to return to Diagnostic Menu.
-
Page 19: Jobd Diagnose
4.2.9 Vehicle Information Select [Vehicle Info] and press [ENTER], the screen will display the information, such as VIN (Vehicle identification Number), CID (Calibration ID) and CVN (Calibration verification number), as shown below: Press [ESC] to return to Diagnostic Menu. 4.3 JOBD Diagnose Select [JOBD Diagnose] in Main Menu and press [ENTER], the screen will display the following menu. -
Page 20: Dtc Lookup
2) View the code and definition, press exit to return the previous menu 4.3.2 Erase Codes 1) Use Up or Down button to select Erase Codes and press ENTER button. 4.3.3 Data Stream Press [UP] or [DOWN] button to select Data Stream in Main Menu interface and then press [ENTER] button to confirm, the screen will display the interface as shown below: Press [UP] or [DOWN] button to select View All Items / Select Items and press [ENTER] button to confirm, the screen will display the relative data. -
Page 21: Review History
You can use [UP] [DOWN] key to change the first letter. It can be switched among. Press [LEFT] [RIGHT] key to input number. After you input the code number, press [ENTER] to view the definition of the code. After viewing the definition, press [ESC] to return to the Main Menu. -
Page 22: Help
The recorded DTC will be displayed as shown above. You can use [UP] [DOWN] key and press [ENTER] button to view detailed information, 2). Review Data stream: The operation is similar to the "Review DTC" function. 3). Review Freeze Frame: The operation is similar to the "Review DTC" function. 4). - Page 23 2). About OBD: Relevant introductions information about OBD 3). About Data stream: Relevant introductions information about Data stream. Select [About Data-stream] in the Help Menu and press [ENTER] and the screen will display the interface as shown below: Select the data-stream item and press [ENTER] to review data-stream status. Press [ESC] to return to previous menu.
-
Page 24: Warranty Details
To the extent permitted by law and subject to this Limited Warranty, and as part of the terms of the sale of the equipment or part thereof: SP Tools shall not be liable for any form of loss, damage, cost, injury or harm of any kind (whether direct, indirect, special or consequential) howsoever arising from the use or supply of the equipment to the purchaser.
Need help?
Do you have a question about the SP61155 and is the answer not in the manual?
Questions and answers
How to change the scanner back to English?
To change the SP Tools SP61155 scanner language to English:
1. Choose the language interface option.
2. Press [ENTER] to enter the language settings screen.
3. Use [UP] or [DOWN] to select the language.
4. Use [LEFT] or [RIGHT] to change the language to English.
5. Press [ENTER] to confirm the selection.
This answer is automatically generated