Advertisement
Quick Links
Install Safety:
- Inspect the installation area for safety hazards
- Be sure to remove all metal, such as rings and other jewlery
- Dissconnect all power sources and ensure solar panels are completely covered by
- a box or blanket until installation is complete
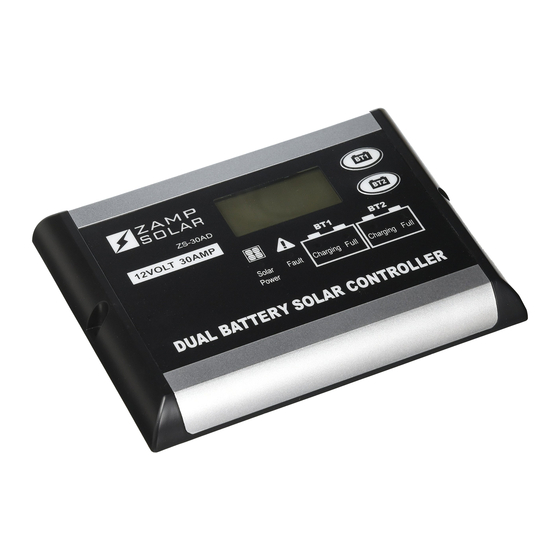
Install Instructions:
1. Arrange the layout of your panels and wires, ensuring that:
- 3-port roof cap is no more than 15' from charge controller
- panel leads can reach 3-port roof cap
- charge controller is no more than 9' from battery
- panels are not shaded by vents, AC units, or other obstructions
2. Connect 15' Solar wire(s) to the 3-port roof cap(s).
- Strip the ends of both positive and negative wires ½ inch
- Screw the red (+) wire into corisponding positive terminal, black (-)
wire into corisponding negative terminal.
3. Mount 3-port roof cap and route the 15' cable from roof to charge controller location
*Do not make connections at this time
4. Proceed to route the 10' cable from the charge controller to the battery
*Do not make connections at this time
5. Connect the positive solar wire to the charge controller, then connect the positive
battery wires to the controller (1 red terminal on BAT 1, 1 red terminal on BAT 2).
6. Stack the negative wires on the charge controller (solar wire on bottom, battery wires on top)
7. Mount your charge controller
8. Attach mounting feet to panels and proceed with panel installation.
9. Connect positive wire to battery and repeat with negative wire
10. You may now plug the SA E leads into the 3-port cap and uncover your panels
11. You are now charging your battery.
12. Configure your charge controller to the proper battery type(s)
30AD Deluxe Roof Mounted Quick Start Guide
Fuse Blocks
Fuse Block
Advertisement

Summary of Contents for Zamp Solar 30AD
- Page 1 30AD Deluxe Roof Mounted Quick Start Guide Install Safety: - Inspect the installation area for safety hazards - Be sure to remove all metal, such as rings and other jewlery - Dissconnect all power sources and ensure solar panels are completely covered by...
- Page 2 Common solar wiring for multiple 12-Volt Batteries When wiring a solar kit to multiple batteries, it is important to remember that your batteries are wired together. To gain the most from your solar kit, be sure to place the positive wire on the first battery in the sequence and the negative wire on the last battery in the sequence. This is true regardless of the number of batteries in the bank.
- Page 3 US Removable Mounting Feet Quick Start Guide Top View Side View Omni-Mount Included Mounting Foot Components Frame Solar Panel Mounting Mounting Screws - B (4) Mounting Foot Top Foot Top - C (4) Mounting Foot Bottom - D (4) Lock Washer - E (4) ¼-20 Nuts Mounting Foot Top...