Table of Contents
Advertisement
Quick Links
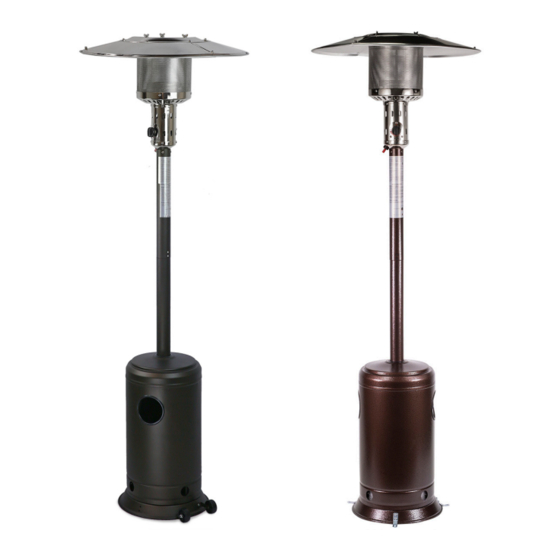
1500W LAMP HEATER
ITEM # 96053C (BRONZE ), 96054C ( MOCHA)
OWNER'S MANUAL AND SAFETY INSTRUCTIONS
SAVE THIS MANUAL. KEEP THIS MANUAL FOR SAFETY WARNINGS, PRECAUTIONS, ASSEMBLY,
OPERATION, INSPECTION, MAINTENANCE AND CLEANING PROCEDURES. WRITE THE PRODUCT'S
SERIAL NUMBER ON THE BACK OF THE MANUAL, OR THE MONTH AND YEAR OF PURCHASE IF
PRODUCT HAS NO SERIAL NUMBER
FOR QUESTIONS, PLEASE CALL CUSTOMER SERVICE: 909.628.4900
Advertisement
Table of Contents

Related Manuals for Barton 96053C


Summary of Contents for Barton 96053C
- Page 1 1500W LAMP HEATER ITEM # 96053C (BRONZE ), 96054C ( MOCHA) OWNER’S MANUAL AND SAFETY INSTRUCTIONS SAVE THIS MANUAL. KEEP THIS MANUAL FOR SAFETY WARNINGS, PRECAUTIONS, ASSEMBLY, OPERATION, INSPECTION, MAINTENANCE AND CLEANING PROCEDURES. WRITE THE PRODUCT’S SERIAL NUMBER ON THE BACK OF THE MANUAL, OR THE MONTH AND YEAR OF PURCHASE IF PRODUCT HAS NO SERIAL NUMBER FOR QUESTIONS, PLEASE CALL CUSTOMER SERVICE: 909.628.4900...
-
Page 2: Safety Information
SAFETY INFORMATION Read all safety warnings and instructions. Failure to follow the warnings and instructions may result in injury and/or property damage. Save all warnings and instructions for future reference. The warning and safety instructions in this manual are not meant to cover all possible conditions and situations that may occur. - Page 3 SAFETY INFORMATION This heater is a combustion appliance. All combustion appliances produces carbon monoxide (CO) during the combustion process. This product is designed to produce extremely minute, non-hazardous amounts of CO. DO NOT block air flow into or out of the heater. For outdoor use ONLY.
-
Page 4: Package Contents
PACKAGE CONTENTS... - Page 5 ASSEMBLY PREPARATION Before beginning assembly, make sure all parts are present. Compare all parts against the contents list and hardware are represented in the contents. If any parts are missing or damaged, do not attempt to assemble the heater. Contact customer service for replacement parts. Tools required for assembly, not included: •...
- Page 6 ASSEMBLY STEP 4: Attach upper post to lower post by screwing the two pieces of the post together. STEP 5: Slide tank housing over the assembled upper/ lower posts and down over the post supports . Rest the tank housing on the base STEP 6: Attach the reflector studs to the top of the head assembly .
- Page 7 ASSEMBLY STEP 8: Install reflector, note: make sure to remove plastic cover on the reflector pieces prior to assembly. Assembly Tip: If necessary for proper alignment of reflector sections, loosen each screw prior to further assembly and re-tighten after sections are aligned. Slide two Reflector Panels together.
-
Page 8: Operation
OPERATION A minimum supply pressure of .5PSI is required for the purpose of input adjustment of propane gas. Storage of an appliance indoors is permissible only if the cylinder is disconnected and removed from the appliance. A cylinder must be stored outdoors in a well ventilated area out of reach of children. A disconnected cylinder must have dust caps tightly installed and must not be stored in an enclosed area out of children’s reach. - Page 9 OPERATION NOTE: Do not attempt to operate this appliance until you have read and thoroughly understand all safety information in this manual and all assembly is complete and leak tests are routinely performed. BEFORE LIGHTING THE HEATER 1. Heater should be thoroughly inspected before each use by a qualified technician, When re-lighting the heater, always wait at least 5 minutes.
-
Page 10: Operation Checklist
OPERATION WARNING: Be careful when attempting to manually ignite the heater. Holding in the control knob for more than 10 seconds before igniting the gas will cause a ball of flame upon ignition. WHEN THE HEATER IS ON: The emitter screen will become bright red due to intense heat. The color is more visible at night. Burner will display tongues of blue and yellow flames. -
Page 11: Operation And Safety
OPERATION | MAINTENANCE OPERATION AND SAFETY: • Unit will operate at reduced efficiency below 40F • Children and adults should be alerted to hazards of high surface temperatures. Stay away to avoid burns. • More frequent cleaning may be necessary to control the compartment burner and circulating air passageways of the heater is to be kept clean and free of debris and/or spider nest. -
Page 12: Maintenance & Troubleshooting
MAINTENANCE | TROUBLESHOOTING STORAGE BETWEEN USES: • Turn the control knob OFF and disconnect the LP source • Store the heater upright in an area sheltered from direct sun and inclement weather. • You can also cover the heater to protect the heater from build up in air passages. Never leave an LPG tank exposed to direct sunlight or excessive heat. -
Page 13: Installation
INSTALLATION... - Page 14 MAINTENANCE / TROUBLESHOOTING OPERATION AND MAINTENANCE...
-
Page 15: Please Read The Following Carefully
OF NOTE PLEASE READ THE FOLLOWING CAREFULLY THE MANUFACTURER AND/OR DISTRIBUTOR HAS PROVIDED THE PARTS LIST AND ASSEMBLY DIAGRAM IN THIS MANUAL AS A REFERENCE TOOL ONLY. NEITHER THE MANUFACTURER OR DISTRIBUTOR MAKES ANY REPRESENTATION OR WARRANTY OF ANY KIND TO THE BUYER THAT HE OR SHE IS QUALIFIED TO MAKE ANY REPAIRS TO THE PRODUCT, OR THAT HE OR SHE IS QUALIFIED TO REPLACE ANY PARTS OF THE PRODUCT.
Need help?
Do you have a question about the 96053C and is the answer not in the manual?
Questions and answers