Advertisement
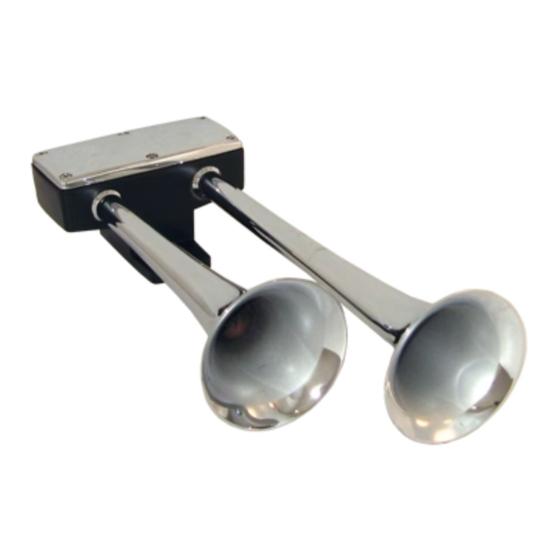
1. Horns should be mounted on top of cab, tilted slightly
downward for best sound projection.
2. If cab is equipped with roof trim panel, remove to install horns.
3. Drill ½" and 11/32" holes (using gasket for template) in position
desired for horns.
4. Place Mounting Pad between base of horn and top of cab roof.
5. Assemble valve and curved tension washer to horn. Insert 5/16"
bolt through front hole of base and tighten nut and lockwasher.
6. Connect tubing from air supply it inlet on manual lanyard valve.
7. Punch hole in trim panel for valve lanyard. Lace lanyard
through panel. Replace panel, fasten lanyard to convenient trim
screw.
CAUTION: Check local noise abatement ordinances to avoid legal violations.
Important – Use Pipe Compound on Pipe
Threads to Assure Air Tight Connections
All Hadley products carry a limited warranty for 12 months from date of purchase. We will repair or replace,
at our option, any defects in material and workmanship during this period when product and proof of
purchase is returned to our service department at the address below.
HADLEY PRODUCTS
Attn: Service Department
2851 Prairie SW, Suite D
Grandville, MI 49418
Service Department Direct: 616-249-8462
Main: 616-530-1717
Fax: 616-530-3283
Form No. H12228
Page 1
Rev. 7/28/04
Installation Instructions
MODEL 900CA
For Vehicles With Air Brakes
www.hadley-products.com
Advertisement
Table of Contents

Related Manuals for Hadley 900CA

Summary of Contents for Hadley 900CA
- Page 1 Threads to Assure Air Tight Connections All Hadley products carry a limited warranty for 12 months from date of purchase. We will repair or replace, at our option, any defects in material and workmanship during this period when product and proof of purchase is returned to our service department at the address below.
Need help?
Do you have a question about the 900CA and is the answer not in the manual?
Questions and answers