Table of Contents
Advertisement
Quick Links
Advertisement
Chapters
Table of Contents

Summary of Contents for JSTRON LVP9000
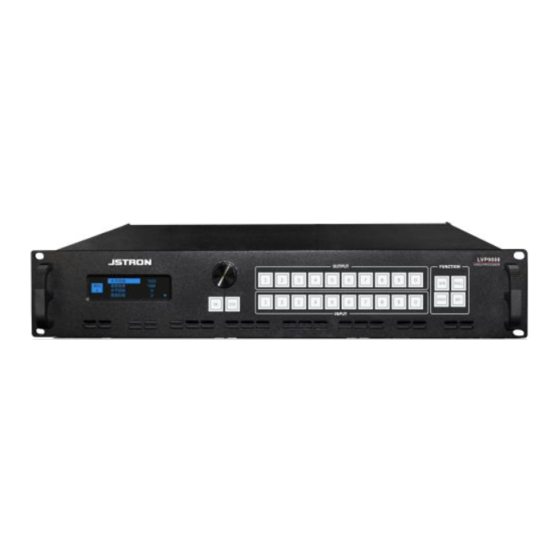
- Page 1 使用说明书 User Manual LED 视频处理器 Video Processor LVP9000...
- Page 2 目 录 声明........................... 1 商标信用........................1 安全须知........................2 附件........................... 3 型号说明........................4 概述........................... 5 面板简介........................7 前面板简介.......................7 后面板简介.......................8 菜单介绍.........................10 默认界面概况....................10 旋钮左旋界面概况..................10 旋钮右旋界面概况..................11 默认菜单概况....................11 主菜单介绍.....................12 输入设置....................12 输出时序....................13 窗口设置....................13 拼接设置....................14 截取设置....................15 画质设置....................15 预设管理....................16 高级设置....................17 系统设置....................17 机器信息....................20 功能说明.........................22 拼接功能......................22 信号连接与分辨率设定................ 22 拼接功能的设置..................22 拼接设置....................23...
-
Page 3: Table Of Contents
自定义 EDID....................24 矩阵功能......................25 预设管理设置....................25 预设场景保存..................25 预设场景擦除..................26 预设模板导入..................26 预设复位....................27 日程管理设置....................27 计数定时....................28 按日期执行.....................29 按星期执行.....................30 多机级联......................31 规格参数.........................32 故障排除.........................34... - Page 4 声 明 未经本公司书面许可,任何单位或个人不得擅自仿制、复制或抄译本手册部分内容或 全部内容。不得将本手册以任何形式(电子、机械、影印、录制或其它可能的方式)进行 商品传播或用于任何商业、营利目的。 在使用本设备前,请认真阅读本手册,所提到的产品规格和资讯仅供参考,如有内容 更新,恕不另行通知。除非有特别约定,本手册仅作为使用指导,所有陈述、信息等均不 构成任何形式的担保。 商 标 信 用 VESA 是视频电子标准协会的商标。 HDMI 标志以及 High-Definition Multimedia Interface (高清多媒体数字接口)都是 HDMI Licensing LLC. 的商标。...
- Page 5 安 全 须 知 本设备必须接有地线。 本设备需使用具有额定功率的电压。保证输入电压误差在±10%之间。 切勿将 AC 电源与某根可能导致过大噪音的 AC 电源线连接。 请在环境温度为 -10℃到 45℃,并且相对湿度≤90%的环境下使用本设备。 切勿在某些特殊环境下使用本设备,比如靠近热源,可能导致设备过热而损坏。请 在通风良好的地方使用本设备,并且注意防止设备通风口阻塞。 切勿将本设备暴露于可能发生意外碰撞或者振动的地方, 如有振动请做好加固处理。 切勿将外物,比如水和金属物体放入本设备后使用。否则,会导致设备损坏并引起 火灾。 如果发现有任何不规则的或者异常现象,请立即关掉电源,断开 AC 电源线,并参 见“故障排除”进行处理。 如果本设备有所损坏,切勿自行拆卸。请联系维修服务部。...
- Page 6 附 件 表 1.1 产品包装内容 项 目 名 称 数 量 LVP9000 电源线 DVI 线 用户手册 合格证 保修卡 * 以上配件可根据用户的使用情况合理配置。...
- Page 7 型 号 说 明 表 2.1 型号说明 描 述 型 号 输入板(数量) 输出板(数量) LVP9000 2 DVI 2 DVI (出厂默认) LVP9000-A 1 HDMI、1 DP、1 DVI、1 SDI 4 DVI LVP9000-B 1 DP + 1 HDMI 4 DVI LVP9000-C 2 DP + 2 HDMI...
- Page 8 LVP9000 系列是一款高性能的超高清拼接器,它采用了 30 位数字图像处理、先进的 去隔行信号处理和专业级缩放处理技术。支持 4K*2K 输入输出、4K60 无损分割、内嵌混 合矩阵功能、超大分辨率带载(最高支持 8K*4K)、可接收多种类型的视频输入格式, 如 DP、HDMI、DVI 和 SDI。 超高清拼接器 LVP9000 系列拼接器支持多种视频输入格式,通过简单的拼接设置,即可实现超大 分辨率 8K*4K 的显示需求。 接收超高清 4K(UHD)信号 LVP9000 系列拼接器接收 4K(UHD)信号,相比于 1080P 画面细节提升四倍,很好 的保留了画面色彩细节。 4K60 无损分割 LVP9000 支持超高清 4K60(UHD)信号,可将其画面以 1080P 进行无损分割。 超大分辨率带载,横向纵向自定义排布 最大支持 8K*4K,解决普通拼接器带载能力不足的问题。 混合矩阵 LVP9000 系列拼接器具备内嵌混合矩阵功能,可当作混合矩阵使用。...
- Page 9 自定义 EDID 根据实际应用设置合适的 EDID,操作简单快捷。 输入信号 选配:2 路 DP 输入,2 路 HDMI 输入,2 路 DVI 输入,2 路 SDI 输入。可根据实际 应用合理选配。 输出信号 选配:2 路 DP 输出、2 路 HDMI 输出、2 路 DVI 输出、2 路 SDI 输出。可根据实际 应用合理选配。 便捷的前面板 直观的 OLED 显示界面,便捷的旋钮控制和清晰的按键灯,简化了系统的安装与控 制。 功能按键 快捷进入窗口设置、拼接设置、截取设置和画质设置。...
- Page 10 面 板 简 介 前 面 板 简 介 图 1.1 前面板 表 3.1 前面板说明 序号 名称 操作说明 OLED 显示屏 显示菜单信息和当前界面信息 旋钮 上下左右方向选择和参数的调节,轻按为确认键 确认键 返回键 输出通道选择键,数字键 0-9 输出 窗口大小调节快捷键 WALL 拼接调节快捷键 CROP 截取调节快捷键 图像亮度调节快捷键 输入信源选择键,数字键 0-9 输入...
- Page 11 后 面 板 简 介 图 1.2 后面板 表 3.2 后面板说明 序号 名称 定义 说明/支持 *① IN-SDI-LOOP 1080p60, 3G-SDI 向下兼容 输入/环出 *② HDMI EIA/CEA-861 标准,HDMI2.0 输入 *③ HDMI EIA/CEA-861 标准,HDMI1.4 向下兼容 输入 *④ VESA 标准,DP1.2 向下兼容 输入 *⑤ VESA 标准,DP1.1 向下兼容 输入...
- Page 12 RS232 ⑪ 串口 串口通信 IN-GENLOCK- ⑫ 级联 多台设备级联 ⑬ 电源 设备供电 注:1、带*号项为选配项 2、技术参数如有变化,恕不另行通知...
- Page 13 菜 单 介 绍 默 认 界 面 概 况 LVP9000 拥有直观的显示界面, 如图 2.1 是 LVP9000 开机后的默认界面。 用户可以通 过此界面得到当前输入输出信号配置信息。 图 2.1 默认界面 旋 钮 左 旋 界 面 概 况 旋钮左旋, LVP9000 进入输入分辨率显示界面, 如图 2.2 界面所示。 当有信号接入时, 对应通道信号会高亮显示。 图 2.2 左旋界面...
- Page 14 旋 钮 右 旋 界 面 概 况 旋钮右旋,LVP9000 进入输出窗口大小及分辨率显示界面。例如:输出分辨率为 2048*1152p60,输出窗口大小调节为 1024*768,则显示如图 2.3 界面所示。 图 2.3 右旋界面 默 认 菜 单 概 况 轻触旋钮或按下“OK”键,LVP9000 进入主菜单界面,如图 2.4 所示。用户可使用 旋钮轻触确认和左右旋转来对各功能进行选择。 图 2.4 主菜单...
- Page 15 主 菜 单 介 绍 输入设置 在主菜单下,旋转旋钮,选择“输入设置”,轻触旋钮,出现图 2.5 所示界面。我们对 输入设置下级菜单的 4 项进行介绍。 图 2.5 输入设置 ①当前 EDID 显示当前输入源信号的 EDID,可通过输入区按键选择不同的信号源。 ②输入模式 协议版本——有 HDMI 1.4、HDMI 2.0 、DP1.1、DP1.2 等版本类型。 (★注意:在接入信号的过程中,单张板卡只能接入一种规格的信号,例如:DP 板 卡不能同时接入 DP1.1、DP1.2 规格的信号) ③新 EDID(1.4) 轻触旋钮,进入新 EDID(1.4)下级菜单,里面可设置标准 EDID 和自定义 EDID。 ...
- Page 16 输出时序 在主菜单下,旋转旋钮,选择“输出时序”,轻触旋钮,出现图 2.6 所示界面,我们对 输出时序下级菜单的 2 项进行介绍。 图 2.6 输出时序 ①当前分辨率 显示当前输出通道信号的分辨率,可通过输出区按键选择不同的输出信道。 ②修改分辨率 轻触旋钮,进入修改分辨率下级菜单,里面有多种固定的 HDMI、DVI 接口类型的 。 EDID 和自定义可供选择 窗口设置 在主菜单下,旋转旋钮,选择“窗口设置”,轻触旋钮进入“窗口设置”下级菜单, 如图 2.7 界面所示,我们对窗口设置中的下级菜单进行介绍。 图 2.7 窗口设置...
- Page 17 水平宽度——默认值:输出时序的宽度,范围:16~输出时序的宽度 垂直高度——默认值:输出时序的高度,范围:16~输出时序的高度 水平起始——默认值:0,范围:0~(输出时序的宽度-水平宽度) 垂直起始——默认值:0,范围:0~(输出时序的高度-垂直高度) 窗口设置——默认是部分,可选部分和全屏两种模式 复位——对当前通道下的上述窗口设置模式参数进行初始化 拼接设置 在主菜单下,旋转旋钮,选择“拼接设置”,轻触旋钮进入“拼接设置”下级菜单, 如图 2.8 界面所示,我们对拼接设置中的下级菜单进行介绍。 图 2.8 拼接设置 拼接设置——默认是关,可选开和关两种模式 水平总宽度——默认值:1920,范围:1920~61440 垂直总高度——默认值:1080,范围:1080~34560 区域宽度——默认值:1920,范围:64~水平总宽度 区域高度——默认值:1080,范围:32~垂直总高度 水平拼接起始——默认值:0,范围:0~(水平总宽度-区域宽度) 垂直拼接起始——默认值:0,范围:0~(垂直总高度-区域高度) 复位——对当前通道下的上述拼接设置模式参数进行初始化...
- Page 18 截取设置 在主菜单下,旋转旋钮,选择“截取设置”,轻触旋钮进入“截取设置”下级菜单,如图 2.9 界面所示,我们对截取设置中的下级菜单进行介绍。(★ 注意:“拼接设置”未开启, “截取设置”才有效) 图 2.9 截取设置 水平宽度——默认值:输入时序的宽度,范围:16~输入时序的宽度 垂直高度——默认值:输入时序的高度,范围:16~输入时序的高度 水平起始——默认值:0,范围:0~(输入时序的宽度-水平宽度) 垂直起始——默认值:0,范围:0~(输入时序的高度-垂直高度) 截取开关——默认是关,可选开和关两种模式 复位——对当前通道下的上述截取设置模式参数进行初始化 画质设置 在主菜单下,旋转旋钮,选择“画质设置”,轻触旋钮进入“画质设置”下级菜单, 如图 2.10 界面所示。我们对画质设置中的下级菜单进行介绍。 图 2.10 画质设置...
- Page 19 亮度——默认值:128,范围:0~255 对比度——默认值:128,范围:0~255 色饱和度——默认值:128,范围:0~255 色调——默认值:128,范围:0~255 亮平衡——可选红、绿、蓝三种模式,默认值:128,范围:0~255 暗平衡——可选红、绿、蓝三种模式,默认值:128,范围:0~255 伽马——默认值:1.0,范围:0.3~3.3 复位——对当前通道下的上述画质设置参数进行初始化 预设管理 在主菜单下,旋转旋钮,选择“预设管理”,轻触旋钮进入“预设管理”下级菜单。 如图 2.11 界面所示,我们对预设管理下级菜单的 4 项进行介绍。 图 2.11 预设管理 预设导入——调取预先保存的用户配置,简化操作步骤 预设保存——保存预设,方便再次调取 预设擦除——擦除预先保存的用户配置 预设复位——对当前通道下的上述预设管理参数进行初始化...
- Page 20 高级设置 在主菜单下,旋转旋钮,选择“高级设置”,轻触旋钮进入“高级设置”下级菜单,如图 2.12 界面所示,我们对高级设置下级菜单中的 3 项进行介绍。(★ 注意:当输出信号画 面不是输入源信号画面时,检查输入、输出测试图卡是否打开) 图 2.12 高级设置 输入测试图卡——测试输入板输入画面是否正常 输出测试图卡——测试输出板输出画面是否正常 多机同步触发——多台设备级联时,主机按下多机同步触发可使多台设备同步 系统设置 在主菜单下,旋转旋钮,选择“系统设置”,轻触旋钮,进入“系统设置”下级菜单,如 图 2.13 界面所示,我们对系统设置中的下级菜单进行介绍。 图 2.13 系统设置...
- Page 21 ①语言 默认简体中文,有英语、简体中文、繁体中文三种语言可供选择。 ②系统复位 旋转旋钮,选择“系统复位”,轻触旋钮进入“系统复位”下级菜单,如图 2.14 界 面所示,下级菜单包含 3 级子菜单:输出复位、输入复位、全部复位。 图 2.14 系统复位 输出复位 可通过按下输出区按键或旋转旋钮选择某个输出通道,后轻触旋钮确定复位。复位 后参数恢复默认值。 输入复位 可通过按下输入区按键或旋转旋钮选择某个输入通道,后轻触旋钮确定复位。复位 后输入测试图卡关闭,EDID 复位。(★ 注意:复位后 HDMI2.0 变为 HDMI1.4,DP1.2 变为 DP1.1,其他 EDID 恢复到初始值) 全部复位 系统设置参数恢复出厂默认值。 ③OLED 对比度 调节屏幕亮度,默认值:10,范围:2~11。...
- Page 22 ④按键锁 默认关闭,轻触旋钮,开启按键锁,此时按下按键无任何效果,并提示:请按住 OK 键 3 秒解锁,按提示操作即可解锁。 ⑤菜单超时 设置菜单超时时间,默认:30 秒,30 秒内无任何操作则跳回主界面,有 20 秒、30 秒、45 秒、1 分钟、90 秒、2 分钟、3 分钟共 7 种超时时间可供选择。 ⑥屏保时间 设置屏幕保护时间,默认:2 分钟,2 分钟内无任何操作则屏幕进入保护状态。有 2 分钟、10 分钟、30 分钟、6 小时、12 小时、18 小时共 6 种屏幕保护时间可供选择。 (★从默认界面开始计时) ⑦通信设置 旋转旋钮,选择“通信设置”,轻触旋钮进入“通信设置”下级菜单,下级菜单包含 2 级子菜单:LAN 设置、RS232 波特率。(★ 更改“LAN 设置”网络参数、“RS232 波 特率”串口参数用于上位机软件与设备之间的通信,实现远程控制设备)...
- Page 23 放等应用场景) 日程总开关 日程设置的开启与关闭 日程表全关 关闭所有日程表 日程表设置 设置日程表的编号、开关、类型、时段表编号、时间、星期等参数 时段表设置 设置时段表的编号、时间参数和预设参数 时间设置 设置年、月、日、小时、分钟、秒等参数 恢复默认值 对所有日程设置参数进行初始化 机器信息 在主菜单下,旋转旋钮,选择“机器信息”,轻触旋钮,进入“机器信息”下级菜单,如 图 2.15 界面所示,我们对机器信息中的下级菜单进行介绍。 图 2.15 机器信息 ①版本信息 轻触旋钮,进入“版本信息”下级菜单,通过旋转旋钮查看当前 MCU、FPGA、输 入、输出四种板卡版本信息。...
- Page 24 ②升级维护 轻触旋钮,进入“升级维护”下级菜单,下级菜单包含 3 个子菜单:操作类型、板 编号、应用。(★ 注意:提示升级成功后,需要重新上电。设备成功启动后可通过查看 “机器信息”菜单下的“版本信息”确定本次升级是否成功) 轻触旋钮,进入“操作类型”子菜单,根据实际应用选择升级文件:控制板程序、 控制板 FPGA、输出板程序、输出板芯片、输出板所有、输入板程序、所有程序,并可将 当前使用的程序备份到 FAT32 格式的 U 盘中, 也可从 FAT32 格式的 U 盘中导入需要升级 的程序文件。 轻触旋钮,进入“板编号”子菜单,根据实际应用选择“操作类型”子菜单下的程 序文件编号,可单独对一块板卡和所有板卡进行升级,有 1、2、3、4、所有共 5 种编号 可供选择。 “操作类型”、“板编号”配置好后,轻触旋钮,进入“应用”子菜单,按提示插 入 FAT32 格式的 U 盘后即可升级程序。 (★ 注意:U 盘为 FAT32 格式,若不是可格式化 U 盘,设置为...
- Page 25 功 能 说 明 用户对主要功能的理解, 可快速的配置机器以完成工程安装调试。 在设置各功能之前, 请确认设备已正确连接,信号显示正常。 拼 接 功 能 拼接功能是为了解决单个视频无法驱动超大 LED 屏的问题而采用的解决方案。其拼 接的方式自由,可应用到各种 LED 拼接系统中。 信号连接与分辨率设定 根据 LED 大屏物理分辨率选择合适的输入分辨率,在主菜单中选择“输入设置”→ “输入模式”,选择 HDMI 1.4、HDMI2.0、DP1.1、DP1.2 等模式,根据实际需要设定所 需的输入分辨率,并按实际应用接线。 拼接功能的设置 根据 LED 大屏物理分辨率,确定输出信号分辨率,然后在“拼接设置”中打开拼接 开关,并自定义水平总宽度、垂直总高度、区域宽度、区域高度、水平拼接起始、垂直拼 接起始等参数。 例如:输入接入 1920*1080@60Hz 的信号 A,输出接到 3840*2160 的 LED 屏上,拼 接设置如图...
- Page 26 拼接设置 拼接设置:开 拼接设置:开 水平总宽度=3840 水平总宽度=3840 垂直总高度=2160 垂直总高度=2160 区域宽度=1920 区域宽度=1920 区域高度=1080 区域高度=1080 水平拼接起始=0 水平拼接起始=1920 垂直拼接起始=0 垂直拼接起始=0 1920 x 2 Part 2 Part 1 Part 3 Part 4 拼接设置:开 拼接设置:开 水平总宽度=3840 水平总宽度=3840 垂直总高度=2160 垂直总高度=2160 区域宽度=1920 区域宽度=1920 区域高度=1080 区域高度=1080 水平拼接起始=0 水平拼接起始=1920 垂直拼接起始=1080 垂直拼接起始=1080 图...
-
Page 27: 自定义 Edid
自 定 义 EDID LVP9000 系列支持输入输出自定义 EDID,可根据实际应用更改图 3.2 界面参数。 用户一般只需要更改宽度、高度、场频三个参数,Hfp、Vfp、Hsyn、Vsyn 等参数为工程 调试参数,对画面大小画质无影响,只影响带宽以及画面不正常时进行微调选项。 图 3.2 自定义 EDID 宽度——水平宽度,默认值:EDID 时序的宽度 高度——垂直高度,默认值:EDID 时序的高度 场频——刷新率,默认值:EDID 时序的频率 Htot——水平总像素,Htot = Hact + Hfp + Hsyn + 水平后廊(菜单中未显示) Vtot——垂直总像素,Vtot = Vact + Vfp + Vsyn + 垂直后廊(菜单中未显示)... -
Page 28: 矩阵功能
矩 阵 功 能 LVP9000 系列内嵌混合矩阵功能,可以用作混合矩阵。如图 3.3 矩阵示意所示。 图 3.3 矩阵功能示例 预 设 管 理 设 置 预设模式方便用户在使用时快速地调出预设应用场景, 减少用户在操作时重复设置参 数的麻烦,提高了工作效率。每一个预设模式都包含了输入通道、输出通道、窗口大小、 。 截取、拼接和画质相关参数。下面介绍预设模式的保存、擦除和导入模板的操作 预设场景保存 设置好当前通道参数,轻压旋钮进入主菜单,选择“预设管理” → “预设保存”按数字 键 0~9 即可保存相应模版,最大可保存 30 种不同的预设场景。保存后相应数字的横线将 变成实心五角星,如图 3.4 预设保存中的数字 1、2 所示。... -
Page 29: 预设场景擦除
图 3.4 预设保存 预设场景擦除 轻压旋钮进入主菜单,选择“预设管理” → “预设擦除”按数字键 0~9 即可擦除原 先保存的相应模版,可通过旋转旋钮左右翻页擦除对应的预设。擦除后相应数字所对应的 五角星将变成横线,如图 3.5 数字 2 所示。 图 3.5 预设擦除 预设模板导入 轻压旋钮进入主菜单, 选择“预设管理” → “预设导入”按数字键 0~9 即可导入原先保 存的相应模版,导入后系统提示:导入预设 X 成功。成功导入预设,则系统按预设进行 显示。如图 3.6 所示。 图 3.6 模板导入... -
Page 30: 预设复位
预设复位 轻压旋钮进入主菜单,选择“预设管理” → “预设复位”按提示操作即可复位到初始状 态即无预设的状态。 日 程 管 理 设 置 日程管理方便用户按照预设时间运行配置,减少重复配置参数的麻烦,提高了工作 效率。日程管理有 3 种方式:计数定时、按日期执行、按星期执行,可根据具体使用情况 合理配置。 轻压旋钮进入主菜单,选择“系统设置” → “日程管理”进入日程管理设置子菜单。如 图 3.7 界面所示(★在预设时间参数配置之前,先关闭日程总开关,防止配置参数的同时 系统按预设时间运行)。 图 3.7 日程管理 旋转旋钮,选择“日程表设置”,轻触旋钮进入日程表参数配置界面,如图 3.8 日程表 设置界面所示。通过旋转旋钮设置日程表编号、开关、类型、时段表编号、年份、月份、 日期、小时、分钟、秒、星期、恢复默认值等参数。... -
Page 31: 计数定时
图 3.8 日程表设置 日程表编号——默认值:1,范围:1~16 开关——默认值:关,可选开、关两种模式 类型——默认值:计数定时,可选计数定时、按日期执行、按星期执行 时段表编号——默认值:1,范围:1~16 年份——默认值:0,范围:0~255 月份——默认值:1,范围:1~12 日期——默认值:1,范围:1~31 小时——默认值:0,范围:0~23 分钟——默认值:1,范围:0~59 秒——默认值:0,范围:0~59 星期——默认值:关,范围:周一 ~ 周日 恢复默认值——复位日程表设置所有参数 计数定时 ①日程总开关:关; ②日程表配置:设置日程表编号、开关、类型、时段表编号、定时时长等参数; ③时段表配置:设置时段表编号、预设编号(在计数定时模式下,时段表均只配置 时段 01); ④日程总开关:开;... -
Page 32: 按日期执行
例如:设置 3 个日程表,预设 1 持续 1 分 30 秒,预设 2 持续 2 分 30 秒,预设 3 持 续 3 分 30 秒,预设 1、2、3 来回切换: 日程表配置: I、日程表编号设为 1,开关设为开,类型设置为计数定时,时段表设为 1,分钟设 为 1,秒设为 30,其他参数默认; II、日程表编号设为 2,开关设为开,类型设置为计数定时,时段表设为 2,分钟设 为 2,秒设为 30,其他参数默认; III、日程表编号设为 3,开关设为开,类型设置为计数定时,时段表设为 3,分钟设 为... -
Page 33: 按星期执行
例如:设置 1 个日程表,2018 年 3 月 20 日早上 9 点打开预设 1 , 9 点 30 分打开预设 2 , 10 点打开预设 3: 日程表配置: I、日程表编号设为 1,开关设为开,类型设置为按日期执行,时段表编号设为 1, 年份设为 18,月份设为 3,日期设为 20,其他参数默认; 时段表配置: I、时段表编号设为 1,时段 01:小时 9、分钟 0、秒 0、预设 1; 时段 02:小时 9、分钟 30、秒 0、预设 2; 时段... -
Page 34: 多机级联
时段表配置: I、时段表编号设为 1,时段 01:小时 8、分钟 0、秒 0、预设 1; 时段 02:小时 8、分钟 5、秒 0、预设 2; 时段 03:小时 8、分钟 10、秒 0、预设 3; 多 机 级 联 每台设备均配置有 IN-GENLOCK-OUT 接口,通过 SDI 线将多台设备级联在一起, SDI 线的一端接到设备的输出端,另一端接到另一台设备的输入端,按照此方法可将多台 设备级联在一起,实现同步传输信号。如图 3.9 示例图所示。(★输出端输出的为主机, 输入端接入的为从机,从机 OLED 显示屏会显示一个闪电标志) 图 3.9 多机级联 当多台设备级联时,若画面不同步,可通过以下两种方法解决:... -
Page 35: 规格参数
规 格 参 数 端口 数量 接口形态 规格 视频输入(可选配) 信号标准:DP1.2 向下兼容 DP1.2 支持分辨率:VESA 标准,4K60(UHD)向下兼容 信号标准:DP1.1 向下兼容 DP1.1 支持分辨率:VESA 标准,4K30(UHD)向下兼容 ★DP1.1、DP1.2 每次只能接入一种规格 信号标准:DVI1.0,HDMI1.4 向下兼容 DVI-I 支持分辨率:VESA 标准,PC to 1920×1200HD 4K30(UHD) HDMI 1.4 信号标准:EIA/CEA-861 标准,HDMI1.4 向下兼容 HDMI HDMI 2.0 信号标准:EIA/CEA-861 标准,HDMI2.0 向下兼容 ★HDMI 1.4、HDMI 2.0 每次只能接入一种规格... - Page 36 整机参数 6.3kg 重量 44cm(长)×30cm(宽)×8.8cm(高) 尺寸 100~240V AC 0.5A 50~60Hz 输入电源 最大功率 0°C~45°C 工作温度...
-
Page 37: 故障排除
故 障 排 除 在安装或使用过程中,可能会遇到问题,用户可按以下步骤尝试排除故障。仍无法解 决,可与当地的经销商联系。 设备无图像,电源指示灯不亮 ①电源开关是否打开 ②检查电源是否接触不良 OLED 屏有显示,但无图像输出 ①左旋旋钮进入左旋界面,查看信号有无接入 ②输入通道与输入设置中输入模式是否统一,都为同一接口形态,如 HDMI2.0 ③轻触旋钮进入主界面,查看输入输出配置是否与实际连接相符 ④检查是否正确连接信号 ⑤检查线材,是否视频传输无问题 ⑥检查设备是否支持该分辨率和刷新频率 ⑦进行工厂复位 图像画面显示不正常(缺色、画质模糊、窗口显示不全等) ①“高级设置”菜单中输入输出图卡是否关闭 ②信号源信号是否正常 ③检查连接线是否连接好 ④设备接口是否已出现损坏 ⑤视频连接线接口以及线管是否正常 ⑥检查设备是否支持该分辨率和刷新频率 ⑦进行工厂复位... - Page 38 Contents REPRESENTATION....................1 TRADEMARKS......................1 ACCESSORIES......................3 MODEL DESCRIPTIONS..................4 OVERVIEW......................5 PANELS........................7 FRONT PANEL....................7 REAR PANEL....................8 MENU........................10 DEFAULT INTERFACE OVERVIEW............10 LEFT-HANDED INTERFACE OVERVIEW OF KNOB......10 RIGHT-HANDED INTERFACE OVERVIEW OF KNOB......11 DEFAULT MENU OVERVIEW..............11 DESCRIPTION ON MAIN MENU............... 12 Input Settings..................
- Page 39 MATRIX FUNCTION..................27 PRESET MANAGEMENT SETTINGS............28 Save Preset....................28 Erase Preset..................... 28 Load Preset Template................29 Reset Preset..................... 29 SCHEDULE MANAGEMENT SETTINGS..........30 Counting and Timing................31 Execution by Date................... 33 Execution by Week..................34 MULTI-MACHINE CASCADING..............35 Specifications......................36 TROUBLESHOOTING..................38...
-
Page 40: Representation
Representation The manual must not be copied, reproduced or transcribed or translated in whole or part, or disclosed commercially in any means (electronic, mechanical, photocopying, recording or otherwise) or used for any commercial profit without prior written consent of our company. Please read this manual carefully before use. - Page 41 Safety Precautions The equipment must be connected with ground wires. Voltage with rated power shall be employed by the equipment and the input voltage error shall be ±10%. Do not connect AC power with another AC power cable that may cause excessive ...
-
Page 42: Accessories
Accessories Table 1.1 Packing List Items Name Quantity LVP9000 Power cord DVI cord User Manual Certificate of conformity Warranty card *Above accessories may differ upon service condition of the user. -
Page 43: Model Descriptions
Model Descriptions Table 2.1 Model Descriptions Descriptions Model Input board (quantity) Output board (quantity) LVP9000 (factory 2 DVI 2 DVI default) LVP9000-A 1 HDMI、1 DP、1 DVI、1 SDI 4 DVI LVP9000-B 1 DP + 1 HDMI 4 DVI LVP9000-C 2 DP + 2 HDMI... -
Page 44: Overview
(up to 8K*4K) and can receive a variety of video input formats such as DP, HDMI, DVI and SDI. Ultra High Definition Splicer LVP9000 series splicer can support a variety of video input formats and can meet up to 8K*4K super-resolution display requirements through simple splicing settings. Receive Ultra HD 4K (UHD) Signals LVP9000 series splicer can receive 4K (UHD) signals, which can promote four times more details than 1080P images and retains brilliant image color details. - Page 45 used as hybrid matrix. Multi-machine Cascading It supports the cascading of multiple equipment for synchronous transmission of multi-channel signals. Customized EDID EDID should be set properly based on actual applications for easy and convenient operation. Input signal Optional: two DP inputs, two HDMI inputs, two DVI inputs, two SDI inputs. A reasonable choice can be made based on actual applications.
-
Page 46: Panels
Panels Front Panel Figure 1.1 Front Panel Table 3.1 Descriptions on Front Panel Serial Name Operating instructions OLED display Display menus and current interface information screen Select up, down, left and right menus or adjust the Knob parameters; pressing slightly means pressing an enter key Enter key Return key Output... -
Page 47: Rear Panel
Rear Panel Figure 1.2 Rear Panel Table 3.2 Descriptions on Rear Panel Serial Name Definition Instruction/Support *① IN-SDI-LOOP Input/Loop 1080p60, 3G-SDI downward compatibility *② HDMI Input EIA/CEA - 861 standard, HDMI2.0 EIA/CEA-861 standard, HDMI1.4 with *③ HDMI Input downward compatibility *④... - Page 48 VESA standard, PC to 1920*1200 HD 4K30 (UHD) Upgrade Insert U disk upgrade program ⑨ Network TCP/IP Network communication ⑩ port RS232 Serial port Serial port communication ⑪ IN-GENLOCK Cascading Cascading of multiple equipment ⑫ -OUT Power Power supply of equipment ⑬...
-
Page 49: Menu
Menu Default Interface Overview LVP9000 has a visualized display interface, as shown in Figure 2.1, which is the default interface on LVP9000 after starting. The user can obtain the configured information about the current input and output signals via the interface. -
Page 50: Right-Handed Interface Overview Of Knob
Figure 2.3 Right-handed Interface Default Menu Overview Press the knob slightly or press the "OK" key, then the LVP9000 enters a main menu interface as shown in Figure 2.4. The user can press the knob to confirm and rotate it left or right to select each function. -
Page 51: Description On Main Menu
Description on Main Menu Input Settings At the main menu, rotate the knob, select "Input" and press the knob slightly, then the interface as shown in Figure 2.5 will pop up. We will introduce the four sub-menus of input settings. Figure 2.5 Input Settings ①... -
Page 52: Output Timing
④ New EDID (2.0) Press the knob slightly to enter the sub-menus of New EDID (2.0) where standard EDID and customized EDID can be set. Output Timing At the main menu, rotate the knob, select "Timing" and press the knob slightly, then the interface as shown in Figure 2.6 will pop up. -
Page 53: Splicing Settings
settings. Figure 2.7 Window Setting H Size -- default value: output timing width, range: 16 - output timing width V Size -- default value: output timing height, range: 16 - output timing height H Pos -- default value: 0, range: 0 - (output timing width - H Size) ... -
Page 54: Crop Settings
H Total -- default value: 1920, range: 1920-61440 V Total -- default value: 1080, range: 1080-34560 Display Width -- default value: 1920, range: 64 - H Total Display Height -- default value: 1080, range: 32 - V Total ... -
Page 55: Image Quality Settings
Image Quality Settings At the main menu, rotate the knob, select "Color" and press the knob slightly to pop out the sub-menus of "Color" as shown Figure 2.10. We will introduce the sub-menus of image quality settings. Figure 2.10 Image Quality Setting Brightness -- default value: 128, range: 0-255 ... -
Page 56: Advanced Settings
management. Figure 2.11 Preset Management Preset load -- Load the user configuration saved before to reduce operation steps Preset save-- Save the preset so that the user can load them conveniently Preset erase-- Erase the user configuration saved before ... -
Page 57: System Settings
GenLock function to synchronize multiple devices. System Settings At the main menu, rotate the knob, select "System" and press the knob slightly to pop out the sub-menus of "System" as shown Figure 2.13. We will introduce the sub-menus of system settings. - Page 58 Output Reset Select an output channel by pressing output area button or rotating the knob, press the knob slightly, and confirm reset. Restore parameter to the default value after reset. Input Reset Select an input channel by pressing input area button or rotating the knob, press the knob slightly, and confirm reset.
- Page 59 ⑥ Screen Timeout Set the screen time, default: 2 minutes. The screen will enter into protection state if there is no operation within 2 minutes. There are a total of 6 screen timeout such as 2 minutes, 10 minutes, 30 minutes, 6 hours, 12 hours and 18 hours. (★ Start timing at default interface) ⑦...
-
Page 60: Machine Information
Schedule ON -- On/Off of schedule Ctrl table OFF-- Close all the schedules Schedule ctrl table-- Set the ctrl number, On/Off, type, date table number, time, week, and other parameters of schedule Schedule date table-- Set the number of date table, time parameter and preset parameter ... - Page 61 after successful upgrade. You can confirm whether the upgrade is successful by checking the "version information" under the "machine information" menu after the successful starting of the equipment) Operation type -- Press the knob slightly to enter the sub-menus of "Opt type" and select ...
- Page 62 ⑤ System log Record the current system status ⑥ Clear log Clear the system log ...
-
Page 63: Function Descriptions
Function Descriptions The understanding of the main functions of users can configure the machine rapidly to complete the installation and debugging of the project. Please confirm that the equipment is correctly connected and the display of signal is normal before setting various functions. Splicing Function The splicing function is a solution which is used to solve the problem that a single video processor cannot drive a large LED screen. -
Page 64: Splicing Settings
correctly connecting the equipment and setting the splicing parameters, the picture of magnified Signal A can be seen on the 3840*2160 LED screen. Splicing Settings Splicing Settings: On Splicing Settings: On H Total H Total =3840 =3840 V Total V Total =2160 =2160 Display Width... -
Page 65: Customized Edid
Customized EDID The LVP9000 series can support the customized EDID when inputting and outputting, and change the interfacial parameters of Figure 3.2 according to practical application. The users generally need to change Hact, Vact and FPS only. Hfp, Vfp, Hsyn, Vsyn and other... -
Page 66: Matrix Function
P+ -- positive polarity Rst -- EDID parameter reset Matrix Function The LVP9000 series has embed function of hybrid matrix that can be used as the hybrid matrix. As shown in the matrix schematic of Figure 3.3. INPUT MATRIX OUTPUT... -
Page 67: Preset Management Settings
Preset Management Settings The preset mode can facilitate the user to rapidly load the preset application scene when using, which can reduce the trouble of the user to repeatedly set parameters during operation, and improve work efficiency. Each preset mode includes the parameters related to input channel, output channel, window size, crop, splicing and picture quality. -
Page 68: Load Preset Template
presets. After erasing, the five-pointed stars of the corresponding numbers will become horizontal lines, as shown in the number 2 of Figure 3.5. Figure 3.5 Preset Erase Load Preset Template Press the knob to enter the main menu, select the "Preset" →"Preset load", and press numeric keys 0-9 to load original saved corresponding templates. -
Page 69: Schedule Management Settings
Schedule Management Settings The schedule management can facilitate the user to run the configuration according to the present time, which can reduce the trouble of the user to repeatedly set parameters, and improve work efficiency. There are 3 methods of schedule management: counting and timing, execution by date, and execution by week, which can be reasonably configured according to specific usage conditions. -
Page 70: Counting And Timing
Figure 3.8 Schedule Settings The schedule number -- default value: 1, range: 1-16 On/Off -- default value: Off; two modes (On and Off) can be selected Type -- default value: counting and timing; counting and timing, execution by date, and ... - Page 71 counting and timing, all date tables only configure the period 01); ④ Schedule ON: On; For example: set three schedules, the Preset 1 can sustain 1 minute and 30 seconds, Preset 2 can sustain 2 minutes and 30 seconds, and Preset 3 can sustain 3 minutes and 30 seconds. The above three presets can be switched back and forth: Schedule configuration: I.
-
Page 72: Execution By Date
Execution by Date ① Schedule ON: Off; ② Schedule configuration: set the number of schedule, On/Off, type, number of date table, year, month, day, and other parameter is set to defaulted; ③ Date table configuration: set date table sernumber, time, preset number, and other parameter is set to defaulted;... -
Page 73: Execution By Week
Execution by Week ① Schedule ON: Off; ② Schedule configuration: set the number of schedule, On/Off, type, number of date table, week, and other parameter is set to defaulted; ③ Date table configuration: set date table the number, period, preset number, and other parameter is set to defaulted;... -
Page 74: Multi-Machine Cascading
Multi-Machine Cascading Each equipment, equipped with an IN-GENLOCK-OUT interface, can be cascaded through SDI lines. One end of the SDI line is connected to the output of the equipment, and the other end is connected to the input of another equipment. According to the above method, many equipments can be cascaded together to achieve synchronous transmission of signals. -
Page 75: Specifications
SPECIFICATIONS Quan Interface Port Specifications tity pattern Video input (optional) Signal standard: DP1.2 Downward compatibility DP1.2 Supporting resolution : VESA standard, 4K60 (UHD) with downward compatibility Signal standard: DP1.1 Downward compatibility DP1.1 Supporting resolution : VESA standard, 4K30 (UHD) with downward compatibility ★Only one kind of specification can be connected to DP1.1 and DP1.2 each time. - Page 76 Signal standard: DVI1.0, HDMI1.4 downward compatibility DVI-I Supporting resolution ratio: VESA standard, PC to 1920×1200HD 4K30 (UHD) HDMI standard Signal standard: EIA/CEA-861 standard, HDMI interface HDMI1.4 downward compatibility SDI standard Signal standard: 1080p60, 3G-SDI downward interface compatibility Communication interface RJ45 Remote control (network communications) RS232 Remote control (serial port communication)
-
Page 77: Troubleshooting
Troubleshooting During the installation or application, the users may run into various problems, and they can take the following steps to eliminate faults. If it still cannot be solved, please contact with local dealers. No image is output, and the power indicator light is off ①... - Page 78 ④ Whether the equipment interface has been damaged ⑤ Whether the interface and line pipe of video connecting line are normal ⑥ Check if the equipment support such resolution and refresh frequency ⑦ Factory reset...
- Page 79 深圳市杰思创视讯科技有限公司 SHENZ HEN JSTRON CO LTD Tel:+86-0755-8618 0829 Fax:+86-0755-8653 8364 www.jstron.com Tech Support: support@jstron.com Email: sales@jstron.com 公司地址: 深圳市南山区马家龙工业区 栋宝成科技大厦 楼 Add : 6 floor, baocheng technology building, Majialong industrial park, Nanshan district, ShenZhen, China...
Need help?
Do you have a question about the LVP9000 and is the answer not in the manual?
Questions and answers