Table of Contents
Advertisement
Quick Links
Advertisement
Table of Contents

Summary of Contents for Mini Gadgets OmniGarage
- Page 1 OmniEye Garage Door Opener With Hidden Camera SKU: OmniGarage 1Version 1.4...
- Page 2 THANK YOU FOR PURCHASING THE OMNIGARAGE HIDDEN CAMERA Please read this manual before operating the camera and keep it handy. Your purchase should include: ● 1 x OmniGarage 1 x AC Wall Charger ● 1 x Manual ● ● 1 x A/V Cable 1 x 3.5mm to USB Cable...
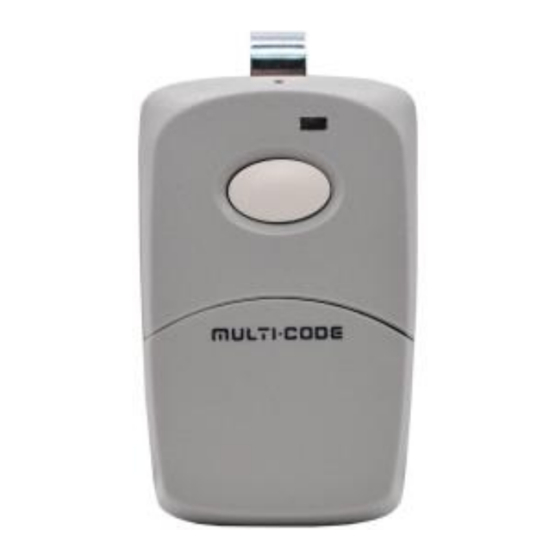
- Page 3 GET FAMILIAR WITH YOUR OMNIGARAGE HIDDEN CAMERA 3Version 1.4...
- Page 4 4Version 1.4...
- Page 5 5Version 1.4...
- Page 6 IMPORTANT WARRANTY INFORMATION: If the warranty sticker on your device has been removed or tampered with, your lifetime warranty will be voided. You may be charged fees or denied a return should this happen. HOW TO CHARGE THE CAMERA Note: If you are not located in the US, or if you intend to use this product anywhere other than the US, you will need to purchase a converter in order to use the AC wall plug in and avoid damaging the product.
-
Page 7: Operating The Camera
3. Allow the device to charge 6-8 hours before first use. OPERATING THE CAMERA HOW TO TURN ON THE CAMERA 1. Once the device is finished charging, unplug it from the charging adapter. 2. Press the Power Button the remote one time. The Green light will blink once and then the Red light will blink 3 more times and turn off (if motion is detected immediately). - Page 8 3. To put the device into standby mode, stop motion recording by pressing the motion detection button one time. The Green light will come on, and the device will be in standby mode. HOW TO RECORD VIDEO 1. When the camera is in Standby Mode, press the “Continuous Recording Button.”...
-
Page 9: How To Take Pictures
2. The camera has now stopped recording and is now in Standby Mode. HOW TO TAKE PICTURES 1. When the camera is in Standby Mode, press the “Photo Button” (see page 4). The green light will turn red while the photo is being taken. 2. - Page 10 NOTE: If you activate motion detection and there is no motion currently in front of the camera, there will be no indication you have entered into motion mode. The green light will simply remain on. If you wish to confirm that you have entered into motion detection mode, wave your hand in front of the camera lens, and the unit will flash the red light 2 times.
- Page 11 HOW TO USE PIR SENSOR (If Applicable) Note: The “Motion Detection” mode and “PIR” mode work similarly in that they detect motion. The “Motion Detection” mode relies on the camera itself to detect motion, while the “PIR” mode relies on the PIR sensors to detect motion.
- Page 12 CHANGING YOUR DEVICE SETTINGS (INCLUDING THE DATE/TIME STAMP) Your OmniGarage comes with an A/V cable that is used to connect the device to a monitor/TV so that you can adjust various settings. 1. Connect your device to a monitor/TV using the provided A/V Cable.
- Page 13 c. Loop Record – Choose whether you want the device to automatically overwrite the oldest file on the memory card if the memory becomes full. d. Video Time – When in continuous recording mode, this setting determines how long video files will be before the current recording is stopped and a new recording is started.
- Page 14 h. Setup -> Format – Use this to format your MicroSD card. All data on the disk will be permanently erased. i. Setup -> Language – Choose your language. j. Setup -> TV Output – Select between NTSC or PAL for video output. We recommend you do not adjust this setting.
-
Page 15: Microsd Card Slot
n. Setup -> Time Input – Set the current time in military format. o. Setup -> System Reset – Use this to factory reset the device. p. Setup -> FW Upgrade – This is not active on this device. q. Setup -> FW Version – Displays the firmware version of the device. - Page 16 unit or the MicroSD card itself will be damaged. 2. To remove the SD card, gently push the card in so that it clicks. The internal spring tension will eject the card. MicroSD cards 65GB and above will require special formatting to work.
- Page 17 RETRIEVE THE FILES TO YOUR PC 1. Remove the MicroSD Card from the device and plug it into your computer using the supplied card reader. (See page 3 to locate the MicroSD card.) 2. Locate “Removable Disk” inside the (My) Computer folder.
- Page 18 Or… Go to Start > Computer > Removable Disk 3. Open the Removable Disk drive. 4. Open the [folder name] folder. 5. Double click the file you want to view. ● VLC Player is recommended for watching videos. If you are having video playback issues, such as a completely black video recording or “squiggly lines”, we recommend you use VLC media player to play back the videos.
- Page 19 COPYING AND DELETING YOUR FILES The video files created are just like any other file on your computer, and can be managed in the exact same manner. ● To save a file, you want to select the file, right click your mouse on the file name, and then choose “Copy”...
-
Page 20: Troubleshooting
TROUBLESHOOTING THE DEVICE WON’T TURN ON ● Make sure the power cable is securely plugged into a functioning electrical outlet or the battery is charged. THE DEVICE HAS CRASHED 20Version 1.4... -
Page 21: Other Problems
● Press the reset button one time while the device is on. DEVICE CONTINUALLY RECORDS IN MOTION MODE ● Motion detection is measured by changing pixels during recording. Any kind of motion including shifting shadows or changing lighting conditions can set off motion detection. Try adjusting the motion detection sensitivity via the setup menu. -
Page 22: Specifications
SPECIFICATIONS Video 1920x1080 Resolution Video Format .MP4 Frames per 30 fps Second Vision Angle 65° Battery Life 10 Hours Continuous Recording Up to 30 Days in PIR Mode (if applicable) Motion 8 meters for straight-line Detection distance Photo 2560x1920 Resolution Photo Format .JPG Type of Memory... - Page 23 Recording Usage 10mins per 1GB USB Interface 2.0 USB Player Software VLC recommended Video H.264 Compression 23Version 1.4...
- Page 24 24Version 1.4...
- Page 25 25Version 1.4...
- Page 26 QUALITY CONTROL CHECKLIST ☐ Remote 26Version 1.4...
- Page 27 ☐ Wall AC Adapter ☐ ___GB MicroSD Card ☐ 3.5mm to USB Cable ☐ A/V Cable ☐ MicroSD Card Reader ☐ OmniGarage QC Tech: _____________________________________ Date: ________________________________________ Leave Us A Review! 27Version 1.4...
Need help?
Do you have a question about the OmniGarage and is the answer not in the manual?
Questions and answers