Advertisement
Quick Links
TYPES OF BUSHBABY2
Storage:
Internal
If your BushBaby uses internal storage, you will only have access to
the USB port for charging and/or video retrieval.
(As seen with the smoke detector or electrical box)
Removable
If your BushBaby uses removable storage, you will have access to a
MicroSD card slot.
IMPORTNANT NOTICE: MicroSD cards are required and your
BushBaby will not record video without one.
Some boards are sealed inside the device, so you only have access
via ports. (As seen with the radar detector)
Manual Version 3.6.1
BushBaby Generation 2 Manual
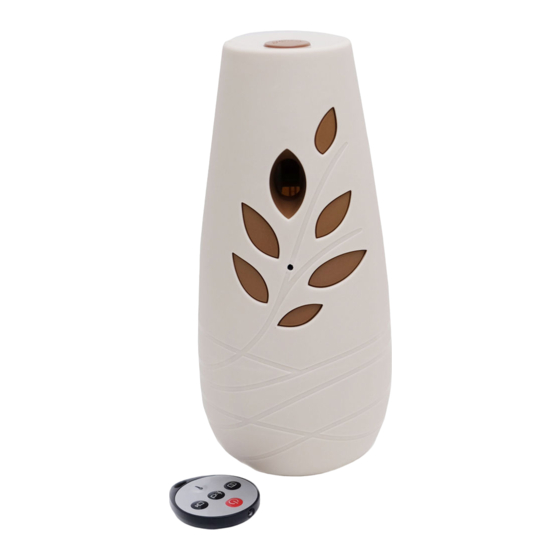
Some boards are accessible inside the device, so you will need to
open it to gain access to the power switch, USB port, and MicroSD
card. (As seen with the air freshener or tissue box)
Battery:
Charging Internal
If your BushBaby uses an internal battery that needs periodic
charging, you will have access to a USB port (as seen in any of the
previous storage examples). Simply use the included AC adapter
wall charger and USB cable to charge the device using this port.
IMPORTANT NOTICE: Be aware that BushBaby cameras DO NOT
record while charging.
Plug-in
If your BushBaby always needs to be plugged in (no battery), it will
have a power cord on it or have its own set of power prongs.
Above: As seen on the coffee pot or DVD player
Below: As seen on the BB2Outlet
Advertisement

Related Manuals for Mini Gadgets BUSHBABY2


Summary of Contents for Mini Gadgets BUSHBABY2
- Page 1 BushBaby Generation 2 Manual TYPES OF BUSHBABY2 Some boards are accessible inside the device, so you will need to open it to gain access to the power switch, USB port, and MicroSD Storage: card. (As seen with the air freshener or tissue box)
- Page 2 Press the Video Button GET FAMILIAR WITH YOUR BUSHBABY2 REMOTE The indicator light will blink 3 times and then turn off o The BushBaby is now recording continuous video HELPFUL TIP: Video records in 20-minute intervals until you manually stop recording.
- Page 3 HOW TO SET THE TIME AND DATE STAMP 1. Visit http://time.mgidownloads.com 2. Choose “All Bush Baby 2 / Bush Baby 3” and your time zone in the dropdowns and click download. 3. Plug the device into your computer 4. Right click and “cut” the downloaded time file 5.
-
Page 4: Included With The Product
3. Turn on the BushBaby using the remote (the indicator light should turn on) The BushBaby2 line of devices are Mac OS X compatible. When you 4. Locate “Removable Disk” inside the (My) Computer folder delete a file from the memory with a Mac, you must then empty ... -
Page 5: Technical Specifications
If you need technical support or have additional questions, please call our support at 770-694-6926 Technical Specifications Resolution 1280*960 @ 30fps Video Format .AVI Photo Format .JPG Vision Angle 62° Motion Detection 6 meters for straight-line distance Minimum Illumination 10LUX Remote Operating Distance 15 meters Scope for Sound (optional)
Need help?
Do you have a question about the BUSHBABY2 and is the answer not in the manual?
Questions and answers