Table of Contents
Advertisement
Available languages
Available languages
Smaltimento di vecchie apparecchiature elettriche ed
elettroniche (applicabile nell'Unione Europea e in altri paesi
europei con sistemi di raccolta separati)
Questo simbolo sul prodotto o sulla confezione indica che questo
prodotto non deve essere trattato come rifiuto domestico. Invece,
deve essere consegnato al punto di raccolta applicabile per il
riciclaggio di apparecchiature elettriche ed elettroniche. Assicurando
che questo prodotto venga smaltito correttamente, contribuirai a
prevenire potenziali conseguenze negative per l'ambiente e la
salute umana, che potrebbero altrimenti essere causate da una
gestione inappropriata dei rifiuti di questo prodotto. Il riciclaggio dei
materiali aiuterà a conservare le risorse naturali. Per informazioni
più dettagliate sul riciclaggio di questo prodotto, rivolgersi all'ufficio
comunale locale, al servizio di smaltimento dei rifiuti domestici o al
negozio in cui è stato acquistato il prodotto.
BGMP-9146
MANUALE DI ISTRUZIONI • INSTRUCTION MANUAL
MANUAL DE INSTRUCCIONES • MANUEL D'INSTRUCTIONS
BEDIENUNGSANLEITUNG • MANUAL DE INSTRUÇÕES
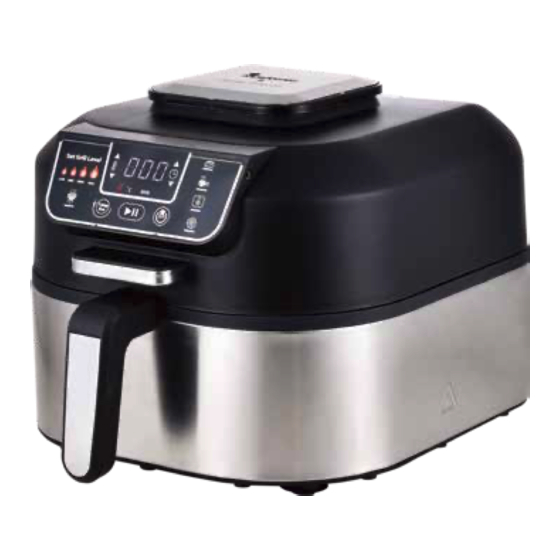
Griglia elettrica senza fumo • Smokeless grill • Grill sin humo
Grill sans fumée • Rauchfreier grill • Grelhador sem fumo
Leggere attentamente le istruzioni prima dell'uso.
Please carefully read the instructions before using.
Lea con atención las instrucciones antes de usar el aparato.
Veuillez lire attentivement les instructions avant d'utiliser le produit.
Bitte lesen Sie vor dem Gebrauch diese Anleitungen sorgfältig durch.
Leia com atenção as instruções antes da utilização.
SAVE THIS MANUAL FOR FUTURE REFERENCE
Advertisement
Chapters
Table of Contents

Related Manuals for Carlo Cracco Masterpro BGMP-9146

Summary of Contents for Carlo Cracco Masterpro BGMP-9146
- Page 1 BGMP-9146 Smaltimento di vecchie apparecchiature elettriche ed elettroniche (applicabile nell'Unione Europea e in altri paesi MANUALE DI ISTRUZIONI • INSTRUCTION MANUAL europei con sistemi di raccolta separati) MANUAL DE INSTRUCCIONES • MANUEL D'INSTRUCTIONS Questo simbolo sul prodotto o sulla confezione indica che questo prodotto non deve essere trattato come rifiuto domestico.
-
Page 2: Table Of Contents
SOMMARIO ATTENZIONE 1. Rimuovere e smaltire la protezione posta sulla presa di corrente di questa unità. Promemoria importanti 01-03 2. Questo prodotto può essere utilizzato da persone con ridotte capacità fisiche, mentali e sensoriali Componenti solo se supervisionate da una persona responsabile e istruita sul corretto utilizzo del prodotto. Introduzione griglia elettrica senza fumo 3. -
Page 3: Componenti
COMPONENTI 30. Non posizionare sopra o vicino un fornello elettrico o a gas, tantomeno vicino ad un forno riscaldato. 31. È necessario usare estrema cautela quando si sposta l'unità contenente olio caldo o altri liquidi caldi. 32. Non riempire mai la pentola di olio, potrebbe causare un incendio. Uscita aria Ventola aria 33. -
Page 4: Primo Utilizzo
INTRODUZIONE PRIMO UTILIZZO 1. Rimuovere dall'unità tutti i materiali di imballaggio, le etichette ed il nastro. La vista della schermata di controllo 2. Rimuovere tutti gli accessori dalla confezione e leggere attentamente questo manuale. Si prega di mostra l'ora nel formato HH: MM. prestare particolare attenzione alle procedure operative, avvertenze e precauzioni essenziali per Lo schermo a sinistra mostra “20 minuti”. -
Page 5: Sonda Termica
IMPOSTARE LA CONSENTE AL CIBO DI ARRIVARE ALLA BASSA: 205°C MEDIA: 215°C ALTA: 245°C MAX (fino a 265º C) CIBO SONDA TERMICA A COTTURA DI RIPORTO (CARRY-OVER COOK) A • Bacon • Carni congelate • Bistecche • Verdure Pesce 60°C 65°C •... -
Page 6: Tipologie Di Cottura
5. Quando la temperatura interna raggiunge quella impostata, il dispositivo emetterà un segnale acustico ed il display mostrerà "End" (ovvero: FINE). Premere il pulsante della Sonda Termica per 2 sec, il display continuerà a mostrare la temperatura interna del cibo. 6a. -
Page 7: Arrosto
FRIGGITRICE AD ARIA (Programma/Pulsante “AIR CRISP”) 7. Ti raccomandiamo di mescolare gli ingredienti di tanto in tanto per un risultato di cottura ottimale. 1. Mettere il contenitore sull'unità principale, posizionando il dentino del contenitore dentro l’incasso Quando il coperchio viene aperto, la macchina entra in pausa. Per mescolare, assicurarsi sempre di presente nell’unità... -
Page 8: Forno
passaggio premendo il pulsante ROAST wuna volta. La scritta “Add Food” (ovvero "Aggiungi cibo") lampeggerà sullo schermo. Metti gli ingredienti nel contenitore ed aprire il coperchio. Quando il si chiude il coperchio, inizia la cottura e il timer eseguirà il conto alla rovescia. 5. -
Page 9: Disidratazione
RISOLUZIONE DEI PROBLEMI E DOMANDE FREQUENTI • “Add Food” (ovvero: “Aggiungi cibo”) viene visualizzato sullo schermo del display. Il coperchio è aperto e per far partire la funzione selezionata, occorre chiudere il coperchio. La macchina ha terminato il pre-riscaldamento ed ora è il momento di aggiungere i tuoi ingredienti. •... -
Page 10: Pulizia E Manutenzione
PULIZIA E MANUTENZIONE • Perché il cibo non si cuoce con la funzione FRIGGITRICE AD ARIA? (AIR CRISP) Assicurati che i prodotti siano posizionati in uno strato uniforme nella parte inferiore del contenitore, senza mescolare, per regalare una doratura omogenea. Durante la cottura, mescola di tanto in Dopo ogni utilizzo la macchina dovrebbe essere accuratamente pulita. - Page 11 CONTENTS WARNING 1. Remove and dispose the protective cover placed on the power socket of this unit. Important Reminders 01-03 2. This product can be used by people with limited physical , sensory or mental capacities or lack of ProductParts experience and awareness if they have been given guidance or instruction concerning use of the Introduction on Smokeless Grill product in a safe way and understand the risks involved.
-
Page 12: Productparts
PRODUCT PARTS 28. DO NOT use metal scouring pads to scrub. Pieces can break off the pad and reach electrical components, causing an electrical shock risk. 29. Children are not allowed to do the cleaning and repairs. 30. Do not place on or near a hot gas or electric burner, or in a heated oven. 31. -
Page 13: Introduction On Smokeless Grill
INTRODUCTION ON SMOKELESS GRILL USING FOR THE FIRST TIME 1. Remove from unit all packaging materials, promo labels and tape. The view of the control screen shows time 2. Remove from the box all accessories, and read this manual carefully. Please pay particular in format HH: MM. - Page 14 LOW: 205°C MEDIUM: 215°C HIGH: 245°C MAX: up to 265°C FOOD SET TEMP ACE TO ALLOW FOOD TO CARRY-OVER COOK TO • Bacon • Frozen meats • Steaks • Veggies Fish 60°C 65°C • Sausages • Marinated / • Chicken •...
-
Page 15: Types Of Cooking
5. When your food inside hits the temperature you set, the device will beep and the display shows ‘End’. Press TEMP ACE button for 2 sec, the display will go on showing the internal food temperature. 6a. Temp probe cooking complete: Remove protein from the unit, insert the probe and position it on a plate for a minimum of 5 minutes to rest. -
Page 16: Air Crisp
AIR CRISP 7. We highly recommend shaking ingredients regularly for better results. When the cover is removed 1. Place the cooking pot within the unit with the indent on the pot aligned with the main unit bump. the machine pauses. To shake the tub, use silicone-tipped tongs, or oven mitts. When done, close Place the cooking pot within the unit with the indent on the pot aligned with the main unit bump. -
Page 17: Bake
cooking pot and open the cover. When the cover is closed, cooking begins and the timer counts 4. To start preheating press START / STOP. PRE appears on the screen, and the progress bar down. begins. Preheat will take up to 3 minutes. NOTE: Although it is highly recommended to preheat for better performance, you can skip it again by 5. -
Page 18: Troubleshooting | Frequentlyaskedquestions
TROUBLESHOOTING | FREQUENTLY ASKED QUESTIONS • Add Food shows on the display screen. The machine has finished its preheating Grill and now it's time to add your ingredients. • Shut Lid shows on the display screen. The cover is open, and the selected function needs to be closed to start. •... -
Page 19: Cleaning Instruction
CLEANING INSTRUCTIONS • For fresh battered ingredients, can I air crisp them ? Sure but use the correct technique of breading. Foods should be filled first with flour, then with butter, and then with crumbs of bread. Firmly press the crumbs of bread onto the food so that they After any use the machine should be thoroughly cleaned. - Page 20 CONTENIDO ADVERTENCIA 1. Retire y deseche la cubierta protectora del enchufe de este aparato. Recordatorios importantes 01-03 2. Este aparato puede ser utilizado por personas con capacidades físicas, sensoriales o mentales Partes del producto limitadas, o sin experiencia ni conocimiento del producto, siempre que hayan recibido supervisión o Presentación del grill sin humos instrucciones sobre el uso seguro del aparato y comprendan los peligros asociados.
-
Page 21: Partes Del Producto
PARTES DEL PRODUCTO tura correcta y así evitar posibles enfermedades. 24. Si se incendiara la grasa o el aparato emitiera humo negro, desenchúfelo inmediatamente. Espere a que deje de salir humo antes de retirar los accesorios de cocción. 25. Consulte el apartado de Limpieza y mantenimiento para conocer los detalles de las tareas de mantenimiento rutinarias. -
Page 22: Presentación Del Grill Sin Humos
PRESENTACIÓN DEL GRILL SIN HUMO PRIMER USO 1. Retire del aparato todo el material de embalaje, las etiquetas promocionales y cintas. El visualizador de la pantalla de control 2. Saque de la caja todos los accesorios y lea con atención este manual. Preste particular atención a muestra el tiempo en el formato HH: MM. - Page 23 precisa y mantener su cocina libre de humos. Deberá seleccionar el ajuste de temperatura del grill a CONFIGURE TEMP ALIMENTOS DEJE QUE LOS ALIMENTOS REPOSEN A la hora de utilizar la función de grill. La gama de temperaturas recomendada para varios tipos de ACE A ingredientes se encuentran a continuación.
-
Page 24: Tipos De Cocción
2. Presione el botón GRILL. El nivel de temperatura por defecto en el lateral derecho del panel de control se iluminará, y la temperatura del aire correspondiente aparecerá en pantalla. Para cambiar el ajuste de temperatura, presione el botón Grill, o las flechas TEMP de ascenso y descenso. 3. -
Page 25: Crujiente Por Aire
CRUJIENTE POR AIRE 7. Recomendamos encarecidamente sacudir los ingredientes regularmente para obtener un mejor 1. Coloque la olla de cocción en la carcasa principal con la muesca de la olla en línea con la resultado. Cuando se levanta la tapa, el aparato se pausa. Para sacar el recipiente, use pinzas con protuberancia posterior de la carcasa. -
Page 26: Hornear
ingredientes en el cesto de fritura y abra la tapa. Al cerrar la tapa, la cocción se iniciará y el temporiza- dor empezará la cuenta atrás. 5. La pantalla mostrará «Add Food» cuando finalice el precalentamiento. 4. Para iniciar el precalentamiento, presione START/STOP. «PRE» aparecerá en pantalla y se iniciará... -
Page 27: Resolución De Problemas | Preguntas Más Frecuentes
RESOLUCIÓN DE PROBLEMAS | PREGUNTAS MÁS FRECUENTES • «Agregar ingredientes» aparece en pantalla. El aparato ha finalizado el precalentamiento del grill ya puede agregar los ingredientes. • «Cerrar la tapa» aparece en pantalla. La tapa está abierta y la función seleccionada no se inicia hasta que la tapa no esté cerrada. •... -
Page 28: Instrucciones De Limpieza
INSTRUCCIONES DE LIMPIEZA • ¿Por qué no se han cocinado los ingredientes con el proceso de crujiente por aire? Los ingredientes deben estar colocados en una capa uniforme en el fondo del cesto de frituras sin amontonarse para obtener un dorado uniforme. Sacuda los ingredientes durante la cocción para Debe limpiar el aparato después de cada uso. - Page 29 TABLE DES MATIÈRES AVERTISSEMENT 1. Retirez et jetez le couvercle de protection placé sur la prise d'alimentation de cet appareil. Rappels importants 01-03 2. L’appareil peut être utilisé par des personnes dont les capacités physiques, sensorielles ou Pièces du produit mentales sont réduites ou qui manquent d'expérience et de connaissances si elles ont reçu une Présentation du gril sans fumée 05-06...
-
Page 30: Pièces Du Produit
PIÈCES DU PRODUIT four. 21. N'utilisez PAS cet appareil comme une friteuse. 22. La sonde de température du gril sans fumée ne remplace pas un thermomètre externe pour les aliments. 23. Utilisez TOUJOURS un thermomètre pour vous assurer que les aliments sont cuits à la bonne Sortie d'air Ventilation température afin d'éviter toute maladie potentielle. -
Page 31: Présentation Du Gril Sans Fumée
PRÉSENTATION DU GRILL SANS FUMÉE bouton START/STOP (DÉMARRAGE / ARRÊT) après avoir sélectionné la température et le temps. La vue de l'écran de contrôle affiche l'heure au format HH : MM. AUTO-OFF (ARRÊT AUTOMATIQUE) L'écran de gauche indique 20 minutes. Si aucune cuisson n'est en cours, l'appareil s'éteint automatiquement, s'il le panneau de contrôle n’a pas été... -
Page 32: Contrôles Du Gril
le loquet arrière sur l'écran avec l'ouverture du couvercle en bas. Ensuite, déplacez lentement la REMARQUE: Pour régler la température de la fonction, appuyez à nouveau sur le bouton TEMP protection anti-éclaboussures vers le haut jusqu'à ce qu'elle s'enclenche sur l'avant du couvercle pour quitter. -
Page 33: Types De Cuisson
4. Lorsque l'appareil a préchauffé et que le message « Add Food » (Ajouter les aliments) clignote à l'écran, ouvrez le couvercle, versez les aliments à l'intérieur de l'appareil et fermez le couvercle sur le cordon de la sonde. L'écran affichera alors la lecture de la sonde de température pendant la cuisson des aliments. -
Page 34: Friture À L'air
8. Gardez le couvercle ouvert après avoir retiré les aliments, afin que la machine puisse refroidir plus 6. Ouvrez le couvercle et placez les ingrédients dans le panier à friture. Une fois le couvercle fermé, rapidement. Après la cuisson, le couvercle en acier inoxydable à l'extérieur de l'appareil sera chaud. la cuisson commencera et le compte à... -
Page 35: Four
2. Appuyez sur le bouton BAKE. L’écran affiche la température ambiante par défaut. Utilisez les flèches TEMP de haut en bas pour régler la température. REMARQUE: Cet appareil fonctionne avec des températures de 10° C de moins que les tempéra- tures indiquées dans les recettes typiques. -
Page 36: Déshydratation
GUIDE DE DÉPANNAGE | FOIRE AUX QUESTIONS DÉSHYDRATATION REMARQUE: Le bouton TEMP ACE et la sonde de température ne peuvent pas être utilisés dans cette fonction. • « Add Food » (Ajouter les aliments) s'affiche sur l'écran. La machine a terminé le préchauffage et il est maintenant temps d'ajouter vos ingrédients. 1. -
Page 37: Instructions De Nettoyage
INSTRUCTIONS DE NETTOYAGE • Pourquoi mes aliments n’ont pas cuit lors du processus de friture à l’air ? Assurez-vous que les produits sont placés en une couche uniforme au fond du panier sans les mélanger pour assurer un brunissement uniforme. Secouez les ingrédients pour assurer une Après toute utilisation, l’appareil doit être soigneusement nettoyé. - Page 38 INHALT WARNUNG 1. Entfernen und entsorgen Sie die Schutzabdeckung, die auf der Netzbuchse dieses Gerätes Wichtige Hinweise 01-03 angebracht ist. Produktteile 2. Dieses Produkt kann von Menschen mit eingeschränkten physischen, sensorischen oder Das ist der Smokeless Grill! mentalen Fähigkeiten oder Personen, denen es an Erfahrung und Wissen mangelt, benutzt werden, wenn sie angeleitet werden oder in den sicheren Gebrauch des Produktes unterwiesen wurden und Tastenfunktionen die damit verbundenen Risiken verstanden haben.
-
Page 39: Produktteile
PRODUKTTEILE von geeigneten Topflappen oder Ofenhandschuhen wird empfohlen. 21. NICHT als traditionelle Fritteuse benutzen. 22. Smokeless Grill-Temperatursensor ersetzt keinen Lebensmittelthermometer. 23. Benutzen Sie IMMER ein Thermometer, um die Gartemperatur der Lebensmittel zu prüfen und Gesundheitsrisiken zu vermeiden. Luftauslass Luftklappe 24. Falls ein Fettbrand auftritt oder schwarzer Rauch entweicht, sofort den Netzstecker ziehen. Das Kochzubehör erst entnehmen, wenn kein Rauch mehr austritt. -
Page 40: Vor Dem Ersten Gebrauch
VORSTELLUNG DES SMOKELESS GRILL VOR DEM ERSTEN GEBRAUCH 1. Entfernen Sie alle Verpackungsmaterialien, Aufkleber und Klebebänder. Das Bedienfeld zeigt die Uhrzeit im 2. Entnehmen Sie alle Zubehörteile aus der Verpackung und lesen Sie das Handbuch aufmerksam Format HH: MM an. durch. -
Page 41: Temp Ace
TEMP ACE- LOW: 205°C MEDIUM: 215°C HIGH: 245°C MAX: bis zu 265°C LEBENSMITTEL GARZIEHEN DER LEBENSMITTEL AUF EINSTELLEN AUF • Speck • Tiefgefrorenes • Steak • Gemüse Fisch 60°C 65°C • Würstchen Fleisch • Hühnerfleisch • Obst Geflügel 75°C 75°C oder höher •... -
Page 42: Zubereitungsmethoden
5. Wenn das Essen die eingestellte Temperatur erreicht hat, gibt das Gerät einen Piepton ab und auf 2. GRILL-Taste betätigen Auf der linken Seite des Bedienfelds leuchtet die standardmäßige dem Display erscheint die Anzeige „End“. Halten Sie die TEMP ACE-Taste 2 Sekunden lang Temperatureinstellung auf und auf dem Display erscheint die entsprechende Lufttemperatur. -
Page 43: Heißluftfrittieren
HEIßLUFTFRITTIEREN 7. Um bessere Ergebnisse zu erzielen, sollten Sie die Lebensmittel regelmäßig schütteln. Das Gerät 1. Stellen Sie den Topfeinsatz in das Gerät und richten Sie ihn dabei so aus, dass die Einkerbung am pausiert den Garvorgang, wenn die Abdeckung geöffnet wird. Zum Schütteln des Korbs silikonüber- Topf auf den Stift trifft. -
Page 44: Trocknen
Abdeckung. Sobald der Deckel geschlossen ist, beginnt der Garvorgang und der Timer läuft los. 4. Drücken Sie START/STOP, um den Vorheizvorgang zu starten. Auf dem Display wird PRE angezeigt und der Fortschrittsbalken läuft. Der Vorheizvorgang benötigt rund 3 Minuten. 5. Wenn der Vorheizvorgang beendet ist, erscheint „Add Food“ auf dem Display. HINWEIS: Obwohl das Vorheizen zu besseren Ergebnissen führt und dringend empfohlen wird, können Sie den Schritt durch Betätigen der BAKE-Taste überspringen. -
Page 45: Problembehebung | Fragen & Antworten
PROBLEMBEHEBUNG | FRAGEN & ANTWORTEN 2. betätigen Sie die DEHYDRATE-Taste. Die standardmäßige Temperatureinstellung wird angezeigt. Durch Betätigen der TEMP-Auf- und Ab-Tasten, können Sie die Einstellung nach Wunsch verändern. • Auf dem Display wird Add Food angezeigt. 3. Mithilfe der TIME-Pfeile können Sie die Zeit für den Trockenvorgang auf eine Dauer zwischen 1 Das Gerät hat den Vorheizvorgang abgeschlossen und sie können nun Ihre Zutaten einfüllen. -
Page 46: Reinigungshinweise
REINIGUNGSHINWEISE • Weshalb wird mein Essen beim Heißluftfrittieren nicht gar? Vergewissern Sie sich, dass die Zutaten gleichmäßig auf dem Boden des Frittierkorbs verteilt sind, damit die Lebensmittel gleichmäßig bräunen. Schütteln Sie zerkleinerte Zutaten während dem Das Gerät sollte nach jedem Gebrauch sorgfältig gereinigt werden. Lassen Sie das Gerät vor Frittiervorgang für gleichmäßig knusprige Ergebnisse. - Page 47 ÍNDICE AVISO 1. Retire e elimine a cobertura de proteção colocada na tomada desta unidade. Lembretes importantes 01-03 2. Este produto pode ser usado por pessoas com capacidades físicas, sensoriais ou mentais Peças do produto reduzidas, ou falta de experiência e conhecimentos, se forem supervisionadas e ensinadas quanto à Introdução ao grelhador sem fios utilização do produto de um modo seguro, e compreenderem os perigos envolvidos.
- Page 48 PEÇAS DO PRODUTO 24. Se a gordura se incendiar, ou se a máquina libertar fumo preto, retire imediatamente a ficha da tomada. Espere que o fumo se dissipe antes de retirar quaisquer dispositivos de confeção. 25. Para proceder à manutenção de rotina do aparelho, consulte a secção “Limpeza e manutenção”. 26.
- Page 49 INTRODUÇÃO AO GRELHADOR SEM FIOS PRIMEIRA UTILIZAÇÃO 1. Retire todos os materiais de empacotamento da unidade, etiquetas e fita. O ecrã de controlo apresenta a hora no 2. Retire todos os acessórios da caixa e leia este manual com atenção. Preste especial atenção ao formato HH: MM.
- Page 50 TEMPERATURA PERMITIR AO ALIMENTO A BAIXA: 205°C MÉDIA: 215°C ELEVADA: 245°C MÁX. Até 265°C ALIMENTO DEFINIDA PARA TRANSFERÊNCIA DE CALOR • Bacon • Carnes • Bifes • Vegetais Peixe 60°C 65°C • Salsichas congeladas • Frango • Fruta Aves 75°C 75°C ou superior •...
- Page 51 5. Quando o alimento no interior atingir a temperatura definida, o aparelho emite um som e o visor apresenta “End”. Prima o botão TEMP ACE durante 2 segundos. O visor acende apresentando a temperatura interna do alimento. 6a. Confeção completa de acordo com a sonda da temperatura: Retire a carne da unidade, insira a sonda e posicione-a num prato durante um mínimo de 5 minutos para assentar.
- Page 52 ESTALADIÇO 7. Recomendamos fortemente que mexa os ingredientes regularmente para obter melhores 1. Coloque o recipiente de confeção dentro da unidade com o entalhe no recipiente alinhado com a resultados. Quando a cobertura é retirada, a máquina faz uma pausa. Para abanar o recipiente, use protuberância da unidade principal.
- Page 53 NOTA: Para um melhor desempenho, apesar de o pré-aquecimento ser altamente recomendado, pode saltar este passo premindo novamente o botão ROAST. “Add food” pisca no visor. Coloque os ingredientes no cesto dos alimentos estaladiços e abra a cobertura. Quando a cobertura estiver fechada, a confeção é...
- Page 54 RESOLUÇÃO DE PROBLEMAS | PERGUNTAS FREQUENTES • “Add food” aparece no visor. O aparelho terminou o pré-aquecimento. Pode agora adicionar os ingredientes. • “Shut lid” aparece no visor. A cobertura está aberta. A função selecionada precisa da cobertura fechada para ser iniciada. •...
- Page 55 INSTRUÇÕES DE LIMPEZA • Quando cozinho no modo estaladiço, os alimentos são lançados para outro lado. Por vezes, a ventoinha sopra os alimentos mais leves. Fixe os alimentos soltos (como a fatia superior do pão numa sanduíche) com um palito, para evitar esta situação. Após qualquer utilização, a máquina deverá...
- Page 57 FU N Z ION AMEN TO GR IG LIA SE NZA FUMO Il display di controllo mostra l’ora nel formato HH:MM. Il display a sinistra indica 20 minuti. T I P I D I F U N Z I O N E GRILL: per grigliare in casa senza fumo, mantenendo i segni della griglia e il sapore di una vera grigliata.
- Page 58 PA RT I DE L P ROD OT TO Coperchio Protezione antischizzi (amovibile) Display di controllo Grata di ventilazione Fuoriuscita d’aria Griglia con rivestimento ceramico Contenitore con rivestimento ceramico...
- Page 59 P R O D U C T PA R T S Cover Splatter Guard (Detachable) Control Screen Air Vent Air Outlet Griller Ceramic-Coated Ceramic-Coated Pot...
- Page 60 IN T RO DUCT IO N ON SM OK ELESS GRI LL The view of the control screen shows time in format HH:MM. The screen on the left read 20 minutes. T Y P E S O F F U C T I O N GRILL: grill indoors and make even smoke, grill marks and grilled taste.
- Page 62 • ANTIPASTI STARTERS Kebab di salmone glassato al miso / Miso glazed salmon kebabs P. 10 Elote (mais stile street food alla messicana) / Elote (mexican style street corn) P. 12 Gamberi con chimichurri / Shrimp chimichurri P. 14 SECONDI PIATTI MAIN COURSE P.16 Bistecca con patate fritte /...
- Page 64 A N T I P A S T I A N T I P A S T I S T A R T E R S...
- Page 65 K E B A B D I SA L M O N E Glassato al miso M I S O G L A Z E D SA L M O N K E BA B S Spiedini di salmone glassato al miso in una marinatura ricca di sapore umami con funghi Portobello e melanzane giapponesi.
- Page 66 (Per 4 persone) (Serves 4) Tempo di preparazione: 20 min. Prep Time: 20 min Tempo di cottura: 10 min. Cook Time: 10 min Ingredienti: Ingredients: Per il kebab: For kebabs 400 g ca. di salmone, tagliato a cubetti 14oz salmon, cut into 1” x 1” cubes di 2,5 x 2,5 cm 1 ½...
- Page 67 E LOT E mais stile street food a a messicana E LOT E ( M E X I CA N ST Y L E ST R E E T C O R N ) Pannocchia tostata nappata con una deliziosa maionese al lime e chili, cosparsa di crumble di formaggio cotija e coriandolo fresco Grilled corn on the cob slathered with chile lime mayonnaise mixture, topped with generous sprinkle of cotija cheese crumble and fresh cilantro.
- Page 68 (Serves 4) (Per 4 persone) Prep Time: 10 min Tempo di preparazione: 10 min. Cook Time: 10 min Tempo di cottura: 10 min. Ingredients: Ingredienti: 4 ears corn on the cobb, cleaned and 4 pannocchie, pulite e senza involucro husks removed ½ cup cotija cheese, esterno crumbled ½...
- Page 69 GA M B E R I con chimichurri S H R I M P C H I M I C H U R R I Succulenti gamberi alla griglia con salsa chimichurri a base di erbe, preparata con prezzemolo, aglio, peperoncino e aceto di vino rosso. Succulent grilled shrimp with a fresh herby chimichurri sauce made with parsley, garlic, cilantro, red peppers and red vinegar.
- Page 70 (Serves 4) (Per 4 persone) Prep Time: 10 min Tempo di preparazione: 10 min. Cook Time: 10 min Tempo di cottura: 10 min. Ingredients: Ingredienti: 1 lb. shrimp, deshelled and deveined ½ kg ca. di gamberi sgusciati ed eviscerati ¼ cup EVOO ¼...
- Page 72 S E C O N D I P I A T T I S E C O N D I P I A T T I M A I N C O U R S E...
- Page 73 B I ST E C CA con patate fritte ST E A K F R I T E S Controfi letto alla newyorkese alla griglia con erbe e burro all’aglio, accompagnato da patate fritte croccanti all’aglio e parmigiano. New York Strip steak grilled and topped with fresh herb and garlic compound butter, served with crispy parmesan garlic fries.
- Page 74 (Serves 4) (Per 4 persone) Prep Time: 30 min Tempo di preparazione: 30 min. Cook Time: 10 min Tempo di cottura: 10 min. Ingredients: Ingredienti: 4 New York Strip steaks 4 fette di controfi letto (di circa 2 cm di (around 3/4“...
- Page 75 COSTOLETTE D'AGNELLO grigliate con erbe aromatiche H E R B G R I L L E D L A M B C H O P S Costolette d'agnello con sentore di agrumi in una profumata gremolata preparata con prezzemolo, scorza di limone e aglio. Servite con patate arrosto alla paprika affumicata.
- Page 76 (Serves 4) (Per 4 persone) Prep Time: 10 min Tempo di preparazione: 10 min. Cook Time: 10 min Tempo di cottura: 10 min. Ingredients: Ingredienti: 12 lamb chops 12 costolette d’agnello ½ lb baby potatoes 250 g di patate novelle 2 tsp.
- Page 77 HAMBURGER ALL AMERICAN di manzo wagyu A L L A M E R I CA N WAGY U B U R G E R Hamburger di manzo wagyu alla griglia, formaggio cheddar fuso, pomodoro, cipolla, cetriolini, lattuga, in due fette di pan brioche spalmate con salsa All American. Si serve accompagnato con patate fritte croccanti.
- Page 78 (Per 4 persone) (Serves 4) Tempo di preparazione: 10 min. Prep Time: 10 min Tempo di cottura: 10 min. Cook Time: 10 min Ingredienti: Ingredients: 600 g di carne di manzo wagyu tritata, divisa in 1 lb. ground wagyu beef, hamburger di 200 g l’uno separated into ¼...
- Page 79 F O R M AG G I O alla griglia U LT I M AT E G R I L L E D C H E E S E Formaggio fuso e cremoso, fontina e gouda in un sandwich di pane bianco classico spalmato di burro, aioli e senape.
- Page 80 (Serves 4) (Per 4 persone) Prep Time: 10 min Tempo di preparazione: 10 min. Cook Time: 10 min Tempo di cottura: 10 min. Ingredients: Ingredienti: 8 slices white bread 8 fette di pane in cassetta bianco ¼ cup butter, softened (add more if ¼...
- Page 81 B R A N Z I N O alla griglia G R I L L E D B R A N Z I N O Branzino grigliato al sentore di limone e timo servito con patate fi ngerling arrosto. Aromatic whole branzino grilled with lemon and thyme with crispy roasted fingerling potatoes.
- Page 82 (Serves 4) (Per 4 persone) Prep Time: 5 min Tempo di preparazione: 5 min. Cook Time: 10 min Tempo di cottura: 10 min. Ingredients: Ingredienti: 3 whole branzino (roughly 1.5 - 2lb each) 3 branzini interi (approssimativamente 2 lemon da 750 g - 1 kg ciascuno) 3 sprigs fresh thyme 2 limoni 1-2 tbsp.
- Page 83 28 28...
- Page 84 D E S S E R T S 29 29...
- Page 85 P E S C H E con gelato P E AC H E S & C R E A M Sinfonia di succose pesche gialle e gelato alla vaniglia artigianale, con un tocco di miele, more, basilico fresco e granella di pistacchio. A symphony of warm juicy grilled yellow peaches and cold home-made vanilla bean ice cream, honey drizzle, blackberries, fresh basil, and chopped pistachio.
- Page 86 (Serves 4) (Per 4 persone) Prep Time: 5 min Tempo di preparazione: 5 min. Cook Time: 8 min Tempo di cottura: 8 min. Ingredients: Ingredienti: 2 ripe yellow peaches, halved and pitted 2 pesche gialle mature tagliate a metà 4 scoops vanilla bean ice cream Handful e denocciolate blackberries 4 palline di gelato alla vaniglia...
- Page 87 F R E N C H TOA ST alla griglia G R I L L E D F R E N C H TOAST Il classico french toast, ma alla griglia. Decorato con banane, fragole fresche, more, sciroppo d’acero e una noce di burro. The classic french toast –...
- Page 88 (Serves 4) (Per 4 persone) Prep Time: 10 min Tempo di preparazione: 10 min. Cook Time: 10 min Tempo di cottura: 10 min. Ingredients: Ingredienti: 8 pieces brioche bread 8 fette di pan brioche 3 eggs 3 uova 2 cups milk 2 tazze di latte 2 tsp.
- Page 89 34 34...
- Page 90 BERGNER ITALY Srl Via Annibali, 31/L, 62100, Macerata Tel: + 39 0733 165 4276 Email: info.italia@bergnereurope.com 35 35...
- Page 91 Masterpro by Carlo Cracco è un marchio di Bergner Italy Srl www.masterproitalia.it...
Need help?
Do you have a question about the Masterpro BGMP-9146 and is the answer not in the manual?
Questions and answers