
Subscribe to Our Youtube Channel
Related Manuals for Smeg FQ75XPED


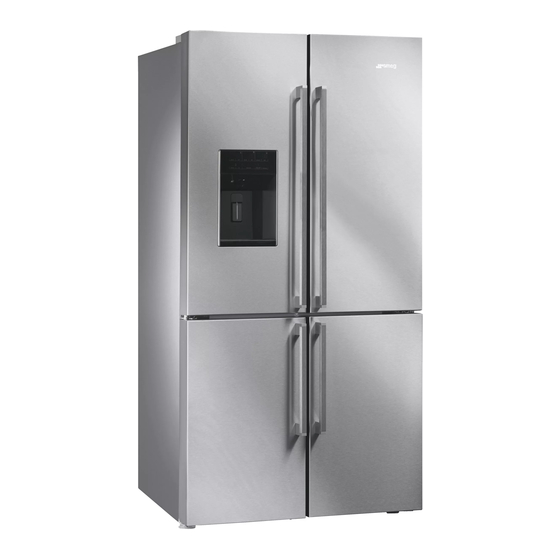
Summary of Contents for Smeg FQ75XPED
- Page 1 FQ75XPED Instruction Manual Manuale di istruzioni Notice d'Utilisation Bruksanvisning Manual de instrucciones Bedienungsanleitung Käyttöohje fin Bruksanvisning...
- Page 2 Please read this user manual first! Dear Customer, Thank you for preferring an your product. We hope that you get the best results from your product which has been manufactured with high quality and state-of-the-art technology. Therefore, please read this entire user manual and all other accompanying documents carefully before using the product and keep it as a reference for future use.
-
Page 3: Table Of Contents
Content 1 Important instructions for safety and 4 Preparation environment 4.1 Things to be done for energy saving ..16 1.1 General safety ..... .3 4.2 Recommendations for the fresh food 1.1.1 HC warning . -
Page 4: Important Instructions For Safety And Environment
Important instructions for safety and environment • Always have the installation and repairing This section contains safety instructions that will procedures carried out by the Authorised help protect from risk of personal injury or property Service Agent. Manufacturer shall not be damage. -
Page 5: Hc Warning
Important instructions for safety and environment • Do not use gaseous sprays near the product If the product is equipped with a cooling since there is the risk of fire or explosion! system containing R134a gas, ignore this • Flammable items or products that contain warning. -
Page 6: Compliance With Weee Directive And Disposing Of The Waste Product
Important instructions for safety and environment 1.4 Compliance with WEEE Directive and Disposing of the Waste Product: This product complies with EU WEEE Directive (2012/19/EU). This product bears a classification symbol for waste electrical and electronic equipment (WEEE). This product has been manufactured with high quality parts and materials which can be reused and are suitable for recycling. -
Page 7: Your Refrigerator
Your Refrigerator 14- Multi Zone / Flexi Zone / Cool Control 1- Fridge compartment compartment food storage sections 2- Butter & Cheese sections 15- Multi Zone compartment 3- Glass shelves 16- Freezer compartment 4- Snack tray 17- Frozen food storage sections 5- Egg holder 18- Ice container 6- Odour filter... -
Page 8: Installation
Installation Refer to the nearest Authorised Service Agent for • Do not place the product on the materials such installation of the product. To make the product as rugs or carpets. ready for use, make sure that the electricity • Place the product on an even floor surface to installation is appropriate before calling the prevent jolts. Authorised Service Agent. -
Page 9: Adjusting The Feet
Installation WARNING: Damaged power cable must 3.5 Illumination lamp be replaced by the Authorised Service Do not attempt to repair yourself but call the Agents. Authorised Service Agent if the LED illumination WARNING: If the product has a failure, it lamps do not go on or are out of order. -
Page 10: Connecting The Water Hose To The Refrigerator
Installation Normally, you are not required to tighten Check that following parts have been delivered the union with a tool. However, you can use together with the product: a spanner or pliers to tighten the union if there is a leakage. 1. -
Page 11: Water Filter
Installation 3.10 Water filter (in some models) Your refrigerator may be equipped with an external or internal filter depending on its model. To fit the water filter, follow the instructions below referring to the figures supplied: 3.10.1 Mounting the external filter onto the wall 1. -
Page 12: Attaching The Internal Filter Into The Refrigerator
Installation WARNING: 3.10.2 Attaching the internal Water filter must be hold upright as shown in the figure. It is critical filter into the refrigerator to connect the water inlet and outlet hoses on the filter correctly. 1. Press “Ice Off” button on the display. 2. -
Page 13: Connecting The Water Hose To Demijohn
Installation 3.11 Connecting the water WARNING: Ensure that the Ice Off mode hose to demijohn is enabled before removing the by-pass cover. (in some models) To make the water supply connection between It is normal that a few drops of water drip the refrigerator and the demijohn, you must use after the cover has been removed. -
Page 14: Things To Do To Have The Filter Usage Time Calculated Automatically
Installation 3.12 Things to do to have the filter usage time calculated automatically (in some models) (For products connected to the mains water line and equipped with filter) 1- Plug in the refrigerator. Press A (key lock) button simultaneously to enable the key lock. 2- Then press on the following buttons in turn. -
Page 15: Before Starting To Use The Water/Ice
Installation • The first 10 glasses of water should not be If the filter usage time is calculated consumed. automatically, Filter Change Warning • You must wait approximately 12 hours to indicator will illuminate continuously in a few seconds after the product is plugged obtain ice from the ice dispenser for the first time. -
Page 16: Transportation Of The Product
Installation • It is recommended that the water is disconnected if you will not be using the refrigerator for a long period of time due to vacation or similar reasons. • Do not attempt to dismantle the ice container group assembly parts. • Do not attempt to clean the ice container assembly without removing it from the refrigerator. -
Page 17: Preparation
Preparation 4.1 Things to be done for 4.2 Recommendations for the energy saving fresh food compartment • Do not allow the food to touch the temperature Connecting the product to electric energy sensor in fresh food compartment. To allow the saving systems is risky as it may cause fresh food compartment keep its ideal storage damage on the product. -
Page 18: Initial Use
Preparation 4.3 Initial use Before starting to use the product, check that all preparations are made in accordance with the instructions in sections "Important instructions for safety and environment" and "Installation". • Clean the interior of the refrigerator as recommended in the “Maintenance and cleaning”... -
Page 19: Operating The Product
Operating the product 5.1 Indicator panel Touch-control indicator panel allows you to set the temperature and control the other functions related to the product without opening the door of the refrigerator. Just press the relevant buttons for function settings. 13 *20 21 1- Economy Mode indicator 12- Fridge Compartment Temperature Setting 2- Freezer Compartment Temperature indicator... - Page 20 Operating the product 1. Economy Mode indicator 9. Key Lock indicator Indicates that the refrigerator is running in energy- Use this function if you want to prevent efficient mode. This indicator will be active if the temperature setting of the refrigerator from being Freezer Compartment temperature is set to -18 or changed.
- Page 21 Operating the product 16. Freezer compartment Temperature Setting button Press this button to set the temperature of the freezer compartment to -18,-19,-20,-21,-22,-23,- 24, -18... respectively. Press this button to set the freezer compartment temperature to the desired value. 17. Quick Freeze Function indicator Indicates that the Quick Freeze function is enabled.
-
Page 22: Dual Cooling System
Operating the product 5.2 Dual cooling system • Pack the food in an airtight manner to prevent Your refrigerator is equipped with three them from drying even if they are going to be separate cooling systems to cool the fresh food stored for a short time. compartment, frozen food compartment and multi • Materials to be used for packaging must be zone compartment. -
Page 23: Recommendations For Preserving The Frozen
Operating the product 5.4 Recommendations for Divided the food into portions according preserving the frozen food to your family’s daily or meal based • • Frozen food that you have purchased should consumption needs. be stored in accordance with the frozen food Pack the food in an airtight manner to manufacturer's instructions for a prevent them from drying even if they are ( 4 star) frozen food storage compartment. -
Page 24: 2Making Ice
Operating the product 5.9 Glass shelves Under normal conditions, you can start to use the Icematic at full capacity after one day. You can remove the glass shelves to clean them. Icematic allows you to obtain ice from the Be careful when removing the shelves since they refrigerator easily. -
Page 25: Crisper
Operating the product 5.11 Crisper 5.14 Movable middle section Crisper of the refrigerator is designed specially Movable middle section is intended to prevent to keep the vegetables fresh without loosing their the cold air inside the refrigerator from escaping humidity. For this purpose, cool air circulation is outside. -
Page 26: Multi Zone Storage Compartment
Operating the product 5.15 Multi Zone Storage compartment 5.16 Rotating storage container You can use the Multi Zone compartment in (in some models) desired mode by setting it to freezer or fridge This accessory is designed to increase the usable temperatures. -
Page 27: Ion
Operating the product 5.18 Ion (in some models) Air is ionized by means of the ionizer system in the fridge compartment air duct. Thanks to this system, air-borne bacteria and odorising molecules are eliminated. 5.19 Odour filter (in some models) Odour filter in the air duct of the fridge compartment prevents build-up of unpleasant odours in the refrigerator. -
Page 28: Drip Tray
Operating the product Minibar section of the product works with push 5.21 Drip tray and pull system. When you want to open this (in some models) compartment, it will be sufficient to press in the direction of arrow to open or close it smoothly. Minibar compartment opens slowly. -
Page 29: Movable Body Shelf
Operating the product 5.23 Movable Body Shelf Lift the Movable Body Shelf up first and (in some models) then pull it towards yourself to take it out. The "Movable Body Shelf", which offers solutions for pans, pitches, bottles, etc. that you are forced When the Movable Body Shelf is moving to place on glass shelves because of their heights, downwards or upwards, make sure that... -
Page 30: Maintenance And Cleaning
Maintenance and cleaning Service life of the product extends and frequently • Keep the food in closed containers. faced problems decrease if cleaned at regular Microorganisms spreading out from uncovered intervals. containers can cause unpleasant odours. • Never keep the food that have expired best WARNING: Unplug the product before before dates and spoiled in the refrigerator. cleaning it. -
Page 31: Troubleshooting
Troubleshooting Please review this list before calling the service. It will save your time and money. This list includes frequent complaints that are not arising from defective workmanship or material usage. Some of the features described here may not exist in your product. The refrigerator does not operate. - Page 32 Troubleshooting Freezer temperature is very low while the fridge temperature is sufficient. • The freezer temperature is adjusted to a very low value. >>> Adjust the freezer temperature to a warmer degree and check Fridge temperature is very low while the freezer temperature is sufficient. • The fridge temperature is adjusted to a very low value.
- Page 33 Troubleshooting The door is not closing. • Food packages are preventing the door from closing. >>> Replace the packages that are obstructing the door. • The refrigerator is not completely even on the floor. >>> Adjust the feet to balance the refrigerator. • The floor is not level or strong.
Need help?
Do you have a question about the FQ75XPED and is the answer not in the manual?
Questions and answers