Advertisement
Quick Links
Advertisement

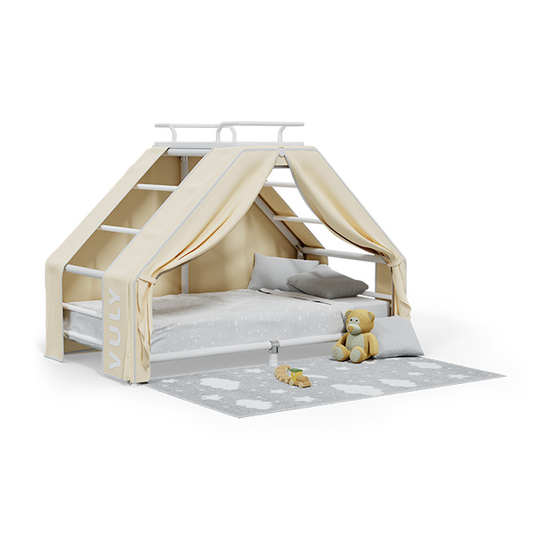
Summary of Contents for Vuly Den
- Page 1 MANUAL Visit VulyPlay.com/Installation for video instructions...
-
Page 3: Start Here
WARNING! Do not allow climbing or hanging from the telescopic poles. This may reduce the strength of the pole. WARNING! Do not allow any ropes, hooks or belts to be hung from Den as they may cause a strangulation hazard. -
Page 4: Care And Maintenance
• Tighten all hardware, including elements that secure to the product. • Keep away objects that could damage textile components. • Use only parts and accessories recommended by Vuly • Hand wash textiles using cold water and hang to dry. -
Page 5: Parts Reference
1x Bed Slat Set 2 x Bed Frame Tube B BOX B 1 x Frame Support Tube - Short 16 x Angle Joiner BOX C 4x Den Leg Tube (with foot) 4x Den Climbing Frame Tube 2x Top Tube - Short... - Page 6 BOX C 2 x Den Front Leg Tube 1x Front Top Tube 2x Den Front Straight Tube BOX D 1x Den Play Board 2x Den Guard Rail 4x Plastic Board Sleeve 1x Den Top Tube - Long 1x Den Telescopic Inner Tube...
- Page 7 BOX E 2x Large Climbing Bar Bottom 2x Large Climbing Bar Top 8x Den Climbing Bar 1x Den Frame Support Tube Long 1x Den Telescopic Outer Tube...
-
Page 8: Bed Frame
PART 1: BED FRAME STEP 1 • Join A2 to A3 and secure in place using T-Joiner (D7) grub screw • Insert A4 all the way into bottom of T-joiner and secure in place using grub screw. - Page 9 STEP 2 CHECK! Make sure bed rails are assembled as shown below. STEP 3 • Slide T-Joiner down C1 until below lower hole and secure on tube. • Assemble E3 bars into C1 tubes and fasten using M10 bolts, , spring washers and washers •...
- Page 10 STEP 4 MEASURE! Ensure each T-Joiner is 105mm from floor. The top of the joiners should be nearly touching the bottom of E3 bars. 105mm STEP 5 • Join bed ends to frame tubes and secure using grub screws.
- Page 11 STEP 6 CHECK! Make sure bed frame is assembled as shown. And frame tubes shall be level to the floor. Level to the floor Level to the floor STEP 7 • Take bed slat set (A1) and place into bed frame.
- Page 12 STEP 8 CHECK! Make sure bed slats are secured at each corner over locating pin. Locating pin PART 2: CLIMBING FRAME...
- Page 13 STEP 9 • Attach B1 joiners to C1 poles and make sure the grub screws are facing outwards. • Do not tighten grub screws yet. • Make sure two B1 joiners are assembled as shown below. Facing outwards STEP 10 •...
- Page 14 STEP 11 • Attach remain of B1 joiners to E1 pole. secure in place. • Locate and align all holes and • Only tighten these B1 joiners that attached to C1 poles. STEP 12 • Insert frame support tube (E5) into T-joiner. •...
- Page 15 STEP 13 • Slide D5 pole through 4-way joiner. • Align in centre of joiner, do not fasten yet. STEP 14 CHECK! Make sure climbing frame is assembled thus far as shown.
- Page 16 STEP 15: CLIMBING BARS • Assemble E3 tube with C2 tube. • Fasten using M10 locking bolts, spring washers, washers. M10 Bolt Spring washers & washers STEP 16 • Attach right side of B1 joiner to top of C2 tube. •...
- Page 17 STEP 17 • Slide E2 pole through joiner and attach left side of B1 joiner as shown. • Locate and align all holes and secure in place by tightening all grub screws. STEP 18 Repeat Step 15 to Step 17 to complete the other climbing bar assembly. CHECK! Make sure climbing bar is assembled thus far as shown.
- Page 18 STEP 19: CLIMBING FRAME • Attach first climbing bar asembly to climbing frame. • Secure climbing bar assembly using grub screws. Do not fasten yet. STEP 20 • Attach the second climbing bar asembly to climbing frame. • Secure climbing bar assembly using grub screws and secure 4-way joiner. Do no fasten yet.
- Page 19 STEP 21 • Attach both C3 poles to D8 joiner, do not tighten grub screws. then use guard rail D1 to align top of frame. • Slide into climbing frame as shown, • Double make sure frame tubes are still level to the floor and then tighten all grub screws. •...
- Page 20 STEP 23 • Insert telescopic inner tube (D6) with the push pin first. • Insert until only 150mm of tube remains exposed. STEP 24: END CLIMBING FRAME CHECK! Make sure climbing frame is assembled thus far as shown.
- Page 21 PART 3: DEN COVER STEP 26 • Insert C6 tubes into part C4.
- Page 22 STEP 27 • Insert C5 tubes into C6 tubes. STEP 28 • Fasten using cover bolts in supplied hardware kit.
- Page 23 STEP 29 • Take assembled den cover and attach to inner telescopic tube. STEP 30 • Fasten using telescopic bolt in supplied hardware kit.
- Page 24 STEP 31: END DEN COVER CHECK! Make sure den frame is assembled thus far as shown.
- Page 25 PART 3: DEN FABRIC ATTACHMENT • Place den fabric (D4) over frame and align as shown below. Secure using hook and loop straps Attach front fabric to rear fabric using zip FRONT FRONT...
- Page 26 STEP 32 • Place play board (D2) on top of climbing frame. • Locate holes and insert plastic rail guards and safety rails. Secure using locking bolts, spring washers, washers. • Warning! Do not over-tighten the bolts. Otherwise, it may damage the board. STEP 33: ASSEMBLY COMPLETE...
- Page 27 STEP 34: EXTENDING CUBBY NOTE! Fabric cover hidden in drawings to show push pin location. NOTE! Pull den cover with two hands until the push pin locks into place.
- Page 28 STEP 35: COLLAPSING CUBBY NOTE! Fabric cover hidden in drawings to show push pin location. NOTE! Press push pin in from both sides and slide inner telescopic tube until fully closed.
- Page 29 STEP 36: DEN CLIMBING COVER ATTACHMENT • Attach Den climbing cover to the velcro attachment points as shown below. Secure using velcro attachment points. STEP 37: DEN CLIMBING COVER ATTACHED...
-
Page 30: Product Registration
Warranty All Vuly products are sold with a manufacturing warranty, which assures that the item is free of defects in workmanship and materials (“warranty”). Warranty periods Warranty periods do not reset for any reason, unless the customer purchases a new product. In this case, that particular item will be covered by its own warranty period. - Page 32 Vuly warranty policies, terms and conditions.
Need help?
Do you have a question about the Den and is the answer not in the manual?
Questions and answers