Advertisement
Available languages
Available languages
Quick Links
Ventilation Systems
HS583E
Curtain/Vent Machine Installation Manual
Enclosed Limit Switch (Includes Spanish Translation)
General Installation Notes:
Make sure that power is disconnected from system prior to servicing.
Installation of this equipment and related OEM equipment should be in accordance with these
instructions, OEM's installation instructions and local codes (if applicable). Failure to follow specified
instructions may cause damage to equipment and/or personal injury or death.
Take special note of any Warnings or Safety Decals on the equipment and in manuals.
Always wear protective clothing and any applicable Personal Protective Equipment (Safety Glasses
and/or Ear Plugs) when working with the equipment.
Discarded materials, equipment and boxes should be recycled in accordance with local and national
codes.
Note: Actuator Assembly is to be wired in accordance with all applicable local and national electrical wiring codes. All
wiring sizes and fuse capacities are to be sized according to applicable electrical code specifications or other regulations.
SAFETY INSTRUCTIONS:
Read all safety messages in this manual and on equipment safety decals. Follow recommended
precautions and safe operating practices.
Ground all electrical equipment for safety.
Ground all non-current carrying metal parts to guard against electrical shock.
Always keep safety decals in good condition and replace missing or damaged decals.
Hog Slat Inc. Newton Grove, NC USA August 2016
1
Advertisement

Summary of Contents for Hog Slat Grower Select HS583E
- Page 1 Ground all electrical equipment for safety. Ground all non-current carrying metal parts to guard against electrical shock. Always keep safety decals in good condition and replace missing or damaged decals. Hog Slat Inc. Newton Grove, NC USA August 2016...
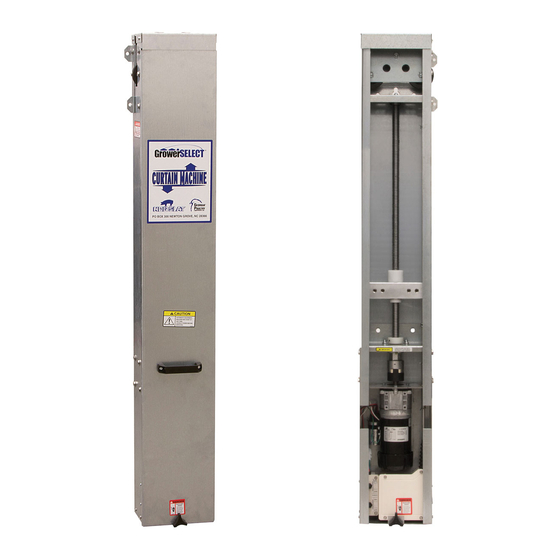
- Page 2 Ventilation Systems COMPONENT LAYOUT (SERVICE REPLACEMENT PARTS) Hog Slat Inc. Newton Grove, NC USA August 2016...
- Page 3 Limit rod, 24” machine HS583-27-36 Limit rod, 36” machine HS583-27-48 Limit rod, 48” machine HSLABEL-083 Label, “Warning Moving Parts” HSLABEL-087 Label, “Grease Location” HS583-29 Spring, limit rod EL1083 Rubber cover, toggle switch Hog Slat Inc. Newton Grove, NC USA August 2016...
-
Page 4: Specifications
2:1 ratio (Fig 8) 15 & 30 RPM 2,000 lbs 1,000 lbs 4,000 lbs 60 RPM 1,000 lbs 500 lbs 2,000 lbs Total load = load on each side of machine added together Hog Slat Inc. Newton Grove, NC USA August 2016... -
Page 5: Unpacking Unit
(6) 3/8” x 2” lag bolts and slide door down to remove. 2. Installation manual Assembly of Cabinet door with hardware supplied. HS612 Tri-Handle Knob installs over threaded stud when cabinet door is placed on machine. Hog Slat Inc. Newton Grove, NC USA August 2016... - Page 6 3. Hang machine on bolt aligning keyhole slot located near top of the machine. (Figure 1) Keyhole mounting location MODEL LENGTH “A” 24” 30 3/8” 36” 42 3/8” 48” 54 3/8” Figure 1 Hog Slat Inc. Newton Grove, NC USA August 2016...
- Page 7 6. Run cable ends through side of machine around pulley down to the load block. Route cables around pulleys as shown in figures 3,4 and 5 that best suits the application. Hog Slat Inc. Newton Grove, NC USA August 2016...
- Page 8 8. Install corner brackets, through wall brackets and hand winch. Use bearing supported pulleys on any pulley that rotates during operation of machine. Following figures show examples of external cabling and hand winch location. Hog Slat Inc. Newton Grove, NC USA August 2016...
- Page 9 2:1 Ratio (Figure 8) 2,000lb max 2,000lb max For each (2) inch travel of the machine there is (1) inch travel of the Load. 2,000 max each side = 4,000lb total load Hog Slat Inc. Newton Grove, NC USA August 2016...
- Page 10 Ventilation Systems Outside Endwall Mount – Curtains 1:2 Ratio Figure 9 Figure 10 Hog Slat Inc. Newton Grove, NC USA August 2016...
- Page 11 Ventilation Systems Outside Endwall Mount – Curtains 1:1 Ratio Figure 11 Figure 12 Hog Slat Inc. Newton Grove, NC USA August 2016...
- Page 12 Ventilation Systems Outside of building, on one side, center mount - Curtains 1:2 Ratio Figure 13 1:1 Ratio Figure 14 Hog Slat Inc. Newton Grove, NC USA August 2016...
- Page 13 Ventilation Systems Inside Endwall Mount – Vent Doors 1:2 Ratio Figure 15 Inside Sidewall Mount – Vent Doors 1:1 Ratio Figure 16 Hog Slat Inc. Newton Grove, NC USA August 2016...
- Page 14 10. To secure cable to load block, run cable through hole nearest the center in load block, then loop back up through the outboard hole. Tighten all set-screws. (Figure 18) SET SCREWS SET SCREWS Figure 18 Hog Slat Inc. Newton Grove, NC USA August 2016...
- Page 15 Wiring should be routed through liquid tight connectors provided. Care should be taken to route wires in enclosure away from limit switch assembly to prevent wire damage or interference with limit switch operation. Figure 19 Hog Slat Inc. Newton Grove, NC USA August 2016...
- Page 16 HS583E WIRING DIAGRAM – 115V, 60 Hz Auxiliary outputs are Normally Open Figure 20A HS583E WIRING DIAGRAM – 230V, 50/60 Hz Auxiliary outputs are Normally Open Figure 20B Hog Slat Inc. Newton Grove, NC USA August 2016...
- Page 17 Ventilation Systems LIMIT SWITCH ASSEMBLY, SWITCH LAYOUT Figure 21 Hog Slat Inc. Newton Grove, NC USA August 2016...
-
Page 18: Operation
Down - “Close” operation Figure 22 To operate machine in Auto mode for vent control: set “Operation Mode” to “Auto”. In this position the machine will be controlled by the ventilation controller. Hog Slat Inc. Newton Grove, NC USA August 2016... - Page 19 Slide the upper limit lock collar down to the top of the load block and tighten set screw. Upper Limit lock collar. Adjust for “OPEN” set point Lower Limit lock collar. Adjust for “CLOSED” set point Figure 23 Hog Slat Inc. Newton Grove, NC USA August 2016...
- Page 20 Using local “manual” controls, run machine in both directions to ensure limit switch function and cabling operation. Apply grease along length of ACME Drive Screw – Grease Monthly Grease fitting for thrust bearing – Grease Every 3 Months Figure 24 Hog Slat Inc. Newton Grove, NC USA August 2016...
- Page 21 Ventilation Systems Notes Hog Slat Inc. Newton Grove, NC USA August 2016...
- Page 22 Ventilation Systems Page Intentional Left Blank Hog Slat Inc. Newton Grove, NC USA August 2016...
-
Page 23: Conditions And Limitations
Hog Slat warrants products to be free from defects in material or workmanship for a period of twenty-four (24) months from the date of original purchase. Hog Slat will credit, repair, or replace, at its option any product deemed defective within this time period. - Page 24 PO Box 300 Newton Grove, NC 28366 Phone: (910) 594-0219 Fax: (910) 594-1392 www.hogslat.com Copyright © 2016 by Hog Slat, Inc Part Number: HSMANUAL-073 Rev A4 HSART-415 Market: Hog & Poultry Hog Slat Inc. Newton Grove, NC USA August 2016...
-
Page 25: Instrucciones De Seguridad
Realice conexión/polo a tierra a todas aquellas piezas metálicas no-conductoras para evitar una descarga eléctrica. Mantenga siempre las etiquetas de seguridad en buen estado y vuelva a colocar las calcomanías faltantes o dañadas. Hog Slat Inc. Newton Grove, NC USA August 2016... - Page 26 Ventilation Systems DESGLOSE DE COMPONENTES (PIEZAS DE REPUESTO Y SERVICIO) Hog Slat Inc. Newton Grove, NC USA August 2016...
- Page 27 Barra limite, maquina de 36” HS583-27-48 Barra limite, maquina de 48” HSLABEL-083 Etiqueta, de "Advertencia Partes en Movimiento" HSLABEL-087 Etiqueta, "Lugar de Engrase" HS583-29 Resorte, barra limite EL1083 Cubierta de goma, interruptor de palanca Hog Slat Inc. Newton Grove, NC USA August 2016...
-
Page 28: Especificaciones
Modelos Proporción 1:1 (Fig 6) Proporción 1:2 (Fig 7) Proporción 2:1 (Fig 8) 15 & 30 RPM 2,000 lbs 1,000 lbs 4,000 lbs 60 RPM 1,000 lbs 500 lbs 2,000 lbs Hog Slat Inc. Newton Grove, NC USA August 2016... - Page 29 Ensamblaje de la puerta de la caja con los accesorios incluidos Perno Cabeza Con Borde Tuerca Con Borde HS612 Perilla tres-Mangos se instala sobre el clavo roscado cuando la puerta de la caja se coloca en la máquina. Hog Slat Inc. Newton Grove, NC USA August 2016...
- Page 30 Cuelgue la máquina en el perno en alineación por la ranura situado cerca de la parte superior de la máquina. (Figura 1) Local de ranura de montaje Largo del Modelo “A” 24” 30 3/8” 36” 42 3/8” 48” 54 3/8” Figura 1 Hog Slat Inc. Newton Grove, NC USA August 2016...
- Page 31 Pasar el cable a través del lado de la máquina alrededor de la polea hasta el bloque de carga. Dirija los cables alrededor de las poleas como se muestra en las figuras 3,4 y 5 que mejor se adapte a la aplicación. Hog Slat Inc. Newton Grove, NC USA August 2016...
- Page 32 Instalar soportes de esquina, a través de los soportes de pared y malacate manual. Utilice cojinetes de soporte de poleas en cualquier polea que gira durante el funcionamiento de la máquina. Siguientes figuras muestran ejemplos de cableado externo y la posición del malacate manual. Hog Slat Inc. Newton Grove, NC USA August 2016...
- Page 33 (2) pulgadas de desplazamiento de la carga. Proporcion 2:1 (Figura 8) Por cada (2) pulgadas de recorrido de la máquina hay (1) pulgada de desplazamiento de la carga. Hog Slat Inc. Newton Grove, NC USA August 2016...
- Page 34 Ventilation Systems Cortinas – Montaje Pared Extremo Final Parte de Afuera Proporcion 1:2 Figura 9 Figura 10 Hog Slat Inc. Newton Grove, NC USA August 2016...
- Page 35 Ventilation Systems Cortinas – Montaje Pared Extremo Final Parte de Afuera Proporcion 1:1 Figura 11 Figura 12 Hog Slat Inc. Newton Grove, NC USA August 2016...
- Page 36 Ventilation Systems Cortinas -Parte de Afuera del Edificio, en un lado, montaje central Proporcion 1:2 Figura 13 Proporcion 1:1 Figura 14 Hog Slat Inc. Newton Grove, NC USA August 2016...
- Page 37 Ventilation Systems Puertas de Vent –Montaje Pared Extremo Final parte de Adentro Proporcion 1:2 Figura 15 Puertas de Vent –Montaje Pared Lateral parte de Adentro Proporcion 1:1 Figura 16 Hog Slat Inc. Newton Grove, NC USA August 2016...
- Page 38 Para asegurar el cable al bloque de carga, pase el cable a través del orificio más próximo al centro en el bloque de carga, a continuación de vuelta de nuevo a través del orificio externo. Apriete todos los tornillos de fijación. (Figura 18) TORNILLOS DE TORNILLOS DE FIJACION FIJACION Figura 18 Hog Slat Inc. Newton Grove, NC USA August 2016...
- Page 39 Figura 19 Hog Slat Inc. Newton Grove, NC USA August 2016...
- Page 40 Conectar los cables a la máquina por (Figura 20A o 20B) dependiendo del voltaje de entrada. Toda instalación de los cables debe realizarse de acuerdo con los códigos eléctricos nacionales y locales HS583E DIAGRAMA DE ALAMBRADO – 115V, 60 Hz Salidas auxiliaries estan Normalmente Abiertas Figura 20A Hog Slat Inc. Newton Grove, NC USA August 2016...
-
Page 41: Ventilation Systems
Ventilation Systems HS583E DIAGRAMA DE ALAMBRADO – 230V, 50/60 Hz Salidas auxiliaries estan Normalmente Abiertas Figura 20B Hog Slat Inc. Newton Grove, NC USA August 2016... - Page 42 Ventilation Systems ENSAMBLAJE DE INTERRUPTOR DE LIMITE, Diseño DE INTERRUPTOR Figura 21 Hog Slat Inc. Newton Grove, NC USA August 2016...
- Page 43 Para hacer funcionar la máquina en el modo automático Auto para el control de la ventilación: ajuste "Modo de operación" en "Auto". En esta posición la máquina va a ser controlada por el controlador de ventilación. d S “O M d ” Hog Slat Inc. Newton Grove, NC USA August 2016...
- Page 44 Collar de Límite superior de seguridad. Ajustar para obtener el punto de ajuste "ABIERTO" Collar de límite inferior de seguridad. Ajustar para obtener punto de ajuste “CERRADO” Figura 23 Hog Slat Inc. Newton Grove, NC USA August 2016...
- Page 45 Aplique grasa a lo largo de la longitud del tornillo de accionamiento ACME Drive tornillo – Engrase Mensual Aplique grasa al cojinete de empuje – Engrase cada 3 Meses Figura 24 Hog Slat Inc. Newton Grove, NC USA August 2016...
- Page 46 Ventilation Systems Notas Hog Slat Inc. Newton Grove, NC USA August 2016...
- Page 47 Garantía Limitada de Hog Slat Hog Slat garantiza que los productos están libres de defectos de material o mano de obra durante un período de veinticuatro (24) meses desde la fecha de compra original. Hog Slat acreditará, reparara o reemplazara, a su elección, cualquier producto considerado defectuoso dentro de este período de tiempo.
- Page 48 PO Box 300 Newton Grove, NC 28366 Phone: (910) 594-0219 Fax: (910) 594-1392 www.hogslat.com Copyright © 2016 by Hog Slat, Inc Part Number: HSMANUAL-073 Rev A4 HSART-415 Market: Hog & Poultry Hog Slat Inc. Newton Grove, NC USA August 2016...
Need help?
Do you have a question about the Grower Select HS583E and is the answer not in the manual?
Questions and answers