Chapters
Table of Contents

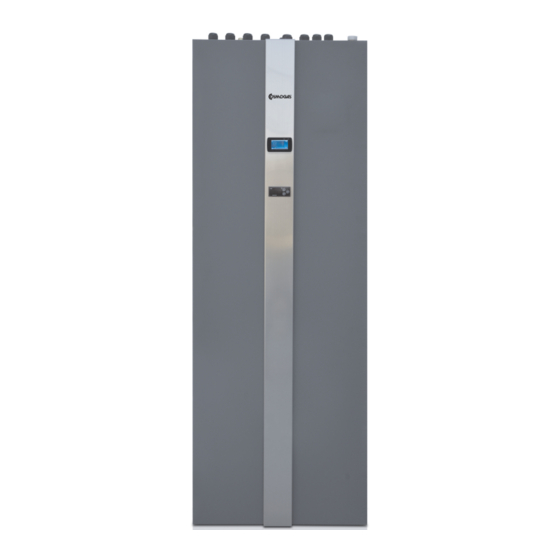
Summary of Contents for COSMOGAS GB 06
- Page 1 MANUALE DI INSTALLAZIONE, USO E MANUTENZIONE GB 06/ STM 06 SISTEMA SPLITTATO POMPA DI CALORE CON GB 09/ STM 09 GRUPPO IDRONICO E GB 13 STM 13 SERBATOIO 62403684 - R01 08-10-2019_IT-UK...
-
Page 2: Table Of Contents
Sommario 1. Prima Dell'utilizzo 1. Elenco degli accessori Precauzioni di sicurezza Componenti principali Ingombri e dimensioni Principio di funzionamento Specifiche Vista esplosa 2. Installazione 1. Schema di installazione Cablaggio 3. Installazione dell’ unità interna 4. Installazione dell’u nità esterna 5. Connessione tubazione refrigerante 6. - Page 3 Sommario 4. Assistenza E Manutenzione Avvertenze Assistenza Unità interna Unità esterna 3. Manutenzione Pulizia del filtro acqua Pulizia dello scambiatore Carica del gas Pulizia dello scambiatore a piastre Antigelo in inverno 4. Soluzione ai problemi 5. Schema Di Collegamento 1 03...
-
Page 4: Prima Dell'utilizzo
Prima Dell'utilizzo 1. Elenco Degli Accessori 【 】 Elenco degli accessori Gli accessori elencati di seguito sono inclusi nell’imballo. à Si prega di verificarne la loro integrit appena possibile, in caso di problemi contattare il venditore. 【 】 Unità interna Desccrizione Quantità... -
Page 5: Precauzioni Di Sicurezza
Prima Dell'utilizzo Precauzioni Di Sicurezza 【 】 Descrizione dei simboli I seguenti simboli sono molto importanti, riguardano il prodotto e la vostra sicurezza personale. Si prega di essere sicuri di capire il loro significato. Avvertimento Attenzione Divieto 【 】 Precauzioni di sicurezza 1. - Page 6 Prima Dell'utilizzo Precauzioni Di Sicurezza Cavo di terra Serbatoio d'acqua Non avviare la pompa di calore con la Per evitare malfunzionamenti utilizzare L’alimentazione elettrica di questo temperatura dell’acqua nel serbatoio una presa elettrica dedicata per questo apparecchio deve essere correttamente inferiore a 20 °C.
- Page 7 Prima Dell'utilizzo Precauzioni Di Sicurezza Le alette della batteria evapo-condensante possono ferire le dita. Si prega di utilizzare il fusibile e l’interruttore idonei. Non utilizzare fili di rame o di acciaio in sostituzione del fusibile o dell’interruttore si potrebbero Rame verificare gravi danni.
-
Page 8: Componenti Principali
Prima Dell'utilizzo Componenti Principali 【 】 Unità Interna Esterna GB 06/09/13 Superiore Descrizione Descrizione Connessione al kit di sicurezza ( G 1’’ Maschio Collegamento refrigerante da 1 / 4” , 1/2’’ (6KW) Maniglie Collegamento refrigerante da 3/8’’ , 1/2’’ (9KW) 11-12 Collegamento refrigerante da 3/8’’... -
Page 9: Ingombri E Dimensioni
Prima Dell'utilizzo 4. Ingombri E Dimensioni 【 】 Unità Interna GB 06/09/13 Unit:mm 1 09... - Page 10 Prima Dell'utilizzo 4. Ingombri E Dimensioni ——STM 06/09 【 】 Unità Esterna : mm Unità STM 06: φ Tubazione del liquido O.D: 6.35 1/4” φ Tubazione del gas O.D: 12.7 1/2" STM 09 φ Tubazione del liquido O.D: 9.52 3/8” φ...
- Page 11 Prima Dell'utilizzo 4. Ingombri E Dimensioni ——STM 13 【 】 Unità Esterna : mm Unità 1124 1058 φ Tubazione del liquido O.D: 9.52 3/8” φ Tubazione del gas O.D: /8” 1 11...
-
Page 12: Principio Di Funzionamento
Valvola a 3 vie Valvola di Refrigerante Filtro espansione Unità Esterna 6. Specifiche Prima Dell'utilizzo Sistema Con Serbatoio Integrato GB 06 GB 09 GB 13 Modello V/Hz/Ph 220-240/50/1-R410A Alimentazione elettrica - Refrigerante 12.6 6.06 10.10 Potenza massima in riscaldamento 4.03... - Page 13 Prima Dell'utilizzo 6. Specifiche Potenza raffrescamento Min./Max. 2.05/5.81 4.10/6.84 4.29/10.37 Assorbimento elettrico Min./Max. 768/2105 1230/3280 957/3156 E.E.R Min./Max. 3.29/4.63 3.15/4.71 2.09/3.32 5.05 Potenza massima in raffrescamento 2.52 1.58 2.63 E.E.R 2.34/7.91 2.34/5.05 1.59/4.5 Potenza raffrescamento Min./Max. Assorbimento elettrico Min./Max. 614/1740 1080/3200 1000/3012 1.58/2.40...
- Page 14 Prima Dell'utilizzo 6. Specifiche 934x354x753 934x354x753 1123x400x1195 Unità esterna 990x440x810 1330x490x1330 990x440x810 Dimensioni nette / Dimensioni imballo 600x650x1720 600x650x1720 600x650x1720 Unità interna 640x965x1914 640x965x1914 640x695x1914 Nota (1) Condizione di riscaldamento: Temperatura acqua ingresso/uscita: 30/35°C,temperatura ambiente: DB/WB 7/6°C. (2) Condizione di riscaldamento: Temperatura acqua ingresso/uscita: 40/45°C,temperatura ambiente: DB/WB 7/6°C. (3) Condizione di raffrescamento: Temperatura acqua ingresso/uscita: 23/18°C, temperatura ambiente: 35°C.
-
Page 15: Vista Esplosa
Vista Esplosa Prima Dell'utilizzo 【 】 Unità Interna GB 06/09 Articolo Nr. Descrizione Quantità Quantità Articolo Nr. Descrizione Pannello Frontale Gruppo di sicurezza Pannello di controllo Serbatoio acqua Termostato digitale Serbatoio di espansione da 5 L Interruttore alimentazione Sensore di temperatura serpentino Relè... - Page 16 Vista Esplosa Prima Dell'utilizzo 【 】 Unità Interna GB 13 Articolo Nr. Quantità Articolo Nr. Descrizione Quantità Descrizione Gruppo di Sicurezza Pannello frontale Serbatoio acqua Pannello di controllo Serbatoio di espansione da 5 L Termostato digitale Sensore di temperatura serpentino Interruttore alimentazione Sensore di temperatura acqua ingresso Relè...
- Page 17 Vista Esplosa Prima Dell'utilizzo 【 】 Unità Esterna -STM 06 1 17...
- Page 18 Vista Esplosa Prima Dell'utilizzo 【 】 Unità Esterna -STM 09 Descrizione Descrizione Descrizione Griglia ventilatore Coperchio scatola elettrica Valvola 1/4’’(6KW),3/8” (9KW) Pannello superiore Ventola esterna Valvola Motore ventola Pannello posteriore Copertura valvola Compressore Pannello frontale Condensatore Guida aria Piede Paratia Pannello destro Staffa Pannello inferiore...
- Page 19 Vista Esplosa Prima Dell'utilizzo 【 】 Unità Esterna -STM 13 20 21 Descrizione Descrizione Descrizione Griglia ventilatore Pannello laterale Condensatore Pannello frontale Paratia Copertura valvole Guida aria Maniglia Blocco connettori Separatore liquido Ventola esterna PFC trasduttore Sensore di temperatura di aspirazione Motore ventola Trasformatore Staffa...
-
Page 20: Installazione
Installazione Metodi Di Installazione 【 】 Temperatura dell’ambiente di stoccaggio Temperatura esterna: ℃ to ℃ Temperatura media: + ℃ to ℃ 【 】 Metodi Di Installazione Acqua calda sanitaria, riscaldamento a pavimento e riscaldamento a radiatori possono essere alimentati dall’unità interna. Resistenze integrative da 1.5KW e 6KW assicurano la prestazione nei giorni freddi. Utilizzando una valvola miscelatrice tra mandata calda acqua calda sanitaria e mandata media acqua calda sanitaria si possono raggiungere le migliori prestazioni senza compromettere la portata massima di acqua calda sanitaria. - Page 21 Installazione Metodi Di Installazione 2.1 Introduzione Agli Schemi Generali 2.1.1 Acqua Calda Sanitaria Per ragioni di sicurezza, è importante configurare lo schema idraulico seguendo lo schema seguente: 1) Applicazione 1 Anodo al magnesio Valvola pressione e temperatura Ritorno dalla pompa di calore Valvola miscelatrice Mandata dalla pompa di calore Acqua dall’acquedotto...
- Page 22 Installazione Metodi Di Installazione Se la struttura del serbatoio lo permette è consigliabile utilizzare una valvola miscelatrice manuale a 4 vie come mostrato nello schema seguente. Questo migliorerebbe la produzione di acqua calda sanitaria nel serbatoio. Valvola pressione e temperatura Anodo al magnesio Ritorno dalla pompa di calore Valvola miscelatrice...
- Page 23 Installazione Metodi Di Installazione Interno Esterno Valvola pressione /temperatura FLH1 FLH2 FLH3 High temperature hot water export City water Drainage Articolo Descrizione Articolo Descrizione Scheda interna Sensore di temperatura acqua in uscita Resistenza 1.5 kW Sensore di temperatura acqua calda Resistenza 6 kW Valvola motorizzata a 3 vie Termostato meccanico...
- Page 24 Installazione Metodi Di Installazione 2.1.3 Circuiti riscaldamento/raffrescamento Questa pompa di calore può controllare 2 circuiti di riscaldamento/raffrescamento indipendenti come mostrato negli schemi. La temperatura dei circuiti viene impostata dal menu “riscaldamento & raffrescamento circuito 1” e “riscaldamento & raffrescamento circuito 2”. Naturalmente se è...
- Page 25 Installazione Metodi Di Installazione Note: Se la sonda TV1 non è collegata e nelle impostazioni è impostata la voce valvola miscelatrice l'unità mostrerà un codice di errore. 2.1.5 Riscaldamento & raffrescamento circuito 2 Se la temperatura dell'acqua nel sistema è superiore (inferiore) rispetto alla temperatura che serve nel circuito 2 in riscaldamento (raffrescamento) si può...
- Page 26 Installazione Metodi Di Installazione Controllo Pompa Di Circolazione Circuiti 1&2: “Serbatoio di accumulo”: Impostare “serbatoio di accumulo” se questo è presente tra la pompa di calore e la distribuzione. “P1 per riscaldamento”: Impostare se si vuole che il circolatore sul circuito 1 funzioni in riscaldamento “P1 per raffrescamento”: Impostare se si vuole che il circolatore sul circuito 1 funzioni in raffrescamento...
-
Page 27: Cablaggio
Installazione 2. Cablaggio 2.2 Cablaggio 1) Terminali La Na PE PE N P3 Lato utilizzatore Alimentazione elettrica 3× 2.5mm Alimentazione elettrica generale, collegare alla rete domestica. B: Alimentazione elettrica per HWTBH – Resistenza elettrica ausiliaria Alimentazione elettrica per la resistenza da 1.5kW interna al serbatoio di accumulo. Collegarla in questo morsetto per poterla comandare direttamente dalla pompa di calore. - Page 28 Installazione 2. Cablaggio Alimentazione elettrica per AH e HBH( 3*4 , ingresso da alimentazione di rete) L’unit interna è corredata da una resistenza da 3KW per il riscaldamento domestico (AH) e da una resistenza da 3KW à (HBH) per la produzione di acqua sanitaria. E’necessaria una alimentazione dedicata da rete domestica 230V monofase, il cavo non deve avere una sezione inferiore 3*4mm .
- Page 29 Installazione 2. Cablaggio D: Ingresso elettrico per blocchi Alcune aziende di fornitura di energia elettrica offrono una tariffa speciale se il consumo di energia di casa si abbassa fino ad un certo valore durante le ore di punta.Se si desidera che l’unità smetta di funzionare durante questo periodo, è...
- Page 30 Installazione 2. Cablaggio 2) Collegamento elettrico ◆ raccomanda di utilizzare un interruttore correttamente dimensionato ◆ l’alimentazione elettrica per la pompa di calore deve essere messa a terra; ◆ I l cablaggio elettrico deve essere fatto da personale qualificato. ◆ I l cablaggio elettrico deve essere effettuato in maniera conforme alle regolamentazioni locali.
-
Page 31: Installazione Dell' Unità Interna
Installazione 3. Installazione Dell’unit Interna à 【 】 Note installative A. L’unit interna deve essere installata all’interno: in una stanza, corridoio, garage, magazzino…. à B. L’unit interna deve essere posizionata su un pavimento solido. à C. Si consiglia di installare l’unit interna vicina alla fonte idrica e ad uno scarico. à... -
Page 32: Installazione Dell'u Nità Esterna
Installazione 4. Installazione Dell’unit Esterna à 【 】 Note installative A. L’unit esterna può essere locata in spazi aperti, corridoi, balconi, tetti o appeso alle pareti. à L’unit esterna deve essere installata in un ambiente ventilato ed asciutto; Se venisse installata à... - Page 33 Installazione 4. Installazione Dell’unit Esterna à 【 】 Installazione Aggiungere dei gommini assorbenti sotto l’ unit esterna per assorbire le vibrazioni. à 【 】 A. Montaggio su un supporto a basamento L’ unit essere posizionata su una superficie piatta e robusta, possibilmente cementizia. à...
-
Page 34: Connessione Tubazione Refrigerante
Installazione 5. Connessione Tubo Refrigerante Il tube per il refrigerante e gli accessori sono all’interno della scatola del kit installazione. Isolamento Coibentare ogni tubo del refrigerante in maniera indipendente (vedi la figura seguente. Tubo di rame Figura 1 Figura 2 【... - Page 35 Installazione 5. Connessione Tubo Refrigerante 【 】 Inserimento dei tubi IMPORTANTE: Svolgere il tubo dall’ unità interna verso quella esterna e collegare i raccordi. Il raggio di curvatura non deve essere inferiore a 15 cm, la curvatura deve essere graduale, non utilizzare spigoli o gli angoli dei muri. Usare la dima di cartone per verificare il corretto raggio di curvatura.
- Page 36 Installazione 5. Connessione Tubo Refrigerante 3. Preparare la pompa del vuoto ed il 4. Collegare l’altro tubo. manometro, collegare un tubo del manometro alla pompa del vuoto. 5. Aprire il manomentro edavviare la pompa del vuoto per circa 10 minuti. Quando il manomentro indica una pressione negativa chiudere il manomentro e spegnere la pompa.
-
Page 37: Connessione Tubazione Idraulica
Installazione 6. Connessione Ingresso Acqua Dopo aver installato l’ unità, collegare l’acqua in ingresso e in uscita in accordo con le normative locali. Selezionare con cura le tubazioni utilizzate. Dopo la connessione, le tubature devono esere testate in pressione e pulite prima dell’uso. 【... -
Page 38: Installazione Degli Accessori
Installazione 7. Installazione Del Kit Degli Accessori 4. Collegare il tubo di scarico ad uno scarico dell’abitazione ed aprire la valvola a sfera per svuotare il serbatoio. Nel caso allungare la condotta di scarico con ulteriore tubo. Collegare ad uno scarico della casa 【... - Page 39 Installazione 7. Installazione Del Kit Degli Accessori 【 】 Profili Posteriori Di Decorazione Ad L Quando le tubazioni sono collegate sul lato posteriore dell’ unità utilizzando i profili posteriori di decorazione ad L si possono nascondere in maniera migliore: 1.Prendere due pezzi del profilo ad L di decorazione posteriore lungo ed un pezzo del profilo ad L di decorazione posteriore corto.
-
Page 40: Degasazione Circuito Idraulico
Installazione 8. Degasazione Del Circuito Acqua Al termine dell’installazione, riferirsi alle istruzioni seguenti per degasare il circuito acqua: Evacuazione aria nel serpentino sanitario del serbatoio: 1. Aprire le valvole a sfera1,3,4,5,6,7,8. 2. Fare entrare acqua nel serpentino fino a che non fuoriesce valvola 5. 3. -
Page 41: Test Funzionale
Installazione 9. Primo Avvio 【 】 2.9 Primo Avvio Dopo aver completato l’installazione riempire I circuiti di acqua e degasarli prima di procedere col primo avvio! Prima di avviare è bene portare a termine alcuni controlli per assicurarsi che Prima di procedere col primo avvio l’unità... -
Page 42: Uso
1. Introduzione Al Pannello Di Controllo B. Modo di funzionamento C. Funzioni A. Comunicazione D. Avvertimento START ENGING E. ON / OFF STOP 26℃ 15℃ 23.9℃ F. Pannello touch screen 34.7℃ 6.8℃ G. Modalità di H. Impostazioni: funzionamento Premere per entrare nel menu A. - Page 43 1. Introduzione Al Pannello Di Controllo D. Avvertimento Quando l'unità è in protezione o in blocco il simbolo comparirà. Entrando nel menu “info” si potrà vedere il codice di protezione o di blocco relativo. —— Simbolo giallo Unità esterna in blocco o protezione ——...
- Page 44 1. Introduzione Al Pannello Di Controllo 5. Errore nella porta seriale Errore nella porta seriale significa che la comunicazione tra pannello di controllo e scheda dell'unità interna o dell'unità esterna non funziona correttamente. Controlla il cavo di comunicazione. Controlla che gli ultimi tre interruttori sulla scheda dell'unità esterna e dell'unità interna siano settati come 001. .Temperatura di raffrescamento troppo bassa Il compressore si ferma se la temperatura dell'acqua in uscita è...
- Page 45 1. Introduzione Al Pannello Di Controllo START ENGING STOP 23.9℃ 34.7℃ 6.8℃ Pannello Touch Screen Temperatura dell'acqua impostata temperatura corrente dell'acqua 26℃ 15℃ Modalità di Temperatura 35℃ funzionamento ambiente 40℃ Temperatura 23.9℃ dell'acqua 34.7℃ impostata Temperatura 6.8℃ serbatoio Temperatura esterna Modalità...
- Page 46 1. Introduzione Al Pannello Di Controllo H. Impostazioni: Premere Per Entrare Nel Menu Delle Impostazioni 3.Impostazioni acqua 2.Circuito 2 riscaldamento calda sanitaria – /raffrescamento – Vedi pag.51 Vedi pag.- 50 Vedi pag. 71 Vedi pag. 70 4.Impostazioni 1.Circuito 1 riscaldamento accumulo acqua /raffrescamento –...
-
Page 47: Istruzioni Di Funzionamento
Istruzioni Di Funzionamento 1. Riscaldamento/Raffrescamento Circuito 1 1. Impostazioni riscaldamento/raffrescamento circuito 1, HC/CC 1 1.01) Stop riscaldamento o raffrescamento basato sulla differenza di temperatura dell'acqua Questa impostazione serve a fermare l'unità. L'unità si fermerà quando raggiungerà [Tset + 1.01] in riscaldamento , oppure [Tset - 1.01] in raffrescamento. - Page 48 Istruzioni Di Funzionamento ◆ ~ I parametri 1.06 1.10 sono usati per impostare le 5 differenti temperature esterne di riferimento; ~ Mentre i parametri 1.11 1.15 sono usati per impostare le relative temperature di mandata acqua. Di conseguenza il controller creerà la relativa curva in accordo con questi parametri e cercherà di mantenere la temperatura di mandata calcolata per qualsiasi temperatura esterna.
- Page 49 Istruzioni Di Funzionamento 1.03) Riduzione velocità compressore in funzione del ΔT ◆ Questa impostazione serve ad impostare una temperatura alla quale il compressore inizierà a ridurre la sua velocità ◆ L'impostazione è basata sul Δ T. ◆ Il compressore lavorerà sempre alla massima velocità fino a che la temperatura non sarà inferiore a [Tset-1.03] in riscaldamento o [Tset+1.03] in raffrescamento.
- Page 50 Istruzioni Di Funzionamento 2. Riscaldamento/Raffrescamento Circuito 2 2.01 Riscaldamento/raffrescamento circuito 2 Impostare se il sistema ha il circuito 2 2.02 Temperatura per raffrescamento Impostare la temperatura di mandata per il raffrescamento del circuito 2 2.03 Temperatura per riscaldamento Se la modalità curva di riscaldamento per il circuito 2 è disabilitata con questo parametro si può impostare un valore fisso per la temperatura di mandata del circuito 2;...
- Page 51 Istruzioni Di Funzionamento 3. Impostazioni Acqua Calda Sanitaria 3.01 Impostazione temperature per acqua calda sanitaria 3.02 ΔTemp. Per riavvio produzione acqua calda sanitaria L'unità riprenderà a produrre acqua calda sanitaria quando la temperatura misurata sarà= Tset – 3.02. 3.03 Gestione priorità Avvia o meno la funzione gestione delle priorità.
- Page 52 Istruzioni Di Funzionamento Se la funzione gestione delle priorità è attiva e la temperatura esterna è inferiore rispetto a [3.04] l'unità lavorerà seguendo il seguente schema: Il tempo limite di funzionamento per acqua calda sanitaria è stato raggiunto. Il sistema passa in riscaldamento ed inizia a contare il tempo.
- Page 53 Istruzioni Di Funzionamento 4. Serbatoio ACS Funzione serbatoio acqua calda sanitaria (ACS) Escluso le doccie, la temperatura della ACS in una abitazione è media. Questa funzione permette di scaldare il serbatoio ad una temperatura ridotta in fasce d'orario stabilite. 4.01 Funzione accumulo ACS Permette di abilitare queste funzioni.
- Page 54 Istruzioni Di Funzionamento 4.05 Impostazione temperatura riscaldamento ridotto Impostare una temperatura di riscaldamento in ACS ridotta, quando l'unità lavora entro il periodo impostato in 4.04 la temperatura impostata sarà il valore introdotto. 4.06 Impostazione ΔT temperatura riscaldamento ridotto Impostare “ΔT riscaldamento riavvio”. Quando la temperatura dell'acqua scende sotto al valore di ΔT impostato e siamo dentro al periodo impostato in 4.04 l'unità...
- Page 55 Istruzioni Di Funzionamento 5. Riduzione Setpoint In Riscaldamento Riduzione setpoint in riscaldamento: A volte la temperatura richiesta nell'abitazione può essere inferiore al solito, ad esempio di notte o durante le ore lavorative. Funzionamento silenzioso: Per ridurre il rumore dell'unità si può selezionare questo parametro. All'interno del periodo selezionato l'unità...
- Page 56 Istruzioni Di Funzionamento 6. Funzione Anti-legionella Se l'utilizzatore usa acqua calda sanitaria direttamente dal serbatoio di accumulo almeno una volta alla settimana occorre scaldare l'acqua oltre i 60 °C per almeno 20 minuti per eliminare il rischio legionella. Questa funzione automatica è chiamata funzione anti-legionella. NOTA: Riferirsi sempre alla norma locale vigente per la corretta impostazione di questa funzione.
- Page 57 Istruzioni Di Funzionamento 7. Modalità Vacanza Se si starà fuori casa per alcuni giorni si può abilitare questa funzione per abbassare il setpont sia di riscaldamento che di produzione ACS per risparmiare energia. 7.01 Modalità vacanze Abilità la funzione modalità vacanze. 7.02 ΔT su temperatura ACS durante la modalità...
- Page 58 Istruzioni Di Funzionamento 8. Gestione Utenti 8.01 Livello di autorizzazione Per ragioni di sicurezza alcuni parametri possono venir modificati solo se si è nel livello di autorizzazione dell'installatore. Il livello di autorizzazione può essere modificato da questo menu. Per attivare questo menu serve una password. 8.02 Riscaldamento/raffrescamento Timer on/off Per abilitare il timer per riscaldamento/raffrescamento 8.03 Riscaldamento/raffrescamento Timer on/off...
- Page 59 Istruzioni Di Funzionamento 8.04 Lingua Imposta la lingua del sistema 8.05 Imposta data ed ora Imposta l'ora di sistema e la data 8.06 Impostazioni sistema di distribuzione L'unità è impostata dalla fabbrica per avere 3 valvole motorizzate, che hanno diversi flussi di acqua per riscaldamento/raffrescamento e ACS.
- Page 60 Istruzioni Di Funzionamento 9. Impostazioni 9.01 Acqua calda sanitaria (ACS) Abilitare se l'impianto ha il circuito per acqua calda sanitaria (ACS). Quando l'unità lavora in ACS la valvola 3 vie devierà automaticamente. 9.02 Riscaldamento Abilitare se l'impianto ha il circuito per il riscaldamento. Quando l'unità lavora in ACS la valvola 3 vie devierà...
- Page 61 Istruzioni Di Funzionamento 9.05 Tempo massimo permesso per velocità minima del compressore Quando la potenza richiesta è superiore rispetto a quella erogata il compressore diminuirà la sua velocità. Se il compressore lavorerà per più tempo di quello impostato il sistema lo spegnerà. 9.06 Passaggio automatico tra riscaldamento e raffrescamento Questa funzione permette al sistema di avviare il riscaldamento o il raffrescamento automaticamente.
- Page 62 Istruzioni Di Funzionamento 10. Riscaldatore Ausiliario ◆ Resistenze elettriche interne alla unità interna ◆ Riscaldatore ausiliario esterno ◆ HWTBH Riscaldatore ausiliario per ACS 10.01 Riscaldatore esterno ausiliario Abilitare se il sistema è corredato da un riscaldatore ausiliario esterno (HBH). 10.02 Priorità per riscaldatore ausiliario esterno Impostare la priorità...
- Page 63 Istruzioni Di Funzionamento 10.06 Intervallo di tempo per la lettura dell'incremento di temperatura dell'ACS Imposta l'intervallo di tempo per la verifica dell'incremento di temperatura nel serbatoio di ACS. Se la temperatura aumenta troppo lentamente l'unità chiamerà l'aiuto del riscaldatore esterno. Riscaldatore ausiliario per ACS ◆...
- Page 64 Istruzioni Di Funzionamento 11. Impostazione Delle Pompe Di Circolazione 11.1 Tipo di circolatore P0 Questa impostazione permette di impostare il tipo di circolatore interno all'unità interna 11.2 Impostazione velocità per circolatore P0 Questa impostazione permette di impostare la velocità del circolatore interno all'unità interna 11.3 Modo di funzionamento del circolatore P0 Questa impostazione permette di modificare il modo di funzionamento della pompa interna all'unità...
- Page 65 Istruzioni Di Funzionamento 12. Asciugatura Massetto Dopo un lungo periodo di inattività, il calcestruzzo del pavimento può essere molto umido, per cui molta energia deve essere utilizzata per far evaporare l'umidità trattenuta. La funzione “massetto” è usata per asciugare il pavimento ed assicurare un corretto funzionamento. 12.1 Asciugatura massetto Abilita questa funzione.
- Page 66 Istruzioni Di Funzionamento 13. Funzione Blocco Elettrico Alcune compagnie di fornitura elettrica forniscono tariffe speciali se le abitazioni riducono il loro consumo elettrico durante le ore di picco. Quando il picco elettrico inizia la compagnia elettrica manda un segnale ON-OFF alle varie utenze fiduciosi che i proprietari riducano il loro consumo elettrico Questo sistema può...
- Page 67 Istruzioni Di Funzionamento 14. Altre Opzioni 14.1 Tempo di commutazione della valvola deviatrice Imposta il tempo in minuti che la valvola deviatrice deve impiegare per passare dalla posizione di ACS e riscaldamento/raffrescamento. Nota: il valore impostato deve essere conforme alla valvola utilizzata. Altrimenti si corre il rischio di non avere la portata d'acqua sufficiente.
- Page 68 Istruzioni Di Funzionamento 14.6 Temp.esterna per attivare il primo livello di antigelo 14.7 Temp.esterna per attivare il secondo livello di antigelo 14.8 Temp.esterna per disattivare il secondo livello di antigelo 14.9 Temp.acqua minima durante il secondo livello di antigelo 14.10 Temp.acqua massima durante il secondo livello di antigelo Queste impostazioni servono per impostare la funzione antigelo durante l'inverno mentre l'unità...
- Page 69 Istruzioni Di Funzionamento 15. Informazioni Di Funzionamento Questo menu permette di visualizzare le informazioni attuali di funzionamento del sistema: Versione del sistema di controllo; 02) Versione database; 03) Tuo – Temperatura mandata 04 Tui – Temperatura ritorno 05 Tup – Temperatura batteria interna 06 TW –...
- Page 70 Istruzioni Di Funzionamento Info Premere INFO per vedere lo stato del sistema idraulico. Visualizzazione Visualizzazione codice di errore attuale Lista degli dettagli codice errori di errore selezionato precedenti TW----Temperatura acqua per serbatoio di accumulo sanitario TC-----Temperatura acqua per serbatoio di accumulo tecnico TR-----Temperatura ambiente TA-----Temperatura esterna 1 70...
- Page 71 Istruzioni Di Funzionamento Casa Premere questo pulsante per tornare alla schermata principale START ENGING STOP 26℃ 15℃ 23.9℃ 34.7℃ 6.8℃ 3.3 Resistenza Elettrica Questa unità include due resistenze elettriche interne. Queste resistenze sono usate per riscaldare l’acqua quando la potenza della pompa di calore non è sufficiente, nel caso si voglia raggiungere la temperatura in maniera più...
- Page 72 3. Resistenze Elettriche 【 】 1.5KW Resistenza Elettrica Per ACS L'unità all’interno del serbatoio da 250 litri è dotata di una resistenza elettrica da 1.5 kW. Questa resistenza viene avviata nei seguenti casi (1) Se l’impostazione della temperatura sanitaria è oltre i 55 °C o se la pompa di calore non è riuscita a scaldare l’acqua nel tempo determinato (Fare riferimento al capitolo 3.10 Riscaldatore ausiliario).
-
Page 73: Resistenze Elettriche
3. Resistenze Elettriche 【 】 6.0KW Resistenza Elettrica Ausiliaria L'unità è equipaggiata anche da una resistenza elettrica da 6 kW, divise in 2 da 3 kW ciascuna poste nel circuito idraulico dopo lo scambiatore a piastre. Una resistenza da 3 KW è usata come AH (riscaldatore ausiliaria), mentre l’a’tra èusata come HBH (Riscaldataore ausiliaria esterno). - Page 74 3. Resistenze Elettriche Avviso – Per Termostato Elettronico 1. Collegare il cavo come indicato nello schema elettrico; 2. Per evitare interferenze non tenere vicino il cavo di collegamento a quello di alimentazione o di comunicazione 3. Non mantenere il sensore immerso in acqua calda per molto tempo; 4.
-
Page 75: Lista Degli Errori
Codici Di Errore Soluzione Tipo Codice Descrizione n° lampeggi Stato di funzionamento La corrente di alimentazione del compressore è troppo alta o troppo bassa, oppure il sistema lavora oltre il carico massimo ammesso. Verificare la corrente di Protezione fase alimentazione del compressore Compressore fermo compressore Verificare che i motori delle ventole... - Page 76 Codici Di Errore Soluzione Tipo Codice Descrizione n° lampeggi Stato di funzionamento Il compressore riduce Se la pressione è troppo alta, si la sua velocità a causa attiva questa protezione. Il sistema della rilevazione di si ripristina autonomamente dopo 5 Compressore fermo alta pressione fatta minuti.
- Page 77 Codici Di Errore Soluzione Tipo Codice Descrizione n° lampeggi Stato di funzionamento Se la pressione del sistema è troppo bassa si attiva questa protezione. Il sistema si ripristina automaticamente dopo 5 minuti. Se lo stesso errore si verifica 3 volte Velocità...
- Page 78 Codici Di Errore Soluzione Tipo Codice Descrizione n° lampeggi Stato di funzionamento Questo messaggio appare se il pressostato è in posizione aperta mentre l'unità è in standby o 2 Guasto sul pressostato Compressore fermo minuti dopo che il compressore è di alta/bassa pressione fermo.
- Page 79 Codici Di Errore Soluzione Tipo Codice Descrizione n° lampeggi Stato di funzionamento Se il pressostato sul condensatore rileva una pressione troppo alta per 3 volte in un certo lasso di tempo appare questo messaggio.Il sistema si ripristina togliendo e ridando alimentazione elettrica.
- Page 80 Codici Di Errore Soluzione Tipo Codice Descrizione n° lampeggi Stato di funzionamento Verificare l'alimentazione elettrica all'unità esterna e comparare questi Errore valori con quelli mostrati dal sull'alimentazione pannello di controllo. Se la elettrica Compressore fermo differenza è bassa verificare che la quantità...
- Page 81 Codici Di Errore Soluzione Tipo Codice Descrizione n° lampeggi Stato di funzionamento Controlla che la sonda non sia in Guasto alla sonda di Unità rimane attiva, corto, aperta e che non dia valori temperatura della valvola miscelatrice 2 sbagliati. Eventualmente sostituire valvola miscelatrice 2 bloccata su 0.
- Page 82 Codici Di Errore Soluzione Tipo Codice Descrizione n° lampeggi Stato di funzionamento La portata d'acqua del sistema è Portata acqua troppo troppo bassa. Verificare il sistema bassa Compressore fermo. idraulico, in particolare il filtro, Verificare il buon funzionamento della pompa. Avvertimento ma Verificare che il flussostato non sia Errore al flussostato...
- Page 83 Codici Di Errore Soluzione Tipo Codice Descrizione n° lampeggi Stato di funzionamento Se il sistema non riesce a finire il processo di sbrinamento per 3 volte consecutive si blocca e appare il messaggio di errore S08. Togliere e ridare corrente elettrica per Errore sbrinamento Compressore fermo.
-
Page 84: Assistenza E Manutenzione
Assistenza E Manutenzione 1. Avvertenze A. L’utilizzatore non può modificare i cablaggi interni delle unità B. L’assistenza e la manutenzione deve essere eseguita da personale qualificato ed addestrato tecnicamente. Se l’apparecchio non funziona togliere subito l’alimentazione elettrica; C. Il sistema di controllo è in grado di analizzare automaticamente i vari problemi di protezione durante l'uso quotidiano, e visualizzare il codice di errore sul display. -
Page 85: Assistenza
Assistenza E Manutenzione 2. Assistenza 【 Unità Interna】 La manutenzione nell’unità interna deve essere fatta da personale qualificato, seguire le seguenti indicazioni: 1. Togliere l’alimentazione elettrica; 2. Rimuovere il pannello frontale prestando attenzione al cablaggio elettrico; 3. Controllare le parti elettriche; Valvola di manutenzione Valvola Di Manutenzione : Usata principalmente per svuotare l’impianto del gas refrigerante. - Page 86 Assistenza E Manutenzione 2. Assistenza 【 】 Scheda Interna 1. LED di stato della scheda interna Dip switch della scheda interna Impostazioni di fabbrica 【 】 Scheda Esterna 3. LED di stato della scheda esterna Impostazioni di fabbrica Standby – LED Lampeggiante 2 secondi ON 2 secondi OFF;...
- Page 87 Assistenza E Manutenzione 2. Assistenza 2. Sostituire Il Motore Delle Ventole a. Scollegare l’alimentazione elettrica e rimuovere la rete di protezione delle ventole (fig. a e b). b. Con una chiave allentare il dado centrale che fissa la ventola, rimuoverla (fig. c e d). c.
-
Page 88: Manutenzione
3. Manutenzione Assistenza E Manutenzione 4. Sostituzione Del Sensore Di Temperatura a. Rimuovere il pannello posteriore ( fig. a). b. Rimuovere il sensore difettoso dalla sua sede scollegare il cavo di collegamento alla scheda; c. Inserire il nuovo sensore di temperatura nella sede e collega il cavo nella stessa posizione sul la scheda. -
Page 89: Carica Del Gas
3. Manutenzione Assistenza E Manutenzione 【Carica Del Gas】 Il refrigerante gioca un ruolo importante nel trasportare il calore in riscaldamento o raffrescamento. quantità insufficiente di refrigerante ha impatti negativi sull’efficienza del sistema. Fare attenzione ai seguenti punti prima di aggiungere refrigerante: L’attività... - Page 90 Assistenza E Manutenzione 4. Risoluzione Dei Problemi GUASTO CAUSA SOLUZIONE Verificare l'alimentazione elettrica 1.Nessuna alimentazione elettrica Verificare che il circuito non sia aperto e che sia correttamente 2.Il fusibile è intervenuto o collegato a terra. Sostituire il fusibile e resettare l'interruttore . l'interruttore è...
- Page 91 Assistenza E Manutenzione 4. Risoluzione Dei Problemi CAUSA GUASTO SOLUZIONE Sostituire il filtro disidratatore Filtro disidratatore sporco Pressione Valvola di espansione elettronica Ripararla o sostituirla aspirazione bloccata troppo bassa Verificare che non ci siano perdite nell'unità e nell'impianto Perdita di refrigerante eventualmente ripararle.
-
Page 92: Schema Di Collegamento
1. Schema Di Collegamento Schema Di Collegamento 【 】 Unità Interna GB 06 1 92... - Page 93 1. Schema Di Collegamento Schema Di Collegamento 【 】 Unità Interna GB 09 1 93...
- Page 94 1. Schema Di Collegamento Schema Di Collegamento 【 】 Unità Esterna ATTENZIONE Le specifiche possono subire modifiche senza preavviso. Per le specifiche correnti consultare le etichette poste sul prodotto. 1 94...
- Page 95 Catalogue 1.Before Use List of accessories 2. Safety precautions Main components Outlines and dimensions Working principles 6. Specifications Exploded view 2.Installation Installation methods 2. Wiring 3. Installation of the indoor unit 4. Installation of the outdoor unit 5. Refrigerant pipe connection 6.
-
Page 96: Catalogue
Catalogue 4.Service and Maintenance 1. Attention 2 Service Indoor unit Outdoor unit 3. Maintenance Cleaning of water filter Cleaning of heat exchanger Gas charging Cleaning of plate exchanger Antifreeze in winter 4. Trouble-Shooting 5.Wiring Diagram 1 03... -
Page 97: Before Use
Before Use 1. List Of Accessories 【 】 List of accessories The accessories below are delivered together with the product . Please check in time. If there is any shortage or damage, please contact local distributor. 【Indoor unit】 Quantity 1pcs User manual 1set Four-way Safety valve kit... - Page 98 Before Use Safety Precautions 【 】 Symbol Description The following symbols are very important. Please be sure to understand their meaning, which concerns the product and your personal safety. Warning Caution Prohibition 【 】 Safety Precautions 1.The heat pump is for “Closed pressurized water borne systems only, with running pressure from 1-2.5 bars”.
-
Page 99: Safety Precautions
Before Use Safety Precautions Ground wire Water tank Don't run the heat pump unit The power supply to the unit must Use a dedicated socket for this with water temperature lower be grounded. unit,otherwise malfunction may than 20℃. occur. When running the unit, never cover Do not touch the power plug with Water or any kind of liquid is strictly the product with clothes, plastic... - Page 100 Before Use Safety Precautions Be aware finger might be hurt by the fin of the coil. Please select the correct fuse or breaker as per recommended. Steel wire or copper wire cannot be taken as substitute for fuse or breaker. Otherwise, Copper damaged maybe caused.
-
Page 101: Main Components
Before Use 3. Main Components 【 】 Indoor unit GB 06/09/13 Outside Superiore NAME NAME 1.5L refrigerant expansion tank (6/9KW) Refrigerant Connector 1/4’’ and 1/2" (GB 06) Refrigerant Connector 3/8’’ and 1/2" (GB 09) Handle 11-12 Refrigerant Connector 3/8’’ and 5/8’’ (GB 13) -
Page 102: Outlines And Dimensions
Before Use 4. Outlines And Dimensions 【 】 Indoor unit GB 06/09/13 Unit:mm 1 09... - Page 103 Before Use 4. Outlines And Dimensions ——STM 06/09 【 】 Outdoor unit Unit: mm STM 06 φ Liquid pipe O.D: 6.35 1/4” φ Gas pipe O.D: 12.7 1/2" STM 09 φ Liquid pipe O.D: 9.52 3/8” φ Gas pipe O.D: 12.7 1/2"...
- Page 104 Before Use 4. Outlines And Dimensions ——STM 13 【 】 Outdoor unit Unit: mm 1124 1058 φ Liquid pipe O.D: 9.52 3/8” φ Gas pipe O.D: /8” 1 11...
-
Page 105: Working Principles
Four-Way Vale Compressor Pressure Check Valve Three-Way Valve Expansion Refrigerant Filter Valve Outdoor Unit Before use 6. Specifications All-In-One Series GB 06 GB 09 GB 13 Model V/Hz/Ph 220-240/50/1-R410A Power Supply - Refrigerant 12.6 6.06 10.10 Max.Heating Capacity 4.03 3.89 4.05... - Page 106 Before Use 6. Specifications Potenza raffrescamento Min./Max. 2.05/5.81 4.10/6.84 4.29/10.37 Assorbimento elettrico Min./Max. 768/2105 1230/3280 957/3156 E.E.R Min./Max. 3.29/4.63 3.15/4.71 2.09/3.32 5.05 Potenza massima in raffrescamento 2.52 1.58 2.63 E.E.R 2.34/7.91 2.34/5.05 1.59/4.5 Potenza raffrescamento Min./Max. Assorbimento elettrico Min./Max. 614/1740 1080/3200 1000/3012 1.58/2.40...
- Page 107 Before use Before Use 6. Specifications 6. Specifications 934x354x753 934x354x753 1123x400x1195 Outdoor unit 990x440x810 1330x490x1330 990x440x810 Net / Packing Dimension(LxDxH) 600x650x1720 600x650x1720 600x650x1720 Indoor unit 640x695x1914 640x965x1914 640x965x1914 Note: (1) Heating condition : Water inlet/outlet temperature : 30°C /35°C , Ambient temperature : DB 7°C/WB 6°C; (2) Heating condition : Water inlet/outlet temperature : 40°C /45°C , Ambient temperature : DB 7°C/WB 6°C;...
-
Page 108: Exploded View
Before Use Exploded View 【 】 Indoor unit GB 06/09 Item no. Part Name Quantity Item no. Quantity Part Name Front Panel Safety Valve Kit Operation panel Water Tank Digital Thermostat 5L Expansion Tank Switch Power Supply Coil Temperature Sensor... - Page 109 Before Use Exploded View 【 】 Indoor unit GB 13 Item no. Part Name Quantity Quantity Item no. Part Name Front Panel Safety Valve Kit Operation Panel Water Tank Digital Thermostat 5L Expansion Tank Switch Power Supply Coil Temperature Sensor Water Inlet Temperature Sensor Relay Water Outlet Temperature Senor...
- Page 110 Before Use Exploded View 【 】 Outdoor unit STM 06 1 17...
- Page 111 Before Use Exploded View 【 】 Outdoor unit STM 09 Name Name Fan Guard Right Plate Fan Blade Gauge Fan Motor Handle Front Panel Value Plate Refrigerant Connector (3/8) Air Guide Refrigerant Connector(1/2) Fixture Motor Bracket Valve Cover Column Support Compressor Four-Way Valve Feet...
- Page 112 Before Use Exploded View 【 】 Outdoor unit STM 13 20 21 Name Name Name Fan Guard Side panel Condensor Front Panel Bulkhead Valve cover Air guide Handle Terminal block Separator Fan Blade PFC transducer Suction temperature sensor Fan motor Transformer Fixture EEV controller...
-
Page 113: Installation
Installation Installation Methods 【 】 In the storage environment temperature range Ambient temperature: ℃ to ℃ Media temperature: + ℃ to ℃ 【Installation Methods】 Sanitary hot water, floor heating hot water and radiator heating hot water can all be get from the indoor unit. - Page 114 Installation Installation Methods 2.1 General application system introduction 2.1.1 Sanitary hot water For safety purpose, it is recommended to set up the sanitary hot water system as shown below: 1) Application 1 T/P valve Magnesium rod Water from heat pump Water mixture valve Water to heat pump City water...
- Page 115 Installation Installation Methods If the structure of the tank permits, it is suggested to use a manual 4-way mixture valve in sanitary hot water system as shown below. This can further improve the utilization of hot water in the tank. T/P valve Magnesium rod Water from heat pump...
- Page 116 Installation Installation Methods Interno Esterno Valvola pressione /temperatura FLH1 FLH2 FLH3 High temperature hot water export City water Drainage Drainage Item Name Item Name Indoor PCB Water Outlet Temperature Sensor 1.5KW Electric Heater Hot Water Temperature Sensor 6KW Electric Heater 3-way Motorized Valve Mechanical Thermostat Water Return Port To Heating/Cooling System...
- Page 117 Installation Installation Methods 2.1.3 Heating&Cooling Circuits: This heat pump unit can control two totally different heating/cooling circuit, as shown in the drawing. Temperature setting can be made via menu “Heating & Cooling Circuit 1” and “Heating & Cooling Circuit 2”. Of course, if only one circuit is needed, “heating&cooling circuit 2”...
- Page 118 Installation Installation Methods Note: If TV1 is not connected, while it is activated via setting here, unit will show relative failure code. 2.1.5 Heating & Cooling circuit 2 Control of Mixing Valve 2(MV2): If system water temperature may higher(lower) than temperature that are need for circuit 2 in heating (cooling) operation, then a mixing valve can be added to circuit 2, and connected to MV2 port in indoor unit.
- Page 119 Installation Installation Methods Control of Circulation Pump for circuit 1&2 “With/without Buffer Tank”: Set whether it has a buffer tank between heat pump unit and distribution system or not. “P1 for Heating Operation” means circuit pump for circuit 1should work for heating operation. “P1 for Cooling Operation”...
-
Page 120: Wiring
Installation 2. Wiring 2.2 Wiring 1) Terminals La Na PE PE N P3 For user's side Unit power supply 3× 2.5mm Unit power supply. Should be connected to city power supply. B: Power Supply For HWTBH - Hot Water Tank Back-up Heater For this one, we have 1.5KW electric heater inside the sanitary water tank and have already connected this heater to the heat pump unit, so to have it under the control of heat pump. - Page 121 2. Wiring Installation Power Supply For AH and HBH ( 3*4 , city power input) For this one, we have 3KW as AH and 3KW as HBH for house heating or sanitary hot water system. For AH and HBH, which needs a separate power supply 220V/1ph and its power cable should not be less than 3* Meanwhile, they can be controlled by electric signal, to have them under the control of heat pump.
- Page 122 Installation 2. Wiring D: Electrical Utility Lock Input Some electricity companies offer a special rate if the house power consumption is lowered to a certain value during peak time. If the unit is supposed to stop working during this period, one can connect the signal from electricity company to this “External Shutdown”...
- Page 123 Installation 2. Wiring 2) Wiring ◆ It is recommended to use a suitable circuit breaker for the heat pump; ◆ The power supply to the heat pump unit must be grounded. ◆ The wiring should be done by professional person. ◆...
-
Page 124: Installation Of The Indoor Unit
Installation 3. Installation Of The Indoor Unit 【 】 Installation Notes A. The indoor unit can be located in a room, corridor, balcony, garage or warehouse. B. Indoor unit should be placed on flat and solid ground. C. The unit is recommended to be put in a space close to water supply, and drainage. D. -
Page 125: Installation Of The Outdoor Unit
Installation 4. Installation Of The Outdoor Unit 【 】 Installation Notes A. The outdoor unit can be located in a room, corridor, balcony, and roof or hanged on the wall. B. Please don't install outdoor unit close to bedroom or living room, because there is some noise when it's running. - Page 126 Installation 4. Installation Of The Outdoor Unit 【 】 Installation Please add rubber absorber under the outdoor unit, to reduce the vibration. 【 】 A. On a concrete stand 1.The unit must be located on a flat,solid,preferably cemented surface. 2.When installing the unit,introduce a tilt of 1cm/m for rain water evacuation. 3.When installing the unit in harsh climatic conditions,sub-zero temperature ,snow,humidity.., it is recommended to raise the unit off the ground by about 50cm.
-
Page 127: Refrigerant Pipe Connection
Installation 5. Refrigerant Pipe Connection Please take the refrigerant pipe and accessories from the carton box of piping kit. Insulation When insulating the refrigerant pipe, please insulate each pipe separately (refer to figure 1 below), don't insulate the refrigerant pipes together (refer to figure 2 below). - Page 128 Installation 5. Refrigerant Pipe Connection 【 】 Pipe Routing IMPORTANT: Continue the pipe from the indoor unit to the outdoor unit and connect the pipe fittings in the same way. The radius at pipe bends must not be less than 15 cm. Use a cardboard template to check this.
- Page 129 Installation 5. Refrigerant Pipe Connection 3. Prepare a vacuum pump and a pressure 4. Connect the other tube of the pressure gauge, connect one tube of the pressure gauge to the outdoor unit. gauge to the vacuum pump. 5. Open pressure gauge, and start the vacuum pump to vacuum the unit for around 10 minutes.
-
Page 130: Water Pipe Connect
Installation 6. Water Pipe Connection After installing the unit, please connect the water inlet and outlet pipe according to the local instructions. Please carefully select and operate the water pipe. After connection, the water piping should be pressure tested, cleaned before use. 【... - Page 131 Installation 7. Installation Of The Kits In The Accessories 3. Drain the water to drainage system of the house, and open the ball valve to drain out all water inside the tank. Please extend the drainage pipe by connecting another water pipe, if the distance between the unit and drainage system is long.
- Page 132 Installation 7. Installation Of The Kits In The Accessories 【 】 L type decorative panel in back side When the pipings are installed in back side of the unit, L type decorative panel can be installed as follows, in order to hide the pipings in backside and look better: 1.Take out 2pcs L type decorative panel in back side 1 and 1pcs L type decorative panel in back side 2.
-
Page 133: Air Purging Of Water System
Installation 8. Air Purging Of Water System After finishing the installation, please refer the above illustration and proceed with the following steps to discharge the air in the system: Evacuation of shower coils in water tank 1. Open ball valve 1,3,4,5,6,7,8. 2. -
Page 134: Test Run
Installation 9. Test Run 【 】 2.9 Test Run After installation finished, please fulfill the water system with water and purge out air in the system before start-up. Before start-up Before the unit starts up, a certain number of verifications must be performed on the installation to ensure that the unit will operate under the best possible conditions. -
Page 135: Use
1. Introduction Of Operation Panel B. Working mode C. Functions A. Communication symbol D. Warning START ENGING E. ON / OFF STOP 26℃ 15℃ 23.9℃ F. Touch screen panel 34.7℃ 6.8℃ G. Mode H. Setting A. Communication symbol When this symbol is in blue, it means communication is working correctly. When this symbol is in grey, it means communication is broken. - Page 136 1. Introduction Of Operation Panel D. Warning When the unit is having a protection or failure, a symbol will be shown on the display. Please enter into "Info" menu to check the protection or failure codes. Yellow——Outdoor unit protection or failure Red——System protection or failure Some information, protections and failures that are more likely to happen, will shown in front page so the customers can see it easily:...
- Page 137 1. Introduction of Operation Panel 5. Serial Port Connect Error Serial port connect error means the communication between operation panel and indoor PCB or outdoor PCB hasn't been set up successfully. Check the cable connection in between. Check whether the last three switches on outdoor power PCB are set to 001;...
- Page 138 1. Introduction Of Operation Panel START ENGING STOP 23.9℃ 34.7℃ 6.8℃ F. Touch Screen Panel Set water temperature Current water temperature 26℃ 15℃ Set mode 35℃ Room temperature 40℃ Set water 23.9℃ temperature 34.7℃ Water tank 6.8℃ temperature Ambient temperature G.
- Page 139 1. Introduction Of Operation Panel H. Setting: Press to enter into setting menu 3. DHW settings Heating/Cooling circuit 2 - see page 51 - see page 50 See page 71 See page 70 1. Heating/Cooling 4. DHW circuit 1 Storage - see page 47 - see page 53 8.
- Page 140 2. Operation Instruction 1. Heating/Cooling Circuit 1 1. Heating & Cooling Settings 1, HC/CC 1 1.01) Heating or Cooling Stops based on Water ∆T 1.02) Heating or Cooling Stops based on Water ∆T ◆ 1.01: This is to set a temperature to stop unit. Unit stops operation when [Tset+ 1.01] in heating operation, or [Tset–1.01] in cooling operation is reached.
-
Page 141: Operation Instruction
2. Operation Instruction △ 1.03 T Compressor Speed-Reduction This parameter is used to set a temperature, at which compressor starts to slow down its speed. Also, the set value is based on ΔT. Compressor always works with its maximum allowable speed, if actual water temperature is lower than [ Tset-1.03 ](in heating mode) or higher than [Tset+1.03](in cooling mode). - Page 142 2. Operation Instruction Parameter 1.06~1.10 is used to set 5 different ambient temperatures; while parameter 1.11~1.15 is used to set 5 corresponding set water temperatures VS these 5 ambient temperatures. Then the controller will create a heating curve according to these settings, and try to reach the set water temperature automatically according to actual ambient temperature.
- Page 143 2. Operation Instruction 2. Heating / Cooling Circuit 2 2.01 Heating&cooling Circuit 2 Set whether the system has the second circuit . 2.02 Set Temp For Cooling Set the set temperature for cooling operation of circuit 2. 2.03 Set Temp For Heating If heating curve function is disabled for circuit 2, a fixed value of set water temperature in heating mode can be set here.
- Page 144 2. Operation Instruction 3. DHW Settings 3.01 Setpoint DHW Set temperature for sanitary hot water. 3.02 DHW Restart ∆T Setting Heat pump unit will start working for sanitary hot water again, after temperature drops below Tset-3.02 here. 3.03 Shifting Priority Turn ON/OFF this function.
- Page 145 2. Operation Instruction If shifting priority function is ON, and ambient temperature is lower than [3.04],unit works as shown below: House heating water under water temperature The running time for DHW is cleared. Unit Starts heating and counting the running time. Unit keep on working in DHW and counting the running time.
- Page 146 2. Operation Instruction 4. DHW Storage Sanitary Hot Water Storage Function After showers, house usually needs only medium temperature sanitary hot water in day time. This function is used to store high temperature sanitary hot water in low demand time (mid-night, or day time of working days), and reheat the water to medium temperature out of this time period.
- Page 147 2. Operation Instruction 4.05 Reheating Set Temp. Set a lower set value for DHW operation. Unit will work with this set value when reheating function is activated in the set time period (time period set in parameter 4.04). 4.06 Reheating Restart ∆T Setting Set “reheat restart”water ∆T.
- Page 148 2. Operation Instruction 5. Reduced Setpoint For Heating Reduced Setpoint Function: Sometimes the house heating demand maybe lower than normal, like during sleep period or working time. In this way, a reduced value based on standard set value can be set here for better efficiency of the whole system. Quiet Operation: Also, for a better noise issue, a Quiet Operation can be also set in this menu.
- Page 149 2. Operation Instruction 6. Anti-Legionella Function If user uses sanitary hot water directly out from the HWT (hot water tank), for the health purpose, it's requested that he needs to heat up the water inside the tank over 60℃ for anti-legionella purpose once a week.
- Page 150 2. Operation Instruction 7. Vacation Mode If you need to be away from house for some days, you can use this Vacation Mode function to reduce the set temperatures for both sanitary hot water and house heating , to save more energy. 7.01) Vacation Mode Turn ON/OFF Vacation Mode.
- Page 151 2. Operation Instruction 8. User Management 8.01) Permission Level For the safety of the product,some parameters can only be adjusted under installer' s permission level. The permission level can be changed in this menu. A password is needed for activating the installer's permission level. 8.02) Heating/Cooling ON/OFF Timer To turn ON/OFF the timer function for heating/ cooling operation.
- Page 152 2. Operation Instruction 8.04) Language Set system language. 8.05) Set Date and Time Set system clock date and time. 8.06) Distribution System Setting The unit is default set to have 3-way motorized valve inside the unit, which has different flow directions for sanitary hot water/cooling+heating mode. If user needs to have sanitary hot water and heating on the same distribution system, he can set this parameter to“Hot Water+Heating/Cooling”.
- Page 153 2. Operation Instruction 9. Mode Settings 9.01) Sanitary Hot Water Set whether the system has sanitary hot water circuit or not. When unit works in Sanitary Water mode, 3-way motorized valve will guide water to HWT automatically. 9.02) Heating Set whether the system has water circuit for house heating purpose or not. When unit works in heating mode, 3-way motorized valve will guide water to heating circuit automatically.
- Page 154 2. Operation Instruction 9.05) Max Allowed Duration For Min Compressor Speed When unit output is higher than demand,compressor speed will be reduced.If compressor has continuously worked in minimum compressor speed for over time set via“Max Allowed Duration For Min Compressor Speed”,unit stops. 9.06) Cooling and Heating Switch This function is for having the unit start cooling or heating operation automatically, according to: ◆...
- Page 155 2. Operation Instruction 10. Backup Heating HWTBH 1.5KW 250L D.H.W Tank ◆ AH---Aux iliary Heater inside the indoor unit ◆ HBH---Heating Back-up Heater ◆ HWTBH ---Hot Water Tank Back-up Heater 10.01) Backup Heating Sources For Heating Set whether the system has HBH (Heating Back-up Heater). 10.02) Priority for Backup Heating Sources (HBH) Set the priority of HBH compared with unit AH (Auxiliary Electric Heater inside the indoor unit).
- Page 156 2. Operation Instruction This is for adjusting how fast Backup Heating Sources for heating operation will be turned ON if heat pump unit can't provide enough power. The bigger the value is set, longer time it takes to start the Backup Heating Sources if heat pump capacity is not enough.
- Page 157 2. Operation Instruction 11. Water Pump Settings 11.1) Circulation Pump P0 Type This is to set the type of circulation pump inside the unit, P0. 11.2) Speed Setting of Circulation Pump P0 This is to set the working speed of circulation pump inside the unit, P0. 11.3) Working Mode of Circulation Pump P0 This is to set the working mode of circulation pump for cooling/heating operation inside the unit, P0.
- Page 158 2. Operation Instruction 12. Floor Curing After initial Installation or Long Time Non-operation, a floor heating system may be very wet in the concrete. Most of the heating capacity from heat pump unit is consumed to dry up the water in the concrete for its evaporation.
- Page 159 2. Operation Instruction 13. Electrical Utility Lock Some electricity companies offer a special rate to the houses who lowered their power consumption during peak time. When peak time comes, electricity company will send an ON or OFF signal to every house, indicating that they hope the house owners to turn OFF some electric equipments.
- Page 160 2. Operation Instruction 14. Other Options 14.1) Motorized Diverting Valve Switching Time Set how many minutes as switching time of the motorized diverting valve spending on switching the water flow fully between DHW and Heating/Cooling circuit. Note: This parameter must comply with the motorized diverting valve. Otherwise unit may not be able to work due to not enough water flow rate.
- Page 161 2. Operation Instruction 14.6) Ambient Temp. to activate first class anti-freezing 14.7) Ambient Temp. to activate second class anti-freezing 14.8) Ambient Temp. to stop second class anti-freezing 14.9) Water Temp. to activate second class anti-freezing 14.10) Water Temp. to stop second class anti-freezing These parameters are used for setting the anti- freezing protection of the unit in winter time, when unit is powered but turned OFF.
- Page 162 2. Operation Instruction 15. Unit Real-time Data This menu is designed for viewing the running data of the system. Following parameters that are related to the working of the system can be viewed in this menu: 01): Control System Version No 02): Database Version 03): Heat Exchanger Water Outlet Temperature-Indoor - Tuo 04): Heat Exchanger Water Return Temperature-Indoor - Tui...
- Page 163 2. Operation Instruction Info Press "Info" to view water system and water system working status. Display of Failure Code Display of Record of Failure Previous Failure TW----Water temperature for Sanitary hot water tank TC-----Water temperature for buffer tank TR-----Room temperature TA-----Ambient temperature 1 70...
- Page 164 2. Operation Instruction Home Home: Press this button at any page, operation panel goes back to home page. START ENGING STOP 26℃ 15℃ 23.9℃ 34.7℃ 6.8℃ 3.3 Electric heater This unit has included two electric heaters inside. Two electric heaters are used to keep the water temperature when heat pump capacity is not enough or heat pump fail to work, as well as heat the water up more rapidly when water temperature is low.
- Page 165 3. Electric Heater 【 】 1.5KW Aux. Electric Heater ( Sanitary Hot Water) Unit has quipped with a 1.5KW in its 250L sanitary hot water tank. This heater will be turned ON if both conditions are met: (1) If set and actual sanitary hot water temperature is over 55℃, or heat pump unit think its capacity is not enough that it could not heat the sanitary hot water up so fast enough.
- Page 166 3. Electric Heater 【 】 6.0KW Aux. Electrical Heater There also has a 6KW electric heater, divided into 2*3KW, built in the water circuit after plate heat exchanger. One of the 3KW is used as AH (Auxiliary Heater), while the other one is used as HBH (Heating Backup Heater). For more detailed information, please refer to chapter 10, “Backup Heating”, in page 66.
- Page 167 3. Electric Heater Notice - For Digital Thermostat 1. Please connect the cables according the wiring diagram. 2. The sensor cable can't be packed with power cable or communication cable, please connect them separately, in order to avoid interference. 3. Sensor can't be dip into the hot water for a long time. 4.
- Page 168 4. Failure Code 【Outdoor】 Blinking Unit working Type Description Code Solution times statue Input current too high or too low, or system works in over-load condition. Unit recovers automatically after 5 minutes when it happened the first time. If same failure happened 3 times in a certain period of time, unit stops until repowered.
- Page 169 4. Failure Code Blinking Unit working Type Description Code Solution times statue If system pressure is too low , it activates this protection. Unit recovers automatically after 5 minutes when it happened the first Compressor speed time. If same failure happened 3 times in a certain period of time, down due to unit stops until repowered.
- Page 170 4. Failure Code 【Indoor】 Blinking Unit working Type Description Code Solution times statue Check whether room temperature sensor is open, short-circuit or Room temp. sensor Unit stops failure value drifts too much. Replace it if necessary. Sanitary hot water Check whether sanitary hot water temperature sensor is open, short- Unit stops temp.
- Page 171 4. Failure Code Blinking Unit working Type Description Code Solution times statue Communication data lost too much. Check whether communication Communication cable is longer than 30M; whether there has a source of the Unit stops failure disturbance nearby the unit. Unit recovers when communication recovers.
- Page 172 Service And Maintenance 1. Attention A.The user mustn't change the structure or wiring inside the unit. B.The service and maintenance should be performed by qualified and well-trained technician When the unit fails to run, please cut off power supply immediately. C.The smart control system can automatically analyze various protection problems during daily use, and display the failure code on the controller.
- Page 173 Service And Maintenance 2. Service 【 Indoor unit】 Service on indoor unit as follows: (this operation must be done by qualified personnel) 1. Cut off the power supply 2. Remove the front panel(Be care about the cables in between) 3. Check the electric part Maintenance Valve Maintenance valve mainly used for vacummizing the system or refrigerant charging.
- Page 174 Service And Maintenance 2. Service 【 】 Indoor PCB 1. LED indicator light on Indoor PCB Dip switch on indoor PCB Factory Default Setting: 【 】 Outdoor PCB 3. LED indicator light on Power PCB Factory Default Setting: Standby---flickers (2s ON, 2s OFF) On when unit is running Failure---flickers (0.5s ON, 2s OFF) 4.
- Page 175 Service And Maintenance 2. Service 2. Replacement of fan motor a. Take off screws of the front grill (see picture a and b). b. Use a wrench to loosen the nut for fan blade and take out the fan blade(see picture c and d). c.
- Page 176 Service And Maintenance 3. Maintenance 4. Replacement of temperature sensor a. Take off the back panel (see picture a). b. Take out the broken sensor from its fixture, and also pull its connector out from the controller. c. Put the new sensor back and connect it to the same port on controller. Back panel Sensor connector Temperature sensor...
- Page 177 Service And Maintenance 3. Maintenance 【Gas Charging】 The refrigerant plays an important role in delivering energy in cooling or heating. Insufficient refrigerant affects directly efficiency of cooling and heating. Please pay attention to the following before adding refrigerant: A. The work should be done by professionals B.
- Page 178 Service And Maintenance 4. Trouble-shooting Failure Cause Solution 1. No power supply 1. Check the power supply 2. Check if it's open circuit or if the motor coil is 2. Fuse is broken or circuit earthed. Then change a fuse and reset the breaker, breaker is disconnected check if the circuit is stable or the connection is well.
- Page 179 1.Wiring Diagram Wiring Diagram 【 】 Indoor Unit GB 06 1 86...
- Page 180 1.Wiring Diagram Wiring Diagram 【 】 Indoor Unit GB 09 1 87...
- Page 181 1.Wiring Diagram Wiring Diagram 【 】 Outdoor Unit TAKE CARE! This diagram is subject to change with improvement of the unit. Always refer to the diagram supplied with the product. 1 88...
- Page 182 Thank you for choosing our quality product. Please read this manual carefully before use and follow the instructions to operate the unit in order to prevent damages on the device or injuries to staff. Specifications are subject to change with product improvements without prior notice.
Need help?
Do you have a question about the GB 06 and is the answer not in the manual?
Questions and answers