
Related Manuals for KegLand Cannular KL15769

Summary of Contents for KegLand Cannular KL15769
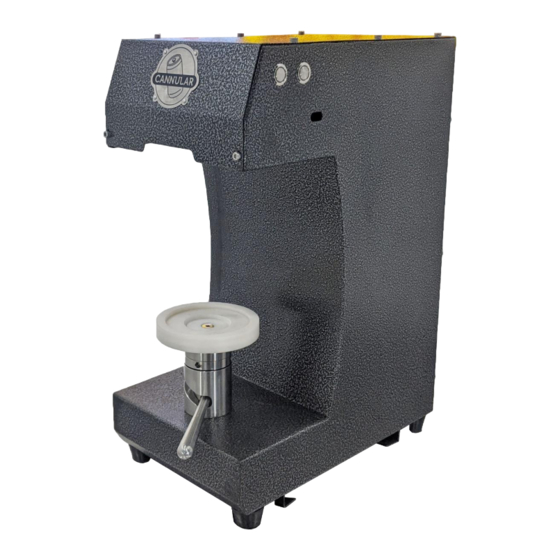
- Page 1 Cannular Semi-Auto Instruction Manual Cannular Compact Semi-Auto Canning Machine Instruction Manual KL15769 KegLand Distribution PTY LTD www.KegLand.com.au www.KegLand.com.au Last Updated 2/03/2021 4:22 PM Page 1 of 27...
- Page 2 OR THE CHUCK. THERE IS A RISK OF SERIOUS INJURY OR DAMAGE TO THE MOTOR IF THE CANNULAR IS PLUGGED IN WHILE MAKING ANY ADJUSTMENTS. WARNING AVOID CONTACT OF ANY ELECTRICAL COMPONENTS WITH LIQUID. www.KegLand.com.au Last Updated 2/03/2021 4:22 PM Page 2 of 27...
-
Page 3: Getting Started
The Cannular has been designed to suit cans available from KegLand and comes standard with a B64 chuck which is compatible with cans available from KegLand. It is however, possible to setup the Cannular to seam a wide range of can heights and diameters by setting up the machine differently. - Page 4 Cannular Semi-Auto Instruction Manual Your Cannular is calibrated and set up at the factory to seam KegLand 500mL B64 cans (KL05449, KL18517 and KL15684), however, due to an extended transit time it may have shifted out of specification during its journey. Before making any adjustments to the seamer follow the following initial start-up instructions: 1.
- Page 5 Cannular Semi-Auto Instruction Manual www.KegLand.com.au Last Updated 2/03/2021 4:22 PM Page 5 of 27...
- Page 6 Cannular Semi-Auto Instruction Manual Table Turn table support Coupling Nut Turntable Lever Power Switch Operation Switch (On/Off) (Momentary) www.KegLand.com.au Last Updated 2/03/2021 4:22 PM Page 6 of 27...
- Page 7 The Cannular is setup out of the box with a chuck that is suitable for B64 can ends. This chuck is compatible with cans available from KegLand. If you wanted to use a non-KegLand can and can end then you will need to adjust the rollers and change the chuck to suit the specific can end you are using.
- Page 8 Make sure to tighten the grub screws very well to ensure the Cannular stays in specification. Push as far up as possible Tighten Grub Screws www.KegLand.com.au Last Updated 2/03/2021 4:22 PM Page 8 of 27...
- Page 9 The can should be held firmly in place but should not buckle under the pressure. Once you are happy with the position of the table, tighten the coupling nut firmly using an Allen key. www.KegLand.com.au Last Updated 2/03/2021 4:22 PM Page 9 of 27...
- Page 10 If the buckling occurs on the second operation then please check your can is being raised straight up and completely concentric with the chuck. Small adjustments to the turn table position To make small adjustments to the turn table position. www.KegLand.com.au Last Updated 2/03/2021 4:22 PM Page 10 of 27...
- Page 11 2. Use two fingers to move the turn table slightly in the desired direction while re- tightening (turn clockwise) the coupling nut on the base of the turn table. 3. Check the can now lifts concentrically www.KegLand.com.au Last Updated 2/03/2021 4:22 PM Page 11 of 27...
- Page 12 3. Adjust the position of the turn table so that the can is completely concentric with the chuck when it is raised. 4. Once you are satisfied with the position of the turn table do up the three bolts with the Allen key www.KegLand.com.au Last Updated 2/03/2021 4:22 PM Page 12 of 27...
- Page 13 For larger tin cans set the detention so that the roller is at its furthest detention position from the chuck as shown below. Drive shaft at furthest position from chuck and rollers at closest position to chuck www.KegLand.com.au Last Updated 2/03/2021 4:22 PM Page 13 of 27...
- Page 14 Ensure that the gap “Y” is measured from the flat face of the roller to the top of the chuck (as shown below). www.KegLand.com.au Last Updated 2/03/2021 4:22 PM Page 14 of 27...
- Page 15 +/- 0.1mm. Ensure that you have the feeler gauge flush with the face of the chuck. The feeler guage should be placed on the same angle as the chuck when taking a gap “X” measurement, not vertical. www.KegLand.com.au Last Updated 2/03/2021 4:22 PM Page 15 of 27...
- Page 16 Op roll is at its closest position to the chuck. The gap “Y” on the 2 Op Roll should be 1.35mm +/- 0.05mm The gap “X” on the 2 Op Roll should be 0.3mm +/- 0.1mm www.KegLand.com.au Last Updated 2/03/2021 4:22 PM Page 16 of 27...
- Page 17 360 degrees to give a greater degree of fine adjustment in the x-axis. 1. Loosen the y-axis adjustment nut just enough that the roller is still held in position in the y-axis www.KegLand.com.au Last Updated 2/03/2021 4:22 PM Page 17 of 27...
- Page 18 The image below shows how the roller can rotated around the drive shaft 360 degrees when the shaft is in a fixed position. www.KegLand.com.au Last Updated 2/03/2021 4:22 PM Page 18 of 27...
- Page 19 (actual overlap, seam width and seam length) are within their specified ranges for forming a high pressure, leak free seam. www.KegLand.com.au Last Updated 2/03/2021 4:22 PM Page 19 of 27...
- Page 20 The x and y measurements of the 2 operation roller effects both the seam width and length. www.KegLand.com.au Last Updated 2/03/2021 4:22 PM Page 20 of 27...
- Page 21 Hence, it is important that both rollers are at their respective correct positions for the seamer to be in specification. IMAGE 1 – 1 Operation IMAGE 2 – 2 Operation www.KegLand.com.au Last Updated 2/03/2021 4:22 PM Page 21 of 27...
- Page 22 You should have two individual cans that look like this below: LEFT: First operation only (we will refer to this as Can A) RIGHT: First and second operation completed (we will refer to this as Can B) www.KegLand.com.au Last Updated 2/03/2021 4:22 PM Page 22 of 27...
- Page 23 WARNING: Please take appropriate safety precautions when using power tools. CAN B CAN A www.KegLand.com.au Last Updated 2/03/2021 4:22 PM Page 23 of 27...
- Page 24 If you determine that the actual overlap between the can body and can end is less than 0.4mm following the first operation, make sure that your 1 operation roller is in the correct position. www.KegLand.com.au Last Updated 2/03/2021 4:22 PM Page 24 of 27...
- Page 25 2 operation roller is not in its correct position. Hence, both actual overlap from the first operation and overlap following second operation should be assessed. www.KegLand.com.au Last Updated 2/03/2021 4:22 PM Page 25 of 27...
- Page 26 If the 2 operation roller is too close to the chuck it can cause springback which can result in the seam width becoming thicker. www.KegLand.com.au Last Updated 2/03/2021 4:22 PM Page 26 of 27...
- Page 27 If the seam is too long it can result in the actual overlap separating and the seam no longer sealing. www.KegLand.com.au Last Updated 2/03/2021 4:22 PM Page 27 of 27...
Need help?
Do you have a question about the Cannular KL15769 and is the answer not in the manual?
Questions and answers