Table of Contents
Advertisement
Quick Links
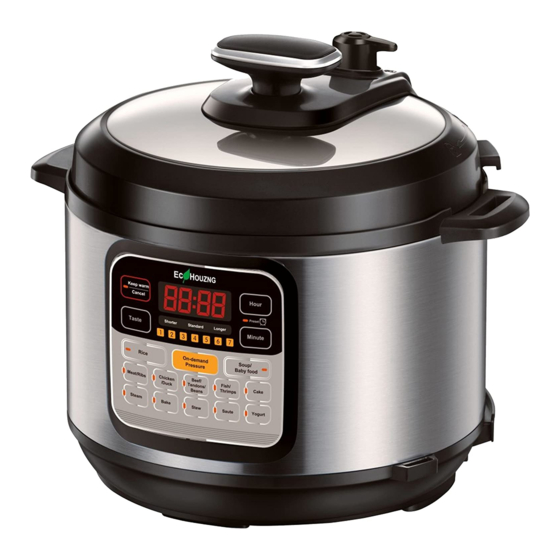
Model: ECP5012
Super Luxury Multi-functional
Electric Pressure Cooker
User Manual
(Pictures in the text are for reference only,
please refer to the actual product.)
Thank you for purchasing our electric pressure cooker. Please read the User Manual
carefully before use and keep it in a convenient place for future reference.
Advertisement
Table of Contents

Related Manuals for ECOHOUZING ECP5012


Summary of Contents for ECOHOUZING ECP5012
- Page 1 Model: ECP5012 Super Luxury Multi-functional Electric Pressure Cooker User Manual (Pictures in the text are for reference only, please refer to the actual product.) Thank you for purchasing our electric pressure cooker. Please read the User Manual carefully before use and keep it in a convenient place for future reference.
-
Page 2: Table Of Contents
Table of Contents Important Safeguards Specifications Product Structure Controls and State of the Cooker Control Panel State of the Cooker Operation Keys Function Keys Before the First Use Remove and Install the Anti-Block Shield Remove and Install the Sealing Ring Safe Lid Opening Cooking Preparation Cooking with Your Cooker... -
Page 3: Important Safeguards
Important Safeguards When using electrical appliances, basic safety precautions should always be followed including the following, please read all instructions. 1. This appliance is intended to be used in household and similar applications such as staff kitchen areas in shops, offices and other working environments, farm houses, hotels, motels and other residential type environments, bed and breakfast type environments. - Page 4 17. Always check the pressure release devices for clogging before use. Do not cover the pressure valves. 18. Please soak the dry foods before cooking them in the product. 19. Be aware that certain food, such as applesauce, cranberries, pearl barley, oatmeal or other cereals, split peas, noodles, macaroni, rhubarb, or spaghetti can foam, froth, and sputter, and clog the pressure release device.
-
Page 5: Specifications
Specifications Power 1000W Voltage/Frequency 120V~60Hz Inner Pot Volume Inner Pot Caliber 22cm ℃ Working Pressure 70kPa Warm Temperature 60 ~8 0℃ Rice paddle, soup spoon, measuring cup, user manual Accessories and recipe booklet. Product Structure Float valve Exhaust valve Lid handle Lid position mark Steam release key Lid open/close mark... -
Page 6: Controls And State Of The Cooker
Controls and States of the Cooker Control Panel The control panel of your electric pressure cooker consists of an LED display, 3 mode indicators, 7 pressure scale indicators, 2 operation keys and 14 function keys. Each function key has a function indicator light. Operation keys do not have indicator lights. LED display Mode indicators Operation keys... -
Page 7: Function Keys
Function Keys The most important key is Keep warm/Cancel . When the cooker is being programmed " " or any program is in effect, press this key will cancel the program and take the cooker to standby state. When the cooker is in standby state, pressing this key activates the keep- warm program. -
Page 8: Safe Lid Opening
Safe Lid Opening 1. Make sure the pressure cooking program has completed or press Keep warm/Cancel " " key to terminate the program. 2. Releasing pressure in one of the following approaches. Quick Release: Press the "S team Release " key on the lid handle to let out steam until the float valve drops down. -
Page 9: Cooking With Your Cooker
3. Take out inner pot, and put in food and liquid The total amount of food and water should NEVER exceed the maximum level marking of the inner pot. It is recommended that you do not fill the unit over 2/3 full. When cooking foods that expand during cooking such as rice, beans or dried vegetables, do not fill the unit over 1/2 full. - Page 10 4. Select cooking time. You may use the Taste key to adjust cooking " " duration. Press the Taste key repeatedly to " " change between Shorter , Standard and " " " " " Longer modes which will light up on the display. "...
-
Page 11: Preset Cooking
8. To serve the food, press Keep warm/Cancel key " " to stop the keep-warm cycle and open the lid according to the Safe Lid Opening section of this " " manual. When opening the lid, the inner pot may appear to be stuck on the lid by vacuum. -
Page 12: Saute
Saute 1. Follow steps in the Cooking Preparation section " " of this manual. Keep the lid open to avoid pressure from building up inside the cooker. An optional glass lid can also be used. 2. Contact power cord. The LED display shows "... -
Page 13: Care And Maintenance
Care and Maintenance Regular care or maintenance is essential in ensuring that this product is safe for use. If any of the following circumstances take place, please stop using the appliance immediately and contact support team. Power cord and plug suffer from expansion, deformation, discoloration, damages, etc. A portion of the power cord or the plug gets hotter than usual. -
Page 14: Troubleshooting
Troubleshooting The cases in the following tables do not always indicate a faulty cooker. Please examine the cooker carefully before contacting the support for repair. Problem Possible Reason Solution Sealing ring not installed properly Position the sealing ring well Difficult to close the lid Float valve in the popped-up Press the float valve lightly position... -
Page 15: Service And Support
SERVICE AND SUPPORT This article includes a limited warranty of one (1) year against defects in workmanship and material (s). Excluding wear or breakage caused by abuse or improper use. In the event of a warranty claim or if service is required for this unit, please contact us at the following: Email: support@ecohouzng.com For questions or comments, please write to:... - Page 16 For any technical improvement or change in appearance or name plate, changes shall be placed in the revised manual without further notice. In case of changes in appearance and color, please refer to the actual product for detailed information.
Need help?
Do you have a question about the ECP5012 and is the answer not in the manual?
Questions and answers