
Related Manuals for Hallman HGC2402ST

Summary of Contents for Hallman HGC2402ST
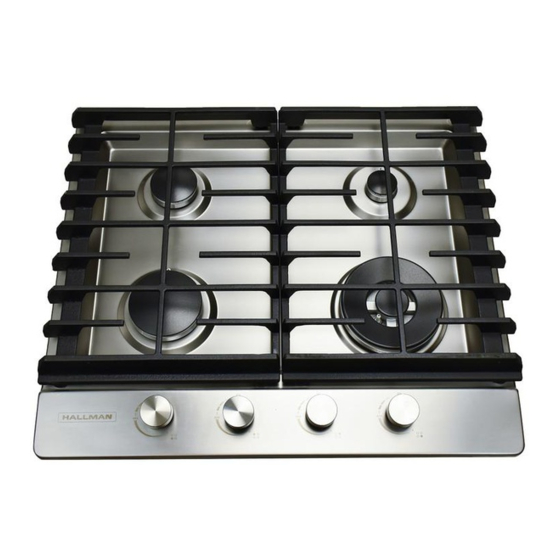
- Page 1 NATURAL GAS COOKTOP (LPG convertible) INSTALLATION HGC2402ST AND OWNERS MANUAL HGC3002ST 30” HGC3602ST SERIAL NUMBER: READ AND SAVE THESE INSTRUCTIONS...
- Page 2 If a cabinet storage is to be provided the risk can be reduced by installing a hob that projects horizontally a minimum of 5’’(12.7cm)beyond the bottom of the cabinets. Hallman Industries, 2502 Hwy 304, Rosanky, TX 78957 Phone: (512) 444-2775 Fax: (512) 444-2777...
-
Page 3: Important Safeguards
Hallman HGC2402ST,HGC3002ST&HGC3602ST Models HGC2402ST,HGC3002ST&HGC3602ST Model NATURAL GAS COOKTOP – LPG CONVERTIBLE Installation and Owners Manual This manual contains information for: Important Safeguards Installation Use and Care Certain cooktops come equipped with special features. Determine from a study of your cooktop which of the instructions given in this booklet pertain to your cooktop. -
Page 4: Table Of Contents
T able of Contents Contents Important Safeguards Page 1 - 5 Energy Saving Ideas Page 6 Installation Instructions Page 7-8 Wall Clearances Page 9 Alignments and Adjustments Page 10 - 14 Operation of Cooktop Page 15 - 16 Cleaning the Cooktop Page 17 Page 18 How to Install a Manual Valve... - Page 5 Your satisfaction is our #1 priority. Please read this manual very carefully, it contains valuable information on how to properly maintain your new gas cooktop. Thank You for choosing one of our Hallman appliances - we hope you will consider Hallman for future purchases. PLEASE READ AND SAVE THESE INSTRUCTIONS This manual provides specific operation instructions for your model.
- Page 6 READ ALL IMPORTANT SAFEGUARDS AND ALL INSTRUCTIONS BEFORE USING THE APPLIANCE. If you smell gas Open windows Don’t touch electrical switches Extinguish any open flame Immediately call your gas supplier OR YOUR AFETY Keep appliance area clear and free from combustible materials, gasoline and other ...
- Page 7 Notice: Never keep pet birds in the kitchen. Birds have a very sensitive respiratory system. Fumes released during the self-cleaning cycle, overheated cooking oil, fat, margarine or overheated non-stick cookware may be harmful or fatal to birds. PROPER INSTALLATION: Be sure your appliance is properly installed and grounded by a qualified technician in accordance with the National Fuel Gas Code ANSI Z223.1-latest edition, and the National Electrical Code ANSI/NFPA No.
- Page 8 Wear proper apparel. Loose fitting or hanging garments should never be worn while using the appliance. Do not let clothing or other flammable materials contact surface burners until they have had sufficient time to cool. When heating fat or grease, watch it closely. Fat or grease may catch fire if allowed to become too hot.
-
Page 9: Energy Saving Ideas
Do not use a “cyclonic” cooktop hood with this product. Some cooktop hoods circulate air by blowing downward toward the cooktop then drawing the air back up into the hood. This creates a “cyclonic” air wash that is designed for electric cooktops only. A “cyclonic”... - Page 10 Energy Saving Ideas Surface Cooking Use lids when surface cooking. A lid traps steam and uses it to speed up the cooking process. If you have a pressure cooker or vegetable steamer, use it. You’ll waste fewer vitamins, save time and cut energy costs. Use medium-weight, flat bottomed pans that match the flame size.
-
Page 11: Installation Instructions
Installation Instructions Be sure the cooktop is properly installed and grounded by a qualified technician. It is the responsibility of the technician to make certain that your cooktop is properly installed. Situations cause by improper installation are not covered under the warranty. Any expenses incurred due to such situations will not be paid by the manufacturer of the cooktop. - Page 12 Title 24, HUD (Part 280)] in the U.S.A. or C.S.A. Standard CAN/CGA Z240.4.2 in Canada or, when such standards are not applicable, with local codes. The installation of cooktops designed for recreational vehicle installation must conform with state or other codes or, in the absence of such codes, with the standard for recreational vehicles.
- Page 13 2.5”/6.4 cm for the 30“ & 36” Hallman models. Front edge of cooktop to front edge of vertical face of cabinets – 1.5”/3.8 cm for the 24” model and 2”/5.1 cm for the 30” & 36” Hallman models. Left side to edge of cooktop: 36”/91.4 cm.
-
Page 14: Alignments And Adjustments
ALIGNMENTS AND ADJUSTMENTS Installation It is the responsibility of the installer to make certain that the cooktop is properly adjusted at the time of installation. Situations caused by improper adjustments or improper installation are not covered under the warranty. Any expenses incurred due to such situations will not be paid by the manufacturer of the appliance. - Page 15 B – depth of C – depth of D – Width of E – To front of cooktop cooktop cooktop base cooktop base countertop HGC2402ST 60 cm/23.6” 51 cm/20.1” 46.3 cm/1 8.2” 54.8 cm/21.6” 1.5”/3.8 cm 76 cm/30” 51 cm/20.1”...
- Page 16 Maximum depth of cabinets installed above the cooking top to be no more 13 inches deep. Seal the cut surfaces with a suitable heat-resistant sealant to avoid swelling caused by moisture. If during installation the seal around the frame does not sit flush within the countertop at the corners, the corner radius (maximum 3/16"...
- Page 17 Tighten the cooktop to the underside of the counter until secure. Install all burners and burner caps Install all grates. Please be aware of the grate positioning on some models - the holes in the grates must align over top of the burners. Connecting gas to cooktop This cooktop is designed to operate at a pressure of 4”...
- Page 18 A flexible metal appliance connector used to connect the cooktop to the gas supply line must have an internal diameter of 5/8”/1.6 cm and should be 3 feet/91.4 cm max. in length for easy installation. In Canada, flexible connectors should be single wall metal connectors less than 6 feet/182.9 cm in length.
-
Page 19: Operation Of Cooktop
OPERATION OF COOKTOP Top Burner Operation Note: When boiling food, the highest temperature that can be reached is the boiling point. When the liquid starts to boil, decrease the size of the flame until you reach the minimum flame that will hold the boil. This will save gas. It will also lessen the possibility of burning food or boil overs, and help to keep your kitchen cooler. - Page 20 To Operate the Surface Burners Knob Symbols High Flame Low Flame Ignition Burner Position • Lighting the burners 1. To obtain a flame more easily, light the burner before placing cookware on the burner grate. 2. Decide which burner you’re igniting first using the screened diagram below each burner knob.
-
Page 21: Cleaning The Cooktop
and “flame cap” are correctly positioned and that there are no spider webs in the burner cavity. CLEANING THE COOKTOP Always keep cleaning materials and chemicals in a safe place and away from children. Know what you are using. Make sure all parts of the cooktop are COOL before cleaning. Be sure to replace the parts correctly. -
Page 22: How To Install A Manual Valve
HOW TO INSTALL A MANUAL VALVE A maual valve shall be installed in an accessible location in the gas line external to the appliance for the purpose of turning on or shutting off gas to the appliance. -
Page 23: Gas Cooktop Conversion And Adjustment Guide
Gas Cooktop Conversion and Adjustment Guide The cooktop is set for use with Natural Gas (NG). The factory setting is indicated on the serial plate. When set for Liquefied Petroleum (LPG) operation, the pressure regulator will regulate the pressure to 11 inches water column. When set for NG Gas operation, the pressure regulator will regulate the gas to 4”... - Page 24 You may require a magnifying glass to see this stamping. See below for rating of orifice for each model Left Front Left Rear Middle/Center Right Front Right Rear HGC2402ST 0.96 mm 0.74 mm 1.25 mm 0.57 mm HGC3002ST 0.96 mm 0.74 mm...
- Page 25 12. Once all the orifices are installed, replace all burners and burner caps, then fire up the burners to check the minimum flame height. 13. Minimum flame height should be approx. ¼” tall. You will want a small minimum flame for simmering (especially on the small burners). There is a small adjustment screw located on the valve itself, the lid must be removed in order to make the adjustment.
- Page 26 1. Shut off gas leading to appliance. 2. Unplug any electrical connections if you are using the 110V option, usually located under the cooktop. 3. Locate convertible regulator under the cooktop, remove cap and pop out the pin that’s attached. 4.
- Page 27 9. You will need a 7mm wrench to remove the orifices. Each orifice can be accessed easily - the larger burner orifice is located on the burner wall. Orifice Locations 10. Remove all LPG orifices and place in a separate bag and store with your manual for future use.
- Page 28 shown below and make the adjustment. Turn the adjustment screw counter clockwise for a smaller flame and clockwise for a larger flame. Adjustment location 14. Replace the lid, burners, burner caps and grates and recheck the flame.
-
Page 29: Wiring Diagram
Wiring diagrams – all models HGC2402ST IGNITION SWITCHES PULSE Four BURNERS IGNITION LEADS 110V... - Page 30 HGC3002ST IGNITION SWITCHES MIDDLE PULSE FIVE BURNERS IGNITION LEADS 110V...
- Page 31 HGC3602ST IGNITION SWITCHES MIDDLE PULSE FIVE BURNERS IGNITION LEADS 110V...
-
Page 32: Parts Lists
Parts Lists – all models HGC2402ST - drawing... - Page 33 HGC3002ST - Drawing...
- Page 34 HGC3602ST - Drawing...
- Page 41 (“Carry in” warranty) Any part(s) replaced or repaired will be warranted only for the balance of the original year. Customer is responsible for labor. Ownership This Warranty is made only to the first purchaser (”original purchaser”) who acquires this cooktop for his/her own use and will be honored by Hallman Industries. and by the Seller. Purchaser must retain their original receipt as proof of purchase date. Warranty Conditions This warranty does not apply to any appliance that has been subjected to alterations, misuse, abuse (including damage by foreign agents or chemicals), accident, improper installation or service, delivery damage, or other than normal household use and service. This HALLMAN appliance must be serviced regularly as outlined in the Owners Manual. Neither Hallman Industries. nor the selling dealer will be liable for direct or indirect loss of foods caused by failure in operation. In case of damage, the owner must provide proof of purchase, Model, and Serial Number to the selling dealer or Hallman Industries. This warranty is LIMITED STRICTLY to the terms indicated herein, and no other expressed warranties or remedies thereunder shall be binding on Hallman. Purchaser’s Responsibilities The purchaser will be responsible for the costs of any service calls requested to demonstrate or confirm the proper operation of the appliance, the installation, or to correct malfunctions in the appearance created by the operation of the appliance in a manner not prescribed by or cautioned against in the use and care instructions. Model and Serial Number ...