Table of Contents
Advertisement
Quick Links
Item # 1005787585
Model # 30636
ASSEMBLY INSTRUCTIONS
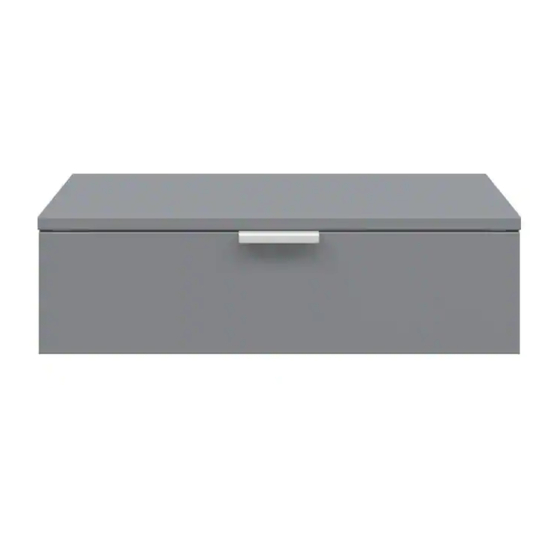
24 IN. GRAFTON MAKEUP UNIT
Questions, problems, missing parts?
Before returning to the store, call Glacier Bay Customer Service.
8 a.m. – 7 p.m., EST, Monday – Friday, 9 a.m. – 6 p.m., EST, Saturday
1- 855- HD GLACIER (1-855-434-5224)
HOMEDEPOT.COM/GLACIERBAY
THANK YOU
We appreciate the trust and confidence you have placed in Glacier Bay through the purchase of this makeup unit. We strive to continually
create quality products designed to enhance your home. Visit us online to see our full line of products available for your home improvement
needs. Thank you for choosing Glacier Bay!
Advertisement
Table of Contents

Related Manuals for Glacier bay 30636


Summary of Contents for Glacier bay 30636
- Page 1 THANK YOU We appreciate the trust and confidence you have placed in Glacier Bay through the purchase of this makeup unit. We strive to continually create quality products designed to enhance your home. Visit us online to see our full line of products available for your home improvement...
-
Page 2: Table Of Contents
Glacier Bay products are manufactured with superior quality standards and workmanship and are backed by our limited lifetime warranty. Glacier Bay products are warranted to the original consumer purchaser to be free of defects in materials or workmanship. We will replace FREE OF CHARGE any product or parts that proves defective. -
Page 3: California And Minnesota Residents
California and Minnesota Residents CALIFORNIA RESIDENTS WARNING THIS PRODUCT CAN EXPOSE YOU TO WOOD DUST WHICH IS KNOWN TO THE STATE OF CALIFORNIA TO CAUSE CANCER. GO TO WWW.P65WARNINGS.CA.GOV/PRODUCTS MINNESOTA RESIDENTS “IMPORTANT HEALTH NOTICE. SOME OF THE BUILDING MATERIALS USED IN THIS HOME (OR THESE BUILDING MATERIALS) EMIT FORMALDEHYDE. EYE, NOSE, AND THROAT IRRITATION, HEADACHE, NAUSEA AND A VARIETY OF ASTHMA-LIKE SYMPTOMS, INCLUDING SHORTNESS OF BREATH, HAVE BEEN REPORTED AS A RESULT OF FORMALDEHYDE EXPOSURE. -
Page 4: Pre-Assembly (Continued)
Pre-assembly (continued) PACKAGE CONTENTS CAUTION: This makeup unit not designed for individual wall hung unit and must be assemble along with vanity unit. Part Description Quantity Makeup unit (Bottom drawer) Suspension rail 574mm (required only for option-2) Handle 15mm (9/16in) handle screw... -
Page 5: Non-Package Contents
Pre-assembly (continued) NON-PACKAGE CONTENTS Item # 1005787537 25in Grafton vanity combo Model # 30635 (Not included in this pack, buy separately) Part Description Quantity Vanity base Vanity top Bumper Suspension rail 574mm Handle 15mm (9/16in) handle screw Item # 1005787557 24in Grafton frame Model # 30632 (Not included in this pack, buy separately) -
Page 6: Installation
Installation Option 1 Attaching the makeup unit □ Place the metal frame (G) on the floor with its pre-drilled holes facing upward. □ Attach the makeup unit (A) with metal frame by fastening the 30mm screws (H) into the pre-drilled holes in the makeup unit. - Page 7 Installation (continued) Securing the vanity to the wall □ Place the vanity (C) in the desired position taking into account the location of your plumbing. □ Ensure the vanity (C) is level front to back and at both sides. □ Secure the vanity (C) to the wall by inserting two #8 x 2 in.
- Page 8 Installation (continued) Option 2 Preparing the wall □ Determine the desired wall location for the cabinet. □ Determine desired height for top of cabinet and mark a horizontal line on the wall using a pencil. □ Use a level to ensure the suspension rail markings will be level before installing to the wall.
- Page 9 Installation (continued) Hanging the makeup unit ±15mm □ Lift the makeup unit (A) above the suspension rail (B) and ±7mm place it against the wall. □ Slide the makeup unit (A) to the left or right to the desired location. □...
- Page 10 Installation (continued) Attaching the vanities □ After hanging the makeup unit, bring the standalone vanity (option 1) nearest to the makeup unit (as shown). □ Align to the standalone vanity to makeup unit and connect them with three #4 x 25mm screws (not included). □...
- Page 11 Installation (continued) Option 3 Attaching the handle and makeup unit Attaching makeup unit □ Attach the handle (AA) using the 15mm screws (BB). □ Attach another makeup unit (A) to the metal frame by fastening the 30mm screws (H) into the pre-drilled holes □...
-
Page 12: Drawer Adjustment
Drawer Adjustment Drawer box side Drawer box side Under mount slide Drawer box bottom Drawer Drawer bracket bracket Drawer Drawer Drawer front front front Removing the drawer: Drawer adjustment: Re-installing the drawer: Open the drawer as far as possible. For drawer alignment move the drawer To install the drawer, open each drawer Push the bracket lever underneath the up and down adjustable to the desired... - Page 13 Questions, problems, missing parts? Before returning to the store, call Glacier Bay Customer Service. 8 a.m. – 7 p.m., EST, Monday – Friday, 9 a.m. – 6 p.m., EST, Saturday 1- 855- HD GLACIER (1-855-434-5224) HOMEDEPOT.COM/GLACIERBAY Retain this manual for future use.
Need help?
Do you have a question about the 30636 and is the answer not in the manual?
Questions and answers