Table of Contents
Advertisement
Quick Links
Thanks for purchasing this Walthers SceneMaster kit. All parts are styrene, so use compatible glue and paint to assemble
and finish your model. PLEASE NOTE: Parts are assembled in numerical sequence: #1 to #2, #1& 2 to #3 etc. With careful
assembly, several parts are positionable; parts marked * snap in place, but may be glued if desired. Please take a few
minutes to read these instructions and study the drawings. Individual parts are not numbered on sprues; use the diagram
below to identify parts during assembly.
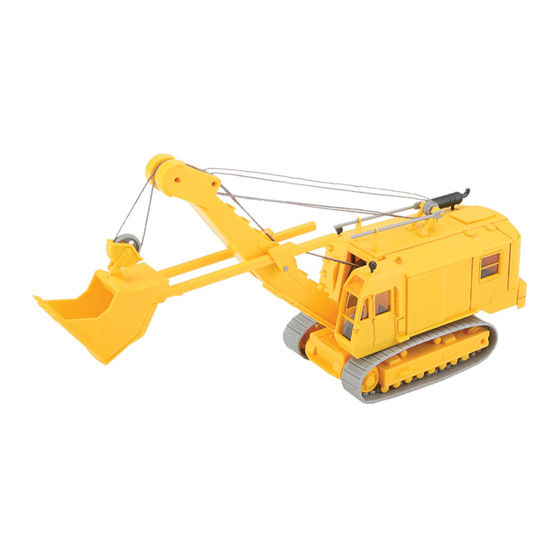
Tracing their origins to the first steam shovels of the 1800s, gasoline and later diesel-powered cable excavators were
standard heavy equipment well into the 1970s and beyond. Using a series of clutches, gears and chains, the operator
could engage winding drums to tighten or loosen wire ropes ("cables"), rotate the cab, or move the machine as needed.
Many were set up to work various attachments, including a shovel as depicted by this model. Sturdy crawler tracks allowed
for sure-footed off-road operation in a variety of settings ranging from construction projects to mines and quarries. For
additional products to complete your model, see your participating hobby dealer, check out the latest Walthers Model
Railroad Reference Book or visit us online at walthers.com.
3
1
874
27
44
46
54
54
45
44
61
60
15
56
53
58
© 2016 Wm. K. Walthers, Inc. Milwaukee, WI 53218 I-949-11001
870
4
5
7
872
50
2
875
64
28
877
55
52
57
CabLE EXCAVATOR
WITH BUCKET
871
14
37
41
65
878
19
17
24
21 22 20
34
18
43
29
23
25
26
47
16
48
30
32
HO Scale
949-11001
873
21
11
6
10
8
12
63
13
9
876
66
38
67
35
39
33
31
40
42
36
879
62
49
49
59
Advertisement
Table of Contents

Summary of Contents for Walthers SceneMaster 949-11001
- Page 1 949-11001 Thanks for purchasing this Walthers SceneMaster kit. All parts are styrene, so use compatible glue and paint to assemble and finish your model. PLEASE NOTE: Parts are assembled in numerical sequence: #1 to #2, #1& 2 to #3 etc. With careful assembly, several parts are positionable;...
- Page 2 Underframe Assembly 1) Glue Turntable (1) to Upper Frame (2) Do Not Glue and glue completed assembly to Lower Frame (3). 2) Track Frames - Make 2: Insert - do not glue - pins on Idlers* (2x 6; one each side) into openings on rear of Right (4) and Left (5) Track Frames.
- Page 3 Boom Assembly 1) Insert - do not glue - Small Cable Guide Pulley* (29) and End Pulley* (30) to openings at top of Boom (28). Glue Links (2x 31) to left and right of Boom as shown. 2) Insert - do not glue - Large Cable Guide Do Not Glue Pulley* (32) to openings in Boom.
- Page 4 4) Glue Arm Braces (2x 54) to inset area at front of Roof. Thread ends of Hangar Arms (2x 47) through openings in Arm Braces at front and over pins on outside of Hanger Braces at rear as shown and glue in place. 5) Glue Spotlight (52) to opening at front left and Muffler (53) to openings at left rear on Roof.
- Page 5 1) Insert Cab Glass (59) to Cab (60) and glue in place. Glue Cab Front (61) below glass as shown. Glue Spotlight (52), and Small Cab Glass (62) to Roof (63). Glue completed Roof to Cab and set aside for installation in step 3 below. START START Final Assembly...
Need help?
Do you have a question about the SceneMaster 949-11001 and is the answer not in the manual?
Questions and answers