Table of Contents
Advertisement
Quick Links
Advertisement
Table of Contents

Related Manuals for Alpine SOT882SLR-HH


Summary of Contents for Alpine SOT882SLR-HH
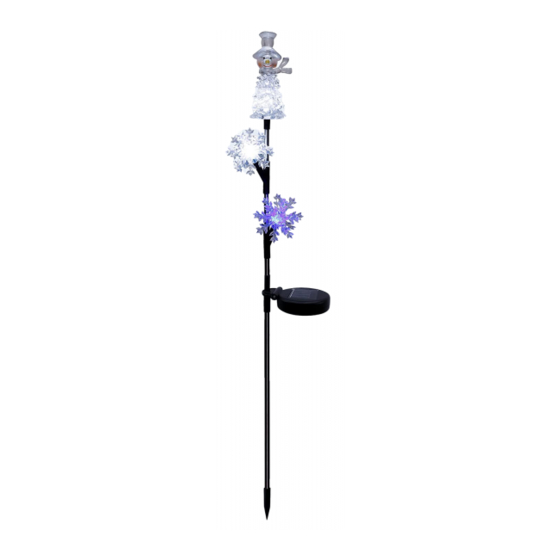
- Page 1 Owner’s Manual Item # SOT882SLR-HH Solar Snowman and Snowflakes Christmas Stake with LED Lights Have Questions or Issues? Need help with assembly? Contact us and we will resolve them within 12 hours. Support Hours: M-F 7:30–5:00 (U.S. Pacific Time) Call:...
-
Page 3: Table Of Contents
CONTENTS Contents ............1 What’s Included ..........2 Features ............3 Assembling & Using Your Product ....4 Charging with the Solar Panel ...... 6 Replacing & Disposing of Batteries ....6 Replacement Parts ........6 Warranty ............7 Notes ............8... -
Page 4: What's Included
WHAT’S INCLUDED Snowman Topper Snowflake Topper Top Stake Bottom Stake... -
Page 5: Features
FEATURES • Bright White and Blue LED • lights Solar powered with automatic • day and night sensor • Stainless steel stake for durability and weather resistance SPECIFICATIONS Battery Type ........ AA Ni-Cd 400mAh Dimensions ........6”L x 4”W x 33” H... -
Page 6: Assembling & Using Your Product
ASSEMBLING & USING YOUR PRODUCT Unpack all components carefully. Please check to ensure all parts have been removed from the packaging. 1. Attach the Snowman Topper to the top LED light of the Top Stake. Attach the 2 Snowflake Toppers to the next 2 LED lights. - Page 7 2. Insert the Bottom Stake into the bottom part of the Top Stake assembly. Flip open the solar panel and turn the ON/OFF switch to the ON position. 3. Your garden stake is now completely assembled. Insert it into the ground at an appropriate location and enjoy.
-
Page 8: Charging With The Solar Panel
CHARGING WITH THE SOLAR PANEL Your solar décor comes with a built-in rechargeable battery. Prior to using the decor for the first time, it is recommended to charge the battery fully for the first time. Turn the On/Off switch to the On position, then place your decor under direct sunlight or in a brightly lit room, so the decor can begin charging. -
Page 9: Warranty
LIMITED WARRANTY INFORMATION Thank you for choosing an Alpine product! We aim to please with our wide range of products including Fountains, Birdbaths, Statuary, Pond Supplies & More. All of our products are constructed from the highest quality materials. In the event that we have not achieved our usual standard of excellence, we will repair or replace, at our discretion, within the warranty period. -
Page 10: Notes
NOTES... - Page 12 Purchased your product online? We would really appreciate it if you can share your experience with others by reviewing our product on the website from which you purchased.
Need help?
Do you have a question about the SOT882SLR-HH and is the answer not in the manual?
Questions and answers