Table of Contents
Advertisement
Quick Links
FDW7CN-3
SView
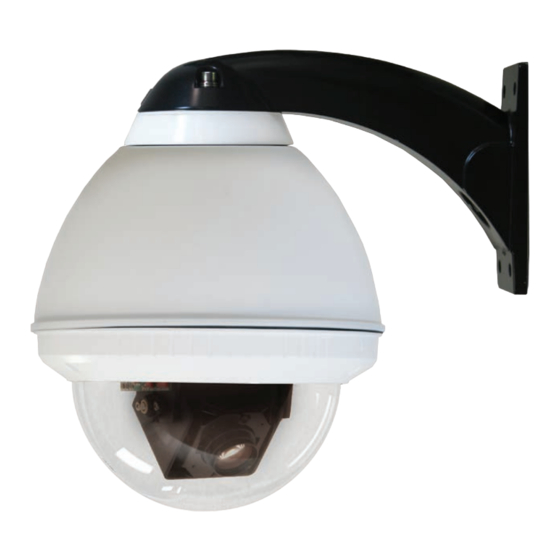
Outdoor / Indoor PTZ Fusion Dome Mounted Camera System
™
FDW7CN-3............... IP Network Ready 7" Outdoor FusionDome PTZ Camera System with 23x zoom Day / Night camera, wall mount, MPEG-4 / MJPEG video
IFDW7CN-3
compression, full D1. Clear dome, with 24Vac input, heater / blower (Outdoor only)
(Indoor)
FDP7CN-3................. IP Network Ready 7" Outdoor FusionDome PTZ Camera System with 23x zoom Day / Night camera, pendent mount, MPEG-4 / MJPEG
IFDP7CN-3
video compression, full D1. Clear dome, with 24Vac input, heater / blower (Outdoor only)
(Indoor)
FDW7CS-3............... (Analog Version)
IFDW7TS-3
7" Outdoor FusionDome PTZ Camera System with 23x zoom Day / Night camera, wall mount, MPEG-4 / MJPEG video
(Indoor)
compression, full D1. Clear dome, with 24Vac input, heater / blower (Outdoor only)
FDP7CS-3................. (Analog Version)
IFDP7CS-3
7" Outdoor FusionDome PTZ Camera System with 23x zoom Day / Night camera, pendent mount, MPEG-4 / MJPEG video compression,
(Indoor)
full D1. Clear dome, with 24Vac input, heater / blower (Outdoor only)
The unit is available in both tinted (T) and clear (C) Models
To be used with the 81-IN5409 Instruction Manual.
© 2013, Moog Inc. All Rights Reserved
Moog Inc.
Sensor and Surveillance Systems
3650 Woodhead Drive Northbrook, IL. USA 60062
+1.847.498.0700 Fax: +1.847.498.1258 www.moogS3.com
Installation and Operation Instructions
Before attempting to connect or operate this product, please
read these instructions completely.
81-IN5357 111113
Advertisement
Table of Contents

Subscribe to Our Youtube Channel
Related Manuals for Moog SView FDW7CN-3

Summary of Contents for Moog SView FDW7CN-3
- Page 1 The unit is available in both tinted (T) and clear (C) Models To be used with the 81-IN5409 Instruction Manual. Moog Inc. Sensor and Surveillance Systems 3650 Woodhead Drive Northbrook, IL. USA 60062 81-IN5357 111113 © 2013, Moog Inc. All Rights Reserved +1.847.498.0700 Fax: +1.847.498.1258 www.moogS3.com...
-
Page 2: Important Safeguards
IMPORTANT SAFEGUARDS SAFETY PRECAUTIONS Read these instructions. Keep these instructions. CAUTION Heed all warnings RISK OF ELECTRIC SHOCK DO NOT OPEN Follow all instructions. Do not use this apparatus near water. CAUTION: TO REDUCE THE RISK OF Clean only with damp cloth. ELECTRIC SHOCK, DO NOT REMOVE COVER ( OR BACK). -
Page 3: Product Warranty Registration
Register Your Products Online www.moogS3.com/technical-support/product-registration Moog values your patronage. We are solely committed to providing you with the highest quality products and superior customer service. With 3-Year and 5-Year warranties (depending on the product purchased) we stand behind every product we sell. - Page 4 ™ During the labor warranty period, to repair the Product, Purchaser will either return the defective product, freight prepaid, or deliver it to Manufacturer at Moog Decatur Operations, 2525 Park Central Boulevard, Decatur, Georgia, 30035. The Product to be repaired is to be returned in either its original carton or a similar package affording an equal degree of protection with a RMA # (Return Materials Authorization number) displayed on the outer box or packing slip.
-
Page 5: Electrical Speci Cations
Contents of Box Electrical Speci cations FDW7CN-3 FDW7CS-3 FDP7CN-3 Power 24VAC FDP7CS-3 Class 2 Only * IFDW7CN-3 * IFDP7CN-3 24 VAC 80 Watts Accessories: Heater: 50 Watts, Blower: 2 Watt Camera Power: (See Camera Speci cations): 28 Watts Max Tools Required: .100”... - Page 6 WALL MOUNTING 4”-5” Trim incoming control & power wires to 4”- 5”, Bracket is designed for 45° conduit tting (If using the for either wall or pendent bracket. conduit). Run wire into bracket, secure to wall. • El soporte se diseña para la guarnición del conducto 45° (si usa el •...
- Page 7 Important Gasket Must be in place Align large arrows. To lock, turn clockwise. • Alinee las flechas grandes. • Para trabarse, dar vuelta a la derecha. • Pour fermer à clef, tourner dans le sens des aiguilles d'une montre. • Zu sich verriegeln, nach rechts drehen. •...
- Page 8 FOR PENDENT/ WALL MOUNTING 4”-5” Trim incoming control and power wires to 4-5” for Secure lanyard to lanyard clip. either wall or pendent bracket. • Ajuste los alambres entrantes del control y de la energía a • Asegure el acollador al clip del acollador. 4-5”...
- Page 9 Important Gasket Must be in place Align large arrows. To lock, turn clockwise. • Alinee las flechas grandes. • Para trabarse, dar vuelta a la derecha. • Alignez les grandes flèches. • Pour fermer à clef, tourner dans le sens des aiguilles d'une montre.
- Page 10 NETWORK: RJ45 24VAC POWER Camera Max 28 Watts Camera Orange Heater/Blower Yellow 52 Watts Heater/Blower Green Alarm 1 Blue Alarm 2 Violet Alarm 3 Gray White Common Make the appropriate male and female connections. Indoor model does not include pre-run cables. •...
- Page 11 CAPTIVE SCREW Remove Pan/Tilt from shipping carton. To secure in place, tighten captive screw. Install in base bracket in housing. • Para asegurar en lugar, apriete el tornillo prisionero. • Quite Pan/Tilt del cartón del envío. Instale en soporte bajo en la cubierta. •...
- Page 12 Loop the lanyard around the tab inside the Wipe the dome clean. housing. • Limpie la bóveda limpia. • Coloque el acollador alrededor de la lengüeta dentro de la cubierta. • Essuyez le dôme. • Faites une boucle la lanière autour de l'étiquette à l'intérieur du logement.
-
Page 13: Replacement Parts List
Replacement Parts List FDW7CN-3 FDW75 PART NUMBER DESCRIPTION FD7C CLEAR REPLACEMENT CAPSULE 1A FD7T TINTED REPLACEMENT CAPSULE RPFD7501 LOWER TRIM RING RPFD703 DOME CLAMPING RING RPNET02 NETWORK HGS POWER SUPPLY RPFD072 24V HEATER 5A RPFD072/12 12V HEATER (12VDC MODELS ONLY) RPFD080 BLOWER RP3510...
Need help?
Do you have a question about the SView FDW7CN-3 and is the answer not in the manual?
Questions and answers