Table of Contents
Advertisement
Quick Links
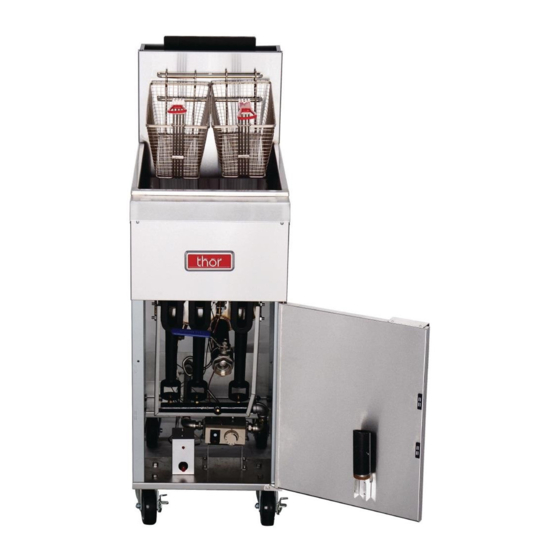
Thor Gas Fryer
Technical Service Manual
Model: GH110-P , GH110-N,GH111-P,GH111-N
IMPORTANT FOR FUTURE REFERENCE
Please complete this information and retain this manual for the life of the equipment. For Warranty
Service and/or parts, this information is required.
Model Number
WARNING: For your safety, do not store or use gasoline or other flammable vapors or
liquids in the vicinity of this or any other appliances. Keep the area free and clear of
combustible.
WARNING:Improper installation, adjustment, alteration, service or maintenance can
cause property damage, injury, or death. Read the installation operating and
maintenance instructions thoroughly before installing, or servicing this equipment.
WARNING:Instructions must be posted in a prominent location. All safety
precautions must be taken in the event the user smells gas. Safety information can be
obtained from your local gas supplier.
Serial Number
15 Badgally Road, Campbelltown
NSW 2560
Date Purchased
Advertisement
Table of Contents

Related Manuals for THOR GH110-P

Summary of Contents for THOR GH110-P
- Page 1 Thor Gas Fryer Technical Service Manual Model: GH110-P , GH110-N,GH111-P,GH111-N IMPORTANT FOR FUTURE REFERENCE Please complete this information and retain this manual for the life of the equipment. For Warranty Service and/or parts, this information is required. Model Number Serial Number...
-
Page 2: Table Of Contents
Table of Contents TABLE OF CONTENTS PAGE Introduction Specification Dimensions Installation 4 ~ 6 Operation 7 ~ 9 Cleaning and Maintenance 10 ~ 11 Troubleshooting 12 ~ 25 Conversion from NG to LPG and vice-versa Explosion Drawing Parts List... -
Page 3: Introduction
Introduction We are confident that you will be delighted with your Thor Gas Fryer, and it will become a most valued appliance in your commercial kitchen. To ensure you receive the utmost benefit from your new Gas Fryer, there are two important things you can do. -
Page 4: Specification
The following is included: Gas Fryer Feet Instruction Manual Gas Supply Requirements Natural Gas Propane GH110-N GH111-N GH110-P GH111-P Single burner Heat 32.5 MJ 32.5 MJ 32.5 MJ 32.5 MJ Input Heat Total 65 MJ 97.5 MJ 65 MJ 97.5 MJ... -
Page 5: Dimensions
Dimensions GH110-P, GH110-N, GH111-P, GH111-N... -
Page 6: Installation 4
Installation Installation Requirements NOTE: • It is most important that this appliance is installed correctly and that operation is correct before use. Installation shall comply with local gas, health and safety requirements. • This appliance shall be installed with sufficient ventilation to prevent the occurrence of unacceptable concentrations of substances harmful to health. - Page 7 2,000 feet altitude and that information was not specified when ordered, contact the appropriate authorized Thor Service Representative or the Thor Service Department. Failure to install with proper orifice sizing will result in poor performance and may void the warranty.
- Page 8 Installation CAUTION THIS APPLIANCE AND ITS INDIVIDUAL COMBINATION GAS VALVE MUST BE DISCONNECTED FROM THE GAS SUPPLY PIPING SYSTEM DURING ANY PRESSURE TESTING OF THAT SYSTEM AT TEST PRESSURES IN EXCESS OF 14”WC (1/2 PSIG or 3.45 kPa). If the incoming gas pressure is in excess of 14"WC (1/2PSI, 3.45 kPa), a proper step-down regulator will be required.
-
Page 9: Operation 7
Operation Operation Guide CAUTION • THIS APPLIANCE IS FOR PROFESSIONAL USE AND IS ONLY TO BE USED BY QUALIFIED PEOPLE. • ONLY QUALIFIED SERVICE PERSONS ARE TO CARRY OUT INSTALLATION, SERVICING OR GAS CONVERSION OPERATIONS. • COMPONENTS HAVING ADJUSTMENTS PROTECTED (E.G. PAINT SEALED) BY THE MANUFACTURER SHOULD NOT BE ADJUSTED BY THE USER/OPERATOR. - Page 10 Operation Operation Guide Open the burner compartment door and do the following: 1. Turn thermostat to “0” 2. Press down the ignition button, turn the thermostat counterclockwise to the “0” position (shown), and continue to press the knob down. Ignition Button Shut-down Button Thermostat...
- Page 11 Operation High Limit Control Thor Fryers are equipped with a secondary heat control that prevents the oil temperature from rising above 195°C/450°F. (Because of the accuracy tolerance of the sensor, the oil temperature may reach as high as 200°C/475°F.) In the event the fryer shuts down due to this condition, the oil must be cooled to below 185°C/400°F before the pilot burner can be re-ignited.
-
Page 12: Cleaning And Maintenance
Cleaning and Maintenance Thor equipment is constructed with the best quality materials and is designed to provide durable service when properly maintained. To expect the best performance, your equipment must be maintained in good condition and cleaned daily. Naturally, the frequency and extent of cleaning depends on the amount and degree of usage. - Page 13 Cleaning and Maintenance MONTHLY CLEANING 1. Perform the Weekly Cleaning procedure (see previous section). 2. Clean around burner and orifices if lint has accumulated. 3. Visually check that burner carry-over ports are unobstructed. CLEANING STAINLESS STEEL SURFACES To remove normal dirt, grease and product residue from stainless steel use ordinary soap and water (with or without detergent) applied with a sponge or cloth.
-
Page 14: Troubleshooting 12
Service (For Authorized Service Technician Only) NOTICE Warranty will be void and the manufacturer is relieved of all liability if: Service work is performed by other than a qualified technician OR Other than approved Thor replacement parts are installed. WARNING Adjustments and service work may be performed only by a qualified technician who is experienced in, and knowledgeable with, the operation of commercial gas cooking equipment. - Page 15 Trouble shooting GENERAL INFORMATION BURNING SPEED: The velocity at which flame travels through an air-gas mixture. Burning speeds vary with types of gases, and the amount of air mixed with the gas. This air to gas ratio is very important in that it is directly related to flame stability.
- Page 16 Trouble shooting BURNER PROBLEMS LIFTING BURNER FLAMES: Excessive primary air can cause flames to lift and blow off the burner ports which can be noisy as well as inefficient. More importantly however is the production of dangerous carbon monoxide under this condition.
- Page 17 Trouble shooting BURNER PROBLEMS– cont’d. FLOATING FLAMES: The difference between floating flames and lifting (or blowing) flames should be clearly understood. Both conditions are undesirable, but the causes and corrective steps are different. Floating flames are lazy looking. They do not have well defined cones, and appear to be “reaching” for the air. They are long, ill- defined, quite flames which roll around in the combustion chamber sometimes completely off the ports.
- Page 18 Trouble shooting Fault Possible Cause Remedy No gas supply or gas isolation Ensure gas isolation valve is turned on, and Pilot won’t light. valve is OFF. that gas tanks are not empty. Pilot injector is clogged or partially Check the pilot injector if clogged or blocked.
- Page 19 Trouble shooting NOTE: Vibrations or shock caused by shaking or pounding baskets on top surface or by slamming door may cause Hi-Limit Control Switch to open. If this condition persists, additional cushioning may be added to the rubber grommets supporting this control to absorb these shocks. Wiring Diagram...
- Page 20 Trouble shooting PILOT TROUBLE SHOOTING CHECKING & CLEANING OF THE ODS INJECTOR: PILOT IGNITER BURNER 1. Visually check the orifice of the pilot injector if clogged, damaged or blocked. If it cannot MOUNTING SCREW OF FDS be checked visually, try to blow air in the injector and check if there is air coming out of the orifice.
- Page 21 Trouble shooting PILOT TROUBLE SHOOTING PILOT TUBE REMOVAL: 1. Shutdown the fryer. Follow the complete shutdown procedure. 2. Shut-off the main isolation valve and follow the lock-out/tag-out procedure. 3. Let the fryer cool down for a few minutes before starting your work. 4.
- Page 22 Trouble shooting PILOT TROUBLE SHOOTING FLAME DEVICE SYSTEM (FDS) REMOVAL: 1. Shutdown the fryer. Follow the complete shutdown procedure. 2. Shut-off the main isolation valve and follow the lock-out/tag-out procedure. 3. Let the fryer cool down for a few minutes before starting your work.
- Page 23 Trouble shooting BURNER TROUBLE SHOOTING BURNER REMOVAL: 1. Shutdown the fryer. Follow the complete shutdown procedure. 2. Shut-off the main isolation valve and follow the lock-out/tag-out procedure. 3. Let the fryer cool down for a few minutes before starting your work. 4.
- Page 24 Trouble shooting BURNER TROUBLE SHOOTING PILOT TUBE COMBINATION VALVE REMOVAL: 1. Shutdown the fryer. Follow the complete shutdown procedure. 2. Shut-off the main isolation valve and follow the lock-out/tag-out procedure. 3. Let the fryer cool down for a few minutes before starting your work.
- Page 25 Trouble shooting BURNER TROUBLE SHOOTING HIGH TEMPERATURE PROTECTOR REMOVAL: 1. Shutdown the fryer. Follow the complete shutdown procedure. 2. Shut-off the main isolation valve and follow the lock-out/tag-out procedure. 3. Let the fryer cool down for a few minutes before starting your work. 4.
- Page 26 Trouble shooting BURNER TROUBLE SHOOTING PIEZO IGNITER REMOVAL: 1. Shutdown the fryer. Follow the complete shutdown procedure. 2. Shut-off the main isolation valve and follow the lock-out/tag-out procedure. 3. Let the fryer cool down for a few minutes before starting your work. 4.
-
Page 27: Conversion From Ng To Lpg And Vice-Versa
Trouble Shooting CONVERTING FROM LPG TO NG AND VICE-VERSA: CONVERTER 1. Shutdown the fryer. Follow the complete COVER shutdown procedure. 2. Shut-off the main isolation valve and follow the lock-out/tag-out procedure. 3. Remove the gas regulator. 4. Remove the converter cover from the regulator. Use a 22mm spanner. -
Page 28: Explosion Drawing
Explosion drawing GH110-P, GH110-N, GH111-P, GH111-N... -
Page 29: Parts List
Spare Parts List DESCRIPTION MODEL CODE GH110-P / GH110-N Drain Extension 01.02.1005325 GH111-P / GH111-N GH110-P / GH110-N Combination Valve 01.20.1068561 GH111-P / GH111-N GH110-P / GH110-N Valve, Ball 01.20.1068560 GH111-P / GH111-N GH110-P / GH110-N Burner 01.03.1015095 GH111-P / GH111-N...
Need help?
Do you have a question about the GH110-P and is the answer not in the manual?
Questions and answers