
Summary of Contents for HURTLE HURTRD18
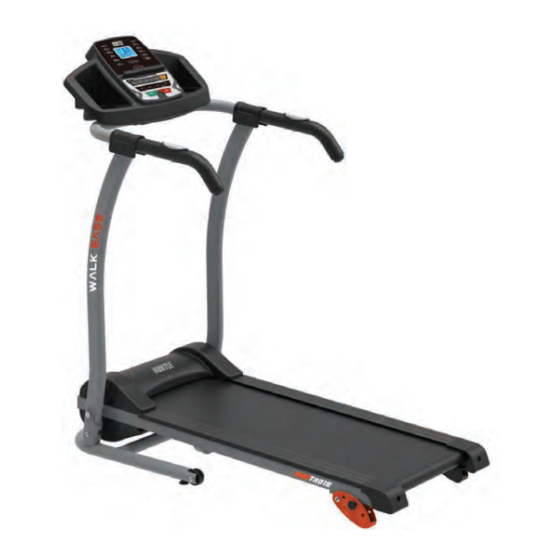
- Page 1 HURTRD18 Smart Digital Treadmill with Wireless BT App Sync, Manual Incline Treadmill Adjustment, Fold-Away Style...
-
Page 2: Important Safety Precautions
IMPORTANT: Read all instructions carefully before using this product. Retain this owner’s manual for future reference. The speci cations of this product may vary from this photo and are subject to change without prior notice. IMPORTANT SAFETY PRECAUTIONS DANGER: To reduce the risk of electric shock, always unplug the treadmill from the electrical outlet immediately after using and before cleaning, assembling, or servicing the treadmill. - Page 3 • Keep dry - do not operate in a wet or moist condition. • The motor cover can become hot while the treadmill is in use. Do not place the treadmill on a blanket or other ammable surface as this can create a re hazard. •...
- Page 4 • Before using the treadmill, check that the belt is aligned and centered on the running deck and all visible fasteners on the treadmill are su ciently tightened and secure. • Children shall not play with the appliance. • Cleaning and user maintenance shall not be made by children without supervision.
- Page 5 ASSEMBLY INSTRUCTIONS 5 easy steps to assemble your treadmill then you're ready to workout. Step 1 It is recommended to have a second person assist with this step. One person should hold the Left/Right Handlebar Support Tubes (3, 4) in place while the other person tightens the bolts.
- Page 6 Step 2 Connect the cable that comes from the Computer Console (54) to the Main Control Cable (6) that comes from the Right Handl ebar Support Tube (4). Slide the Handlebar (61) onto the both Left/Right Handlebar Support Tubes (3, 4). Secure the Handlebar (61) onto the both Left/Right Handlebar Support Tubes (3, 4) with four M8x55 Hexagon Socket Oval Head Bolts (60) and four M8 Curve Washers (67).
-
Page 7: Incline Adjustment
Step 4 A. Remove one Flat Head Phillips Screw from both sides of the Frame. Attach the Rear Left Cover onto the left side of the Frame. Align the holes and secure the Rear Left Cover using the one Flat Head Phillips Screws , that were previously removed by Allen Wrench. -
Page 8: Folding / Unfolding The Treadmill
TRAINING IN PRE SET PROGRAM MODE P01 P12 : The computer o ers 12 pre-set programs (P01-P12). You may select one of the pre-set training programs in STOP mode before training. Press the PROG (PROGRAM) button on the computer console to select one of the training programs. The split window of TIME begins to blink. - Page 9 Kick to unfold LUBRICATION Lubricating under the running belt will ensure superior performance and extend its life expectancy. After the rst 25 hours of use (or 2-3 months) apply some lubricant, and repeat for every following 50 hours of use (or 5-8 months). How to check running belt for proper lubrication •...
-
Page 10: Operating The Computer
OPERATING THE COMPUTER Before beginning a workout session ensure that the Safety Key is properly placed onto the Computer Console and the Safety Clip is securely attached to an article of your clothing. NOTE: Always stand on the side rails when you start the treadmill, never start the treadmill while you are standing on the running belt. -
Page 11: Display Functions
FUNCTION BUTTONS START: Press the START button to start training on di erent training mode. STOP: Press the STOP button to stop training on di erent training mode. PROG (PROGRAM): Press the PROG button to select the pre-set training program (P01-P12) mode before training. - Page 12 moving. The running belt starts moving with an initial speed of 0.6 MPH. You may press the SPEED or SPEED button on the computer console or handlebar to increase or decrease the running speed during exercise. Distance starts counting up. CAL.
-
Page 13: Troubleshooting Guide
CARE, MAINTENANCE & TROUBLESHOOTING GUIDE WARNING: To prevent electrical shock, please turn o and unplug the treadmill before cleaning or performing routine maintenance. WARNING: Always check the wear and tear components like spring knob and running belt to prevent injury. CLEANING After each exercise, ensure that the unit is wiped down and any sweat is removed from the unit. -
Page 14: Emergency Stop
EMERGENCY STOP SAFETY TETHER KEY Before beginning a workout session ensure that the Safety Key is properly placed onto the Computer Console and the Safety Clip is securely attached to an article of your clothing. If you fall the clip will pull out the SAFETY KEY from the Computer Console and the running belt will stop immediately for emergency stop, helping to prevent injury. -
Page 15: Warm Up And Cool Down Routine
WARM UP AND COOL DOWN ROUTINE The WARM-UP is an important part of any workout. The purpose of warming up is to prepare your body for exercise and to minimize injuries. Warm up for two to ve minutes before aerobic exercising. It should begin every session to prepare your body for more strenuous exercise by heating up and stretching your muscles, increasing your circulation and pulse rate, and delivering more oxygen to your muscles. -
Page 16: Inner Thigh Stretch
QUADRICEPS STRETCH With one hand against a wall for balance, reach behind you and pull your right foot up. Bring your heel as close to your buttocks as possible. Hold for 15 counts and repeat with left foot. INNER THIGH STRETCH Sit with the soles of your feet together and your knees pointing outward. - Page 17 Features: • Smart Digital Treadmill Design • Get Connected with the ‘FitShow’ App • Pairs to Your Device via Wireless BT • Running & Training Data Statistics Readout • Built-in Hand Grip Sensors for BPM Pulse Monitoring • Large LCD Digital Display Screen with Touch Button Controls •...
- Page 18 Questions? Issues? We are here to help! Phone: (1) 718-535-1800 Email: cs@hurtleusa.com...
Need help?
Do you have a question about the HURTRD18 and is the answer not in the manual?
Questions and answers