Table of Contents
Advertisement
Infoblox Installation Guide
For the Infoblox-550-A, -1050-A, -1550-A, and -1552-A Appliances
Contents
Introduction . . . . . . . . . . . . . . . . . . . . . . . . . . . . . . . . . . . . . . . . . . . . . . . . . . . . . . . . . . . . . . . . . . 3
Product Overview . . . . . . . . . . . . . . . . . . . . . . . . . . . . . . . . . . . . . . . . . . . . . . . . . . . . . . . . . . . . . . . . . . . . . . . . . . . . . . .3
Hardware Components. . . . . . . . . . . . . . . . . . . . . . . . . . . . . . . . . . . . . . . . . . . . . . . . . . . . . . . . . . . . . . . . . . . . . . . . . . .4
System, Environmental, and Power Specifications . . . . . . . . . . . . . . . . . . . . . . . . . . . . . . . . . . . . . . . . . . . . . . . . . . . .9
Installing an Appliance . . . . . . . . . . . . . . . . . . . . . . . . . . . . . . . . . . . . . . . . . . . . . . . . . . . . . . . . 11
Rack Mounting . . . . . . . . . . . . . . . . . . . . . . . . . . . . . . . . . . . . . . . . . . . . . . . . . . . . . . . . . . . . . . . . . . . . . . . . . . . . . . . 11
Powering the Appliance . . . . . . . . . . . . . . . . . . . . . . . . . . . . . . . . . . . . . . . . . . . . . . . . . . . . . . . . . . . . . . . . . . . . . . . . 11
Cabling the Appliance to a Network . . . . . . . . . . . . . . . . . . . . . . . . . . . . . . . . . . . . . . . . . . . . . . . . . . . . . . . . . . . . . . 12
Changing Power Supplies (Infoblox-1552-A) . . . . . . . . . . . . . . . . . . . . . . . . . . . . . . . . . . . . . . . . . . . . . . . . . . . . . . . 13
Accessing the Appliance . . . . . . . . . . . . . . . . . . . . . . . . . . . . . . . . . . . . . . . . . . . . . . . . . . . . . . . 15
Connecting to the Appliance . . . . . . . . . . . . . . . . . . . . . . . . . . . . . . . . . . . . . . . . . . . . . . . . . . . . . . . . . . . . . . . . . . . . 16
Specifying Appliance Settings. . . . . . . . . . . . . . . . . . . . . . . . . . . . . . . . . . . . . . . . . . . . . . . . . . . . . . . . . . . . . . . . . . . 17
Infoblox GUI . . . . . . . . . . . . . . . . . . . . . . . . . . . . . . . . . . . . . . . . . . . . . . . . . . . . . . . . . . . . . . . . . . . . . . . . . . . . . . . . . 19
Infoblox CLI . . . . . . . . . . . . . . . . . . . . . . . . . . . . . . . . . . . . . . . . . . . . . . . . . . . . . . . . . . . . . . . . . . . . . . . . . . . . . . . . . . 20
Copyright Statements
© 2010, Infoblox Inc.- All rights reserved.
The contents of this document may not be copied or duplicated in any form, in whole or in part, without the prior
written permission of Infoblox, Inc.
The information in this document is subject to change without notice. Infoblox, Inc. shall not be liable for any
damages resulting from technical errors or omissions which may be present in this document, or from use of this
document.
This document is an unpublished work protected by the United States copyright laws and is proprietary to Infoblox,
Inc. Disclosure, copying, reproduction, merger, translation, modification, enhancement, or use of this document by
anyone other than authorized employees, authorized users, or licensees of Infoblox, Inc. without the prior written
consent of Infoblox, Inc. is prohibited.
For Open Source Copyright information, see Open Source Copyright and License Statements in the Infoblox
Administrator Guide.
Trademark Statements
Infoblox, the Infoblox logo, Grid, NIOS, bloxTools, NetMRI and PortIQ are trademarks or registered trademarks of
Infoblox Inc.
All other trademarked names used herein are the properties of their respective owners and are used for
identification purposes only.
1
Advertisement
Table of Contents

Related Manuals for Infoblox Infoblox-550-A


Summary of Contents for Infoblox Infoblox-550-A
-
Page 1: Table Of Contents
Changing Power Supplies (Infoblox-1552-A) ........ - Page 2 Contents Warranty Information Your purchase includes a 90-day software warranty and a one year limited warranty on the Infoblox appliance, plus an Infoblox Warranty Support Plan and Technical Support. For more information about Infoblox Warranty information, refer to the Infoblox website, or contact Infoblox Technical Support.
-
Page 3: Introduction
Introduction This guide provides an overview of Infoblox-550-A, -1050-A, -1550-A, and -1552-A network appliances that ship with NIOS 5.1r1-4 and later, and explains how to install and configure them. For information about the compatible software releases, refer to the Knowledge Base (KB) article 13272 for details. For the most current version of the KB article, visit http://www.infoblox.com/en/support/support-center-login.html. -
Page 4: Hardware Components
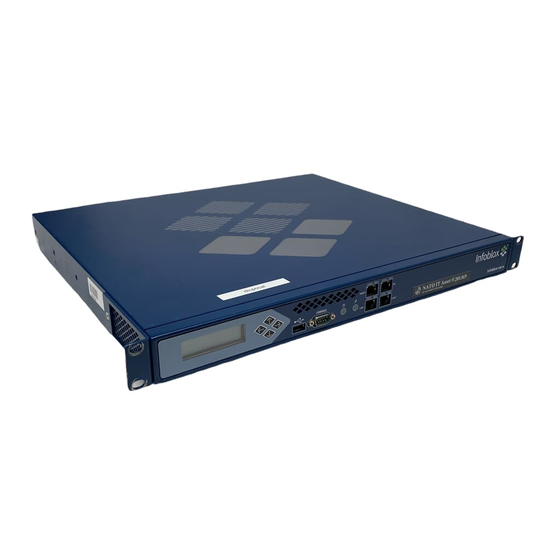
Introduction Hardware Components Infoblox-550-A, -1050-A, -1550-A, and -1552-A appliances are 1-U platforms that you can easily mount in a standard equipment rack using the mounting brackets and bolts that ship with each appliance. The front panel components include the LCD (liquid crystal display) panel and navigation buttons, communication ports, and indicator lights. - Page 5 An LED that glows green when there is power to the appliance. When it is dark, the appliance is not receiving power. For the Infoblox-1552-A, the power indicator on the front panel is green if at least one power supply has power and is dark if neither power supply has power.
- Page 6 EIA232 standard. To make a serial connection from your management system to the console port, use the RJ-45 rollover cable and two female RJ-45-to-female DB-9 adapters that ship with the appliance. The RJ-45 pin assignments follow IEEE 802.3 specifications. All Infoblox Ethernet ports are auto-sensing and automatically adjust to standard straight-through and cross-over ethernet cables.
- Page 7 Receive - BI_DB- Orange Green Infoblox appliance) (not used) BI_DD+ White/Brown White/Brown (not used) BI_DD- Brown Brown Legend: BI_D = bidirectional; A, B, C, D = wire pairings For the Infoblox-550-A, -1050-A, -1550-A, and -1552-A Appliances...
- Page 8 Figure 5 Infoblox Appliances, Rear View Infoblox-550-A, -1050-A, and -1550-A Power Outlet On/Off Model Number Vent Switch Serial Number Note: The label with the model and serial numbers is on the underside of the Infoblox-1552-A. Infoblox-1552-A Power On/Off Power Power Switch Vent...
-
Page 9: System, Environmental, And Power Specifications
Dimensions: — Infoblox-550-A, -1050-A, and -1550-A: 1.75” H x 17.5” W x 15” D (4.45 cms H x 43.82 cms W x 38.1 cms) — Infoblox-1552-A: 1.75” H x 17.5” W x 21.5” D (4.45 cms H x 43.82 cms W x 55 cms) —... - Page 10 10A, 125V 70° C 70° C BLACK-ICC Australia RVV 300/500 3C X IEC 320 C13/ 10A, 250V 70° C New Zealand 1.00mmSQ GB2099.1 GB1002 India 1.0/3 HO5VVF3 IEC-320 C-13/BS 10A, 250V 70° C South Africa 70° C 546SABS Infoblox Installation Guide...
-
Page 11: Installing An Appliance
Use the power cable that ships with the Infoblox appliance to connect it to a power source. Make sure that the power switch on the Infoblox-550-A, -1050-A, and -1550-A is turned off. For the Infoblox-1552-A, make sure that both power switches are off. -
Page 12: Cabling The Appliance To A Network
Disable other dynamic and proprietary protocols that might interrupt the forwarding of packets Use the Infoblox GUI to access the Infoblox appliance from a management system. Through the GUI, you can set up and administer the appliance. For management system requirements and access instructions, see Accessing the Appliance on page 15. -
Page 13: Changing Power Supplies (Infoblox-1552-A)
Although the Infoblox-1552-A can run with only one power supply, it is advisable to install two. This practice minimizes the chance of system failure due to an individual power supply failure. - Page 14 Installing an Appliance Infoblox Installation Guide...
-
Page 15: Accessing The Appliance
Accessing the Appliance The management system is the computer from which you configure and monitor the Infoblox appliance. You can access the appliance from the management system remotely across an Ethernet network or directly through a serial cable. After completing the steps in... -
Page 16: Connecting To The Appliance
You can disable LCD input functionality. To disable the LCD, refer to the NIOS Administrator Guide. Console Port The Infoblox appliance has a male DB-9 console port on the front panel. You can log in to the appliance through this port and specify initial network settings using the Infoblox CLI. -
Page 17: Specifying Appliance Settings
Specifying Appliance Settings Specifying Appliance Settings When you make the initial HTTPS connection to the Infoblox appliance, you see the Setup Wizard, which guides you through the basic deployment of the appliance on your network. You can deploy an appliance individually or in an HA (high availability) pair, for hardware redundancy. A single appliance or an HA pair without a Grid license runs independently from a grid. - Page 18 Local Date, Time and Time Zone NTP Server IP Address On the last screen of the wizard, click Finish. The Infoblox GUI application restarts. If you configured an HA pair, use the VIP address when you make an HTTPS connection to the HA pair.
-
Page 19: Infoblox Gui
Infoblox GUI Infoblox GUI You can view data and configuration settings and make configuration changes through the Infoblox GUI. When an Infoblox appliance functions as an independent appliance, you launch System Manager to access the Infoblox GUI. When the appliance is in a grid, you log in to the grid master and launch Grid Manager. -
Page 20: Infoblox Cli
The Infoblox CLI allows you to configure and monitor the appliance using a small set of Infoblox commands. There are some tasks, such as resetting the appliance, that you can only do through the CLI. You can access the Infoblox CLI through a direct console connection from your management system to the Infoblox appliance.
Need help?
Do you have a question about the Infoblox-550-A and is the answer not in the manual?
Questions and answers