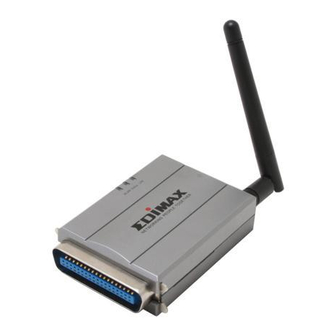
Edimax PS-1206P Quick Installation Manual
Wireless / fast ethernet print server series
Hide thumbs
Also See for PS-1206P:
- User manual (159 pages) ,
- Compatible list (9 pages) ,
- Specifications (2 pages)
Summary of Contents for Edimax PS-1206P
-
Page 1: Quick Installation Guide
Quick Installation Guide Version 1.1 January. 2006... - Page 2 Č Č ý Anglického průvodce rychlou instalací naleznete ý na přiloženém CD s ovladači Finden Sie bitte das englische QIG beiliegend in der Treiber CD (German) ñ ñ Incluido en el CD el QIG en Ingles. Veuillez trouver l’anglais QIG ci-joint dans le ç...
-
Page 3: Product Introduction
1.1 Product Introduction Thank you for purchasing and using our print server. This print server allows your printer to become a shared device on the network. It offers printing flexibility and manageability on your Wired or Wireless Local Area Network with an absolute minimum setup and maintenance required. -
Page 4: Administrator Installation And Setup
Unpack the print server package and verify that all the items listed in the previous section are provided. Connect the print server to the printer you want to share on the network by standard USB or Parallel cable. - Page 5 Insert the CD shipped along with the print server into your CD- ROM drive. The Autorun.exe program should be executed automatically. If not, run Autorun.exe manually from CD-ROM drive’s root directory. The “Installation Manager” will be displayed on the screen as following.
- Page 6 Click “Next” to install the utilities in the default folder or click “Browse” to specify the destination folder where you would like to install the utilities. Select the components you want to install. It is highly recommended to install all provided components. Click “Next” to continue.
- Page 7 The system will start to install the utilities automatically. You have completed the installation phase and prepare to configure the Print Server. The “Choose Print Server” will list all Print Servers within the network. Select the Print Server you would like to configure and click “Next”.
- Page 8 NOTE 1: If this is the first time you configure the Print Server, the “Print Server Name” is the same as the “Device Name” printed at the rear side of the print server. NOTE 2: The list can only display the devices from the same manufacturer.
- Page 9 The configuration summary is displayed in the window. Now, you have completed the “Print Server Setup”. Click “Finish” and your system will add network port of the Print Server to your PC automatically. The Installation procedure is completed. Click “Finish”...
-
Page 10: Client Installation And Setup
Please follow the steps below to start installation. Insert the CD shipped along with the print server into your CD- ROM drive. The Autorun.exe program should be executed automatically. If not, run Autorun.exe manually from CD-ROM... - Page 11 The "Installation Manager" will be displayed on the screen as follows. Click “Client Utility”. The “Client Utilities” window will be displayed. Click “English Version”. Click “Next” to install the utilities in the default folder or click “Browse” to specify the destination folder where you would like to install the utilities.
- Page 12 Specify the program folder where the program icons will be added to, click “Next”. The system will start to install the utilities automatically. Now, the installation procedure is completed, you are ready to set up the client’s computer. All network ports of the Print Servers detected on the network will be added to your PC automatically, click “Continue”.
-
Page 13: Windows Add Printer Procedure
. After adding a “Network Port” of the print server to your PC by Administrator or Client Installation Program, you can follow the procedure described in next pages add printer to the Windows. 1.6 Windows Add Printer Procedure Step1. Click “Start”, choose “Settings” and select ... - Page 14 and make sure that “Automatically detect and install my Plug and Play printer” is not selected. Click “Next”. Step5. Choose the suitable “Print Server Network Port” which was created by the Administrator Installation or Client Installation process and click “Next”.
- Page 15 Step6. Select a suitable printer manufacturer and the printer model and click “Next”. If your printer is not in the list, click “Have Disk…” to install the driver of the printer. After installation, the printer model will be added to the list. Step7.
- Page 16 The information of the printer is displayed in the windows. Click “Finish”. Now you can start to print from your PC to the print server. NOTE: The Above “Add Printer” steps are running under Windows XP, the steps in other Operating Systems are...


Need help?
Do you have a question about the PS-1206P and is the answer not in the manual?
Questions and answers