Table of Contents
Advertisement
Quick Links
Advertisement
Table of Contents

Related Manuals for Kystar K2

Summary of Contents for Kystar K2
- Page 1 Visual switcher User manual Beijing Kystar Technology Co., Ltd.
- Page 2 Statement Thank you for using our products. Copyright of this manual belongs to our company , without our written permission , reproduction, transfer, distribution and storage of any part of this document in any form is strictly prohibited。The company reserves the right to modify and improve any product features described in this document without prior notice.
- Page 3 Safety instructions Power supply The normal working power of this equipment is 100 ~ 220V AC, please make sure to use this product within this voltage range. High voltage This device contains high voltage components. Non-professionals do not disassemble This equipment is not equipped with maintenance accessories for users to repair and use by themselves, please do not open the case for operation by yourself.
-
Page 4: Table Of Contents
Table of Contents 1 Product introduction....................1 2 Hardware introduction ....................1 2.1 Front panel......................2 2.2 Rear panel ......................5 2.3 Monitoring screen introduction ................5 3 Equipment ........................6 3.1 Main menu introduction ..................6 3.2 Layer information ....................14 3.3 Source information ..................... -
Page 5: Product Introduction
1 Product introduction K2 is a pinch-controlled video processor designed for small-pitch super-large screens. The device has built-in video playback, editing, and control functions, supports two 4K @ 60HZ DP inputs, has multiple monitoring modes, switching modes, complete backups, and is safe and reliable. The machine carries 9.6 million pixels, which meets the needs of most field applications. -
Page 6: Hardware Introduction
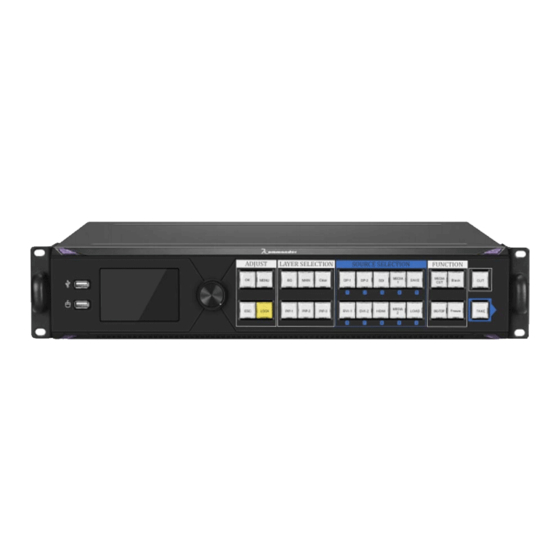
2 Hardware introduction 2.1 Front panel K2 software-visual interactive management platform The user can observe the current playback screen and all input signals in real time, and complete the layout operation of WYSIWYG; the layout and playback content can be visually edited in preview mode, and the playback is pushed after confirmation. - Page 7 ⑥ ① ③ ④ ⑤ ② Serial number Knob name Function introduction ① USB interface For U disk playback; mouse editing and control ② full color Friendly human-machine interface interaction, full information information screen monitoring Turn the knob In menu operation, used to select menu items and adjust parameters ADJUST Enter MENU/LOCK...
- Page 8 SOURCE SELECTION DVI1/1 DVI-1 input port selection key / recall preset 1, keyboard numeric ⑤ key 1. DVI2/2 DVI-2 input port selection key / recall preset 2, keyboard numeric key 2. DP-1/3 DP-1 input port selection key / recall preset 3, keyboard number key DP-2/4 DP-2 input port selection button / recall preset 4, keyboard number button 4.
-
Page 9: Rear Panel
2.2 Rear panel port Number of ports Resolution / Specification 输入端口 DVI× 2 1920 × 1080/60HZ and backward compatible. VESA DVI(24+1) Compliant Resolution DP1.2 DP× 2 3840 × 2160/60HZ and backward compatible. DP1.2 Compliant Resolution HDMI HDMI× 1 1920× 1080/60HZ and backward compatible, compatible with HDMI 1.3 and below SDI×... - Page 10 2.3 Touch screen interface introduction Serial number Function introduction ① Menu bar for debugging device stitching and other common functions ② Layer area, you can turn the layer on and off here ③ PVW display area, where the display content can be edited ④...
-
Page 11: Equipment
3 Equipment Use 3.1 Main menu introduction splicing mode The splicing mode function module contains 3 options: horizontal splicing, vertical splicing, and field splicing. Select the appropriate mode according to the distribution of the loading area of the sending card behind the LED screen. Horizontal splicing: The 4 output ports of the stitcher are arranged horizontally and stitched into a complete image. - Page 12 Screen parameters The screen parameter function module adjusts the load parameters of each of the 4 output ports on the back of the splicer according to the load of the sending card. The four parameters OUT1, OUT2, OUT3, OUT4 correspond to the four output ports respectively. For the number of the output port, see the silk screen on the back of the splicer.
- Page 13 Output resolution The output resolution function module can define the load and output frequency of the splicer output port. The output resolution is divided into regular resolution and custom resolution. The custom resolution is the output port size that can be defined according to specific needs when the conventional resolution does not meet the conditions.
- Page 14 OUT1 1920*1080 模式5 OUT2 1920*1080 模式6 OUT3 1920*1080 OUT4 1920*1080 模式7 模式8 资源配比 匹配 Technical Support The technical support function module contains the basic information of the splicer and the 400 after-sales service hotline. 北京凯视达科技有限公司 网址:www.kystar.net 热线:400-0000-267 型号:K1 IP:192.168.0.100 版本:ARM:180928v1.0 FPGA:18092720...
- Page 15 Advanced menu The advanced menu module contains the following submenus: 1.Chinese / EN: Set the display language of the menu interface to Chinese / English. 中文 ENGLISH 2.Factory setting: All settings saved in the preset will be reset. 所有设置将被重置 确认 取消...
- Page 16 3.Special effects setting: Set the switching effects and transition time when TAKE switches between PGM and PVW. 淡入淡出 直接切换 特效类型 椭圆入 椭圆出 特效时间 菱形入 菱形出 向上划幕 右上划幕 向右划幕 0.2S 右下划幕 0.4S 向下划幕 0.6S 左下划幕 0.8S 画面切换所使用的时间 向左划幕 1.0S 左上划幕 1.5S 水平梳理...
- Page 17 5.Multi-machine cascading: In the case of single-machine splicing, this option is off by default; when multi-machine cascading is required to be loaded, turn on this option to achieve multi-machine synchronization. The connection diagram of the device during multi-machine synchronization is shown below: 开启...
-
Page 18: Layer Information
7.Communication setting: The communication setting function module includes two items of serial port setting and IP setting. Adjusting parameters can be done through the cooperation of knobs and keys. 串口 波特率 115200 IP地址 192.168.0.100 校验位 NONE 子网掩码 255.255.255.0 数据位 网关 192.168.0.254 停止位... - Page 19 Image parameter Image parameters are adjusted by adjusting the horizontal position, vertical position, horizontal size, and vertical size. 水平位置:0 图像参数 垂直位置:0 局部设置 水平大小:1920 全景显示 垂直大小:1080 高级设置 ×1 ×10 ×100 按LOCK键调节幅度 旋钮调节立即生效 Local settings The local setting option is to intercept the input signal by adjusting the four parameters of horizontal position, vertical position, horizontal size, and vertical size to meet the demand.
- Page 20 Panoramic & partial display Panoramic & Partial display is to switch between partial display and panoramic display after the local setting is completed. advanced settings Advanced settings include four options: matting settings, edge feathering, transparency settings, and level operations. Cutout setting: The device can subtract the background below the specified brightness value and merge it into the new background.
-
Page 21: Source Information
3.3 Source information List of input interface functions: Interface Input Input Intelligent hot Signal active EDID name brightness contrast backup mode settings √ √ √ √ √ DVI1 √ √ √ √ √ DVI1 √ √ √ √ √ HDMI1 √... - Page 22 Input contrast Contrast adjustment and contrast fine-tuning for a single input source. 对比度调节 对比度微调 EDID settings There are EDID settings for digital signals in the input advanced settings. There are two types of EDID settings: default and custom. EDID设置 宽度 1920 智能热备份...
- Page 23 Intelligent hot backup and input signal active mode Intelligent hot backup is to backup the current signal source to other signal sources. When the current signal source is lost, the device automatically jumps to the backup signal source, and automatically jumps back when the signal returns to normal. 输入...
-
Page 24: Case Explanation
4 Case explanation 4.1 Horizontal splicing For example: P3 display, the resolution of the large screen is 5120 wide and 1024 high. It is required that the large screen can display one screen or four screens, and each screen is a different signal source. - Page 25 4.2 Vertical splicing For example: P3 display, the large screen resolution is 1280 wide and 4096 high. It is required that the large screen can display one screen or four screens, and each screen is a different signal source. The client requires a point-to-point display in order to show the effect. 1280 1280 Preliminary preparation: 4K dual graphics card with a custom resolution of 1280 ×...
- Page 26 size and position corresponding to each layer 6. Single screen point-to-point display debugging is completed. Select the "MENU" menu key to return to the main menu, select the“Shift”+“ ”key to enter the save preset interface and Preset Save confirm the save to mode one. 7.
- Page 27 to return to the main menu, select the “Shift” + “ ”key to enter the save preset interface and Preset Save confirm the save to mode one. 7. Select the "MENU" menu key to return to the main menu and select screen layout layout 4. Enter the corresponding layer setting interface to adjust the image size and position corresponding to each layer.
-
Page 28: Other Functions
The bottom part is used to view the material list in K2's internal storage or U disk, as well as the edited playlist. Click the material with the mouse to add the material to the pre-playlist interface;... -
Page 29: Basemap Settings
You can also delete the material through the "Delete" button in the lower left corner. K2 also supports the video pictures to be played into a playlist, and the materials in the list are automatically played in a loop. Can reduce mistakes caused by artificial switching materials. Click "Media Library"... -
Page 30: Mouse Editing Operation
WYSIWYG layout operation; the layout and playback content can be visually edited in preview mode, and the playback is pushed after confirmation. K2 supports external mouse, and then operate and debug on the monitor, which is faster and more convenient. - Page 31 Video input signal Types Quantity Explain 1.4A standard, maximum support 3840 × 2160 @ 30Hz SDI(BNC) 1+1(LOOP) Support SD/HD/3G-SDI HDMI 1.3A standard, maximum support 1920 × 1080 @ 60Hz DisplayPort 1.2 standard, maximum support 3840 × 2160 @ 60Hz Video output signal Types Quantity Explain...
-
Page 32: Common Problem
function system automatically outputs the next priority signal, and up to 4 groups of alternative signals can be set. Special · When switching between signals and modes, users can choose different special effects, effects switching including: fade in and fade out, seamless straight cut Multiple ·... - Page 33 VGA: Analog video signal (video graphics array) is a video transmission standard introduced by IBM with the PS / 2 machine in 1987. It has the advantages of high resolution, fast display speed, and rich colors. Wide application. The signal source is generally a desktop computer, a notebook, a karaoke machine, a matrix, etc.
- Page 34 Kommander 官方微信 凯视达官方微信...
Need help?
Do you have a question about the K2 and is the answer not in the manual?
Questions and answers