
Related Manuals for Advanced Electronics Mx-4200N


Summary of Contents for Advanced Electronics Mx-4200N
- Page 1 www.acornfiresecurity.com Installation & Commissioning The operation and functions described in this manual are available from Software Version Mx4200N-023 and Mx4400N- 023 onwards. www.acornfiresecurity.com...
- Page 2 www.acornfiresecurity.com Specifications: Item Specification Details Enclosure Steel IP30 Steel IP30 Steel IP30 Steel IP30 Dimensions H 475 x 450 x 125 475 x 450 x 125 950 x 450 x 190 950 x 450 x 190 x W x D mm 475 x 450 x 190 (/D) 475 x 450 x 190 (/D) Weight...
-
Page 3: Table Of Contents
EATURES WITH EQUIREMENTS NSTALLATION PPROVALS 1.6.1 Fire System Installations 1.6.2 Wiring Regulations INSTALLATION DENTIFICATION OF ARTS 2.1.1 Mx-4200N & Mx-4400N 2.1.2 Mx-4400N/LE 2.1.3 Mx-4800N -4200N & M -4400N E NSTALLING THE NCLOSURES 2.2.1 Opening the Enclosure Cover 2.2.2 Removing the Chassis 2.2.3... - Page 4 5.2.2 Sounder Circuit Lengths 5.2.3 Fire / Fault Routing Circuit Lengths 5.2.4 Network Cables 3 – B PPENDIX ATTERY TANDBY ALCULATION HART 5.3.1 Mx-4200N / Mx-4400N / Mx-4800N 4 – C PPENDIX AUSE AND FFECT ROGRAMMING XAMPLE 5.4.1 Introduction www.acornfiresecurity.com...
- Page 5 www.acornfiresecurity.com 5.4.2 Output Groups 5.4.3 Styles 5.4.4 Output Group Programming 5 – L PPENDIX EVICE PECIFIC NFORMATION 5.5.1 Nittan Auxiliary Devices 5.5.1.1 EV-AIN1 5.5.1.2 EV-AIN2 5.5.1.3 EV-AIO21 5.5.2 Nittan Detection Devices 5.5.2.1 EV-DP (Dual Photo) 5.5.2.2 EV-P (Photo) EV-PH (Photo – Heat) 5.5.2.3 5.5.2.4 EV-H-A1R (Heat)
-
Page 6: Introduction
1 Introduction 1.1 Standards Advanced Electronics Ltd declare that the products identified below conform to the essential requirements specified in the Construction Products Directive 89/106/EEC: 0086-CPD-549125 EN54-2: 1997 +A1:2006 Control and indicating equipment for fire detection and fire alarm systems for buildings... -
Page 7: Cautions And Warnings
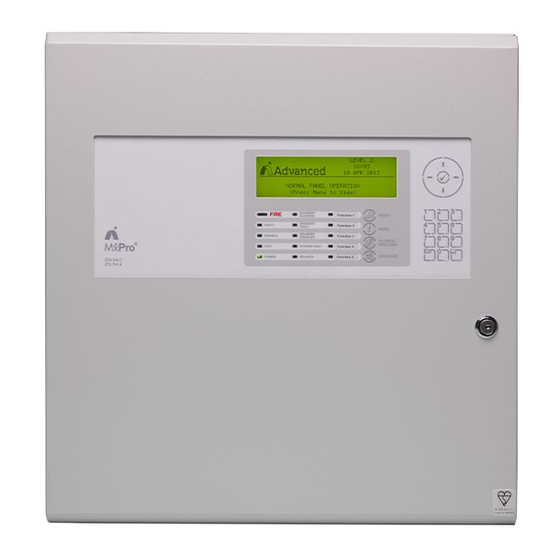
4800N Fire Alarm Control Panels. Refer to the User Manual (Document No. 680-142) for details of how to operate the panel. The Mx-4200N is a Multiple Loop, Analogue Addressable Fire Alarm Control Panel with provision for up to two loops. -
Page 8: En54 Functions
www.acornfiresecurity.com 1.4 EN54 Functions This Fire Alarm Control Panel is compliant with the requirements of EN54 parts 2 and 4 (1997). In addition to the basic requirements, the following optional functions are provided and these comply with the requirements of EN54. C.I.E Optional Functions EN54-2 Clause Indication... -
Page 9: En54 Optional Features With Requirements
www.acornfiresecurity.com 1.5 EN54 Optional Features with Requirements In addition to the mandatory requirements of EN54 Part 2, the Control and Indicating Equipment (C.I.E) supports the following optional features with requirements: - Outputs to Fire Alarm Devices. The C.I.E has provision for connection to Fire Alarm Devices. It is possible to Silence and Resound the alarms at Level 2. -
Page 10: Installation Approvals
www.acornfiresecurity.com Test Condition. The C.I.E has provision for testing the installation on a per zone basis. Refer to the Section 10 User Manual for further information. Standardised Input/Output interface. Standardised I/O interfaces are supported over the Ad-Net Network. Section 11 1.6 Installation Approvals 1.6.1 Fire System Installations The panel must be installed and configured for operation in accordance with these instructions and the... -
Page 11: Installation
2 Installation 2.1 Identification of Parts The following diagrams show the major parts of the panels. 2.1.1 Mx-4200N & Mx-4400N AC Mains Input Chassis Assembly Battery Leads Rear Enclosure 2.1.2 Mx-4400N/LE Bus-bars for cable earth connections Chassis Assembly Loops 1 - 4... - Page 12 www.acornfiresecurity.com 2.1.3 Mx-4800N Bus-bars for cable earth connections Chassis Assembly Loops 1-4 Chassis Assembly Viewing Window for Loops 1-4 Loops 5-8 Viewing Window for Loops 5-8 Battery Shelf Loops 1-4 Battery Shelf Loops 5-8 Rear Enclosure Door Earth Lead to Cover www.acornfiresecurity.com...
-
Page 13: Installing The Mx-4200N & Mx-4400N Enclosures
2.2.1 Opening the Enclosure Cover The Mx-4200N & Mx-4400N are provided with a key-lock assembly for securing the hinged door to the back box. Insert and turn the key to open the enclosure. -
Page 14: Mounting The Enclosure
www.acornfiresecurity.com 2.2.3 Mounting the Enclosure Firstly, remove the required knockouts for the Finally, use a brush to remove any dust or installation wiring. There are sufficient swarf from inside the enclosure. knockouts on the top of the enclosure for all installation wiring. -
Page 15: Installing The Mx-4400N/Le And Mx-4800N Enclosures
www.acornfiresecurity.com 2.3 Installing the Mx-4400N/LE and Mx-4800N Enclosures The panel can weigh in excess of 80kg when the batteries are installed. Use the appropriate fixing hardware necessary to secure the panel to the wall. Observe recommended lifting practices to guard against spinal injury. 2.3.1 Opening the Enclosure Cover The Mx-4400N/LE and Mx-4800N are provided with two key-lock assemblies for securing the hinged door to the back box. -
Page 16: Remounting The Chassis
www.acornfiresecurity.com 2.3.4 Remounting the Chassis Carefully replace the chassis and locate onto the upper two screws. Replace the bottom two screws and tighten all four screws to hold the chassis securely to the back box. Reconnect the chassis earth cable to the spade terminal in the rear of the enclosure. 2.3.5 Recommended Cable Routing Arrangement It is recommended that the routing arrangement shown in the diagram... -
Page 17: Loop Driver Installation
LOOPS used. Ensure that the detector loop wiring is made to the terminal block positions appropriate to the NB: The Mx-4200N only has positions 1 & 2 loop driver cards actually installed. available. Close the chassis display plate and then close up the enclosure. -
Page 18: Local Peripheral Modules
2.5 Local Peripheral Modules The Mx-4200N, Mx-4400N and Mx-4800N panels provide provision for installation / use of local peripheral cards to provide additional functions. The peripherals are connected via an isolated bus interface. The panel supports the Mxp-032 General Routing Interface and up to sixteen Mxp-034 4-Way Programmable Sounder Modules 2.5.1 Peripheral Bus Interface Adaptor... -
Page 19: Wiring Installation
www.acornfiresecurity.com 2.6 Wiring Installation All electrical wiring installation work should be carried out in accordance with the code of practice or applicable national standards appropriate to the country of installation. To maintain electrical integrity of the SELV wiring on the input, output, loop and communications lines all SELV wiring should be segregated from the LV mains wiring and be wired using cable with insulation suitable for the application. -
Page 20: Cable Gland
Refer to the Specifications for minimum and maximum battery sizes allowed. Mx-4200N, Mx4400N & Mx4800N Link Cable BLACK Place the batteries in the bottom of the enclosure and connect the ‘Red’ lead to the positive (+) terminal of battery #1 and the ‘Black’... -
Page 21: Mx-4200N & Mx-4400N
2.6.2.1 Mx-4200N & Mx-4400N The diagrams opposite show the recommended location and orientation for the 12AH and 17AH batteries within the panel. For battery sizes greater than 17AH, use the Mx-4400N/D for batteries up to 38AH and use the Mx-4400N/LE large enclosure variant for up to 48AH. -
Page 22: Mx-4400N/Le & Mx-4800N
www.acornfiresecurity.com 2.6.2.2 Mx-4400N/LE & Mx-4800N The diagrams opposite show the recommended location and orientation for the batteries within the panel for 17Ah, 25Ah and 38Ah batteries. The diagram shows the arrangement for the Mx-4800N. The Mx-4400N/LE is only equipped with the upper chassis. -
Page 23: Detector Loop Installation
www.acornfiresecurity.com 2.6.3 Detector Loop Installation Maximum of 32 Sensors / Call Points in a Zone (between Isolators). The Detection Loop Circuit should be installed as a continuous loop with isolator modules such that a short circuit condition does not remove more than one zone or 32 input devices. -
Page 24: Sounder Circuits
2.6.4 Sounder Circuits The Mx-4200N is equipped with two supervised sounder circuits. These are denoted as Circuits A and B. The Mx-4400N is equipped with four supervised sounder circuits. These are denoted as Circuits A, B, C and D. -
Page 25: Open Collector Outputs
OUTPUT 8 AUX + (24V) GND (0V) 2.6.7 Auxiliary Supply Output The Mx-4200N & Mx-4400N are equipped with an Base Card Connections. auxiliary 24V DC, 500mA power supply output. AUX – (GND) The Mx-4800N is equipped with two such outputs AUX + (24V) (one per chassis). -
Page 26: Rs232 Interface
2.6.9 RS232 Interface The Mx-4200N & Mx-4400N are equipped with an isolated RS232 I/F Circuit at the bottom of the base card. The Mx-4800N has two RS232 interfaces available (one per chassis). RS232 The terminal block connections are shown opposite. -
Page 27: Programming
www.acornfiresecurity.com 3 Programming 3.1 Introduction These instructions cover the configuration and programming of the panels. Note: On the Mx-4800N, each chassis assembly must be individually programmed. 3.1.1 Access Levels The panel operation is protected from inadvertent and erroneous misuse by means of four access levels. These levels are as follows: Level 1 Untrained user Level 2 Authorised User... -
Page 28: Changing Text Descriptions
www.acornfiresecurity.com 3.1.4 Changing Text Descriptions Various parameters can have a text description defined. These include loop devices, zones, etc. The zone and device text descriptions will be shown on the display in the Fire Alarm, Fault and Warning Conditions, etc. to provide a quick and clear indication of the source of the problem. -
Page 29: Recommended Programming Procedure
www.acornfiresecurity.com 3.2 Recommended Programming Procedure Step 1 – SET-UP, Define General Set-up Information (Phone Numbers, etc.). Step 2 – PASSWORDS, Define Level 2 and Level 3 Passwords as required. Step 3 – AUTO-LEARN, Let the panel learn the devices on the loop(s). ... -
Page 30: Loops
www.acornfiresecurity.com 3.3.1 Loops For Multi-loop panels only – On selecting the LOOPS option, the display will prompt for the loop to be viewed / programmed. E.g. for the Mx-4400N: - [Select Loop] -Loop -Loop -Loop -Loop The list of loops available will be adjusted automatically to show only those loops that have a loop driver card installed. -
Page 31: Value
www.acornfiresecurity.com 3.3.2.3 Value This parameter shows the analogue value returned by the device. The number displayed will vary according to the type of device fitted. This parameter cannot be changed. 3.3.2.4 Zone This parameter shows the Zone to which this device has been assigned. Use the number keys to change the zone assigned to the device. -
Page 32: Sensitivity
www.acornfiresecurity.com 3.3.2.8 Sensitivity This parameter shows if the device sensitivity is set to its “DEFAULT” or “CUSTOM” settings. For example: [Loop 1 Devices] <More> Address Sensitivity 001.0 DEFAULT 002.0 DEFAULT 003.0 CUSTOM 004.0 DEFAULT Press the ✔ button to change the sensitivity assigned to an input device. When selected, a new screen displays the sensitivity settings assigned. -
Page 33: O/P Group
www.acornfiresecurity.com 3.3.2.8.6 Special Sensitivity Mode SSM/Clock In addition to the “SENSITIVITY ADJUST MODE”, a device can also run in a “SPECIAL SENSITIVITY MODE” (SSM) under time-clock control. The Mx4200N supports 10 independent, 7-day time clocks. The Mx4400N supports 10 independent, 7-day time clocks. With the SAM/SSM Option highlighted, press the ✔... -
Page 34: Additional Info
www.acornfiresecurity.com 3.3.2.10 Additional Info This parameter shows additional information for this device. Devices that hide the analogue value in the value field (e.g. call points, auxiliary input units) display the raw analogue value in this field. For example: [Loop 1 Devices] <More>... -
Page 35: Procedure If The Panel Finds Devices Missing
www.acornfiresecurity.com This summary provides a quick check to ensure that the panel has found all of the devices that should be connected to the loop. Press the ‘Esc’ button to return to the main Loops Menu. 3.3.3.2 Procedure if the Panel finds Devices Missing When the panel cannot communicate with a device previously programmed into the panel, the Auto Learn process is suspended and the display shows a pop-up window with options. -
Page 36: Double Address
www.acornfiresecurity.com If the new device type is accepted (or all new device types are accepted), the panel will configure the memory to register these devices. All data will be configured to initial settings for sensitivity threshold changes, text assignments, zone assignment, action, etc. for these devices. If the new device type is rejected (or all new device types are rejected), the panel remembers the programming for the original devices. -
Page 37: Outputs
www.acornfiresecurity.com 3.3.8 Outputs The “Cause and Effect” programming is a schedule of actions that will turn on one or more outputs dependant on a set of input events. The Outputs Option provides the means to create simple or complex “cause and effect” programming within the panel. -
Page 38: Cause
www.acornfiresecurity.com 3.3.8.2 Cause Each Output Group can be programmed to respond in a unique way to events from each individual zone. An input event may be a fire alarm condition or it may be a fault, disablement or other condition. A combination of criteria may also be applied to each zone. -
Page 39: Style
www.acornfiresecurity.com 3.3.8.3 Style The way in which an output turns on in response to a particular input event can be programmed. For example, an output may turn on immediately, it may turn on after a delay or it may pulse for a set time and then turn on. This method of operation is called a Style. -
Page 40: Overriding Delays At Level
www.acornfiresecurity.com Delays to Outputs. It must be possible to override the operation of any delays at Level 1. Refer to Section 3.3.9.1 for information on overriding delays. Section 7.11 For compliance, the maximum total delay permitted is 10 minutes. 3.3.9.1 Overriding Delays at Level 1 A facility to override any programmed delays and immediately activate the sounder circuits should be provided at Level 1. -
Page 41: Passwords
www.acornfiresecurity.com 3.3.12 Passwords The panel provides up to 10 User Level-2 passwords and 2 Level-3 passwords. All of the passwords can be changed. On entry to the function, the display shows a list of the passwords. For example: Password Access level User ID 15633 9988... -
Page 42: Setup
www.acornfiresecurity.com 3.3.15 Setup The Setup Options Menu enables the configuration of panel generic operating parameters. When the option is selected, the display shows a list of the available parameters. For example: [Setup] THIS NETWORK NODE NEXT NETWORK NODE PANEL ZONE : 100 SERVICE NUMBER : 01234 567890... -
Page 43: Detector Blinking
www.acornfiresecurity.com [Setup] TRACE LOGGING MODE : Wipe Event Log DETECTOR BLINKING COMPANY LCD LOGO PROGRAM ID Press the ✔ button and the display will show that the event log is being erased by display the message “WORKING…” After the event log is erased, the display reverts to the Set-up Options screen. 3.3.15.6 Detector Blinking The Detector Blinking option determines whether the LED indicators on the devices will blink whenever the panel polls the device. -
Page 44: Config Data
www.acornfiresecurity.com 3.3.15.10 Config Data The Config Data option shows the loop protocol and the checksum for the configuration data. A note of this number can be taken and then checked on the next service visit to see if any changes have been made to the configuration data. -
Page 45: Service And Maintenance
www.acornfiresecurity.com 4 Service and Maintenance 4.1 Maintenance Schedule This equipment should be maintained in accordance with the regulations and codes appropriate to the country and location of installation. The following is recommended if no other regulations apply. 4.1.1 Daily Actions The site operator / user should perform the following checks and actions: a) The panel indicates normal operation. -
Page 46: Replacement Of Components
www.acornfiresecurity.com 4.2 Replacement of Components In general, all of the components parts used in the construction of the panel have been selected for long life and reliability. However, certain components may require to be changed on a regular service basis. The details of these are as follows: 4.2.1 Batteries For battery installation, see section... -
Page 47: Lithium Battery
www.acornfiresecurity.com 4.2.1.2 Lithium Battery WARNING – A lithium battery is used for the real time clock. Replace only with the same type or authorised equivalent. This battery is not rechargeable. When the battery is replaced, re-enter the current date and time, using the menu functions, to update the values in the real-time clock chip. -
Page 48: Appendices
www.acornfiresecurity.com 5 Appendices 5.1 Appendix 1 – Forgotten Level 3 Password Should the Level-3 password be forgotten, contact Customer Support to obtain a temporary permit number to regain access to the panel programming functions. Customer Support will require a decryption key displayed by the panel. To obtain this number, attempt to gain access to the Level-3 Programming Functions by pressing button “1”... -
Page 49: Appendix 2 - Recommended Fire Rated Cables
www.acornfiresecurity.com 5.2 Appendix 2 – Recommended Fire Rated Cables The following table provides a list of suitable fire rated cables with standard (30 minute) and enhanced (120 minute) classification. Refer to Document No. 680-088 for an up to date list. Core Sizes (mm) 5839-1 Rated Manufacturer... -
Page 50: Detector Loop Lengths
www.acornfiresecurity.com 5.2.1 Detector Loop Lengths With the above cables, loops can be up to 2Km in length. However, care must be taken when designing the system to take into account the maximum loop loading. The voltage drop (load current x cable resistance) over the cable always needs to be taken into account to ensure the devices receive an adequate supply voltage. -
Page 51: Fire / Fault Routing Circuit Lengths
www.acornfiresecurity.com 5.2.3 Fire / Fault Routing Circuit Lengths The voltage drop on each transmission circuit should be calculated to ensure that the minimum voltage at the end of the circuit exceeds the minimum required by the relay coil at the minimum circuit output voltage. Typically, relays will energise at 75% of their nominal drive voltage (i.e. -
Page 52: Appendix 3 - Battery Standby Calculation Chart
Use the following charts and associated notes to calculate the size of the batteries required to ensure operation of the installation in the event of AC Mains power failure. 5.3.1 Mx-4200N / Mx-4400N / Mx-4800N Quiescent Load Fire Alarm Load... -
Page 53: Appendix 4 - Cause And Effect Programming Example
www.acornfiresecurity.com 5.4 Appendix 4 – Cause and Effect Programming Example 5.4.1 Introduction By default, all sounders and output devices will turn on immediately as soon as a fire is detected anywhere in the system. For example: Cause Effect Any Fire, Anywhere. ALL Output Devices will Turn ON Quite often an installation will require a more complex “Cause and Effect”... -
Page 54: Output Group Programming
www.acornfiresecurity.com 5.4.4 Output Group Programming To achieve the above cause and effect requirements, the three different Output Groups would be programmed and indicated on the panel as in the following display examples: Output Group 6 – Sounders on Floor 6: [Output Group 3.9% Mem used] [STYLE 02... -
Page 55: Appendix 5 - Loop Device Specific Information
www.acornfiresecurity.com 5.5 Appendix 5 – Loop Device Specific Information 5.5.1 Nittan Auxiliary Devices The functionality of these devices is decided by the panel rather than by any DIP-switch and jumper settings on the device. The functionality is as follows: 5.5.1.1 EV-AIN1 A single zone monitor. - Page 56 www.acornfiresecurity.com 5.5.1.4 EV-SCM Sounder control module. Please wire according to the datasheet provided by the device manufacturer. 5.5.1.5 EV-MiniIP Single input module. Please wire according to the datasheet provided by the device manufacturer. 5.5.1.6 EV-IP Default: Dual input module (radial) – Class B, Style C. Optional: Single input (loop) –...
-
Page 57: Nittan Detection Devices
www.acornfiresecurity.com 5.5.2 Nittan Detection Devices NOTE: The alarm threshold for all devices, in the sensitivity mode screens, is fixed. 5.5.2.1 EV-DP (Dual Photo) This is a FIXED sensitivity device. No pre alarm or sensitivity mode is supported on this device. When the device is placed in a zone test, the advanced processing of the analogue values is bypassed so that smoke can gas can be detected as an alarm condition. -
Page 58: Ev-H-A1R (Heat)
www.acornfiresecurity.com SENSITIVITY ADJUST MODE (HEAT RISE Alarm [ Pre-Alarm= Delay = 3s][ Min.Value= *** [SAM/SSM] 5.5.2.4 EV-H-A1R (Heat) This is a FIXED sensitivity device. The EV-H-A1R provides rate of rise and static response, in accordance with EN54-5 A1R. The static response temperatures are shown below: SENSITIVITY ADJUST MODE (HEAT RISE... -
Page 59: Quiescent And Default Alarm Analogue Values
www.acornfiresecurity.com 5.5.2.8 Quiescent and Default Alarm Analogue Values Device Quiescent Analogue Value Default Alarm Value Sub address 0 Sub address 1 Sub address 0 Sub address 1 EV-H-A1R 0-44 EV-H-CS 0-64 EV-P 0-80% 100% EV-PS 0-80% 100% EV-PH 0-44 0-80% 100% EV-DP 0-80%... -
Page 60: Appendix 6 - Mx4000N Series Loop Output Drive Capability
www.acornfiresecurity.com 5.6 Appendix 6 – Mx4000N Series Loop Output Drive Capability The following information is applicable per loop. All loops can be loaded to the maximum (500mA per loop). Provision has been made to allow for a typical loading of detectors and inputs (30mA). Volume Number of Loop Powered Sounder Bases EV-AV... -
Page 61: Appendix 7 - Other Useful Documents
5.7 Appendix 7 – Other Useful Documents The following reference and application documents may be useful in the design, configuration and installation of the system. The latest versions are available from the Advanced Electronics Ltd web site (www.advancedco.com) or in hard copy format from Sales. Document... -
Page 62: Appendix 8 - Mx-4800N / Network Design Principles
www.acornfiresecurity.com 5.8 Appendix 8 – Mx-4800N / Network Design Principles This section gives recommendations on the design of the installation to cover specific EN54-2 requirements and typical national codes of practice. [EN54-2: 1997, Clause 13.7] Not more than 512 fire detectors and / or manual call points and their associated mandatory functions shall be affected as a result of a system fault in the C.I.E. -
Page 63: Appendix 9 - M Xseries Product Capabilities / Max Limits
www.acornfiresecurity.com 5.9 Appendix 9 – Mx Series Product Capabilities / Max Limits This section gives details on the maximum capabilities for each of the products in the range. Some of the items can only be utilised via the PC CONFIG tool and these are annotated accordingly. 4200N 4400N 4010 /... - Page 64 www.acornfiresecurity.com This page is intentionally left blank. www.acornfiresecurity.com...
- Page 65 www.acornfiresecurity.com USER NOTES www.acornfiresecurity.com...
- Page 66 www.acornfiresecurity.com www.acornfiresecurity.com...
Need help?
Do you have a question about the Mx-4200N and is the answer not in the manual?
Questions and answers