
Related Manuals for Beko WTIK72111


Summary of Contents for Beko WTIK72111
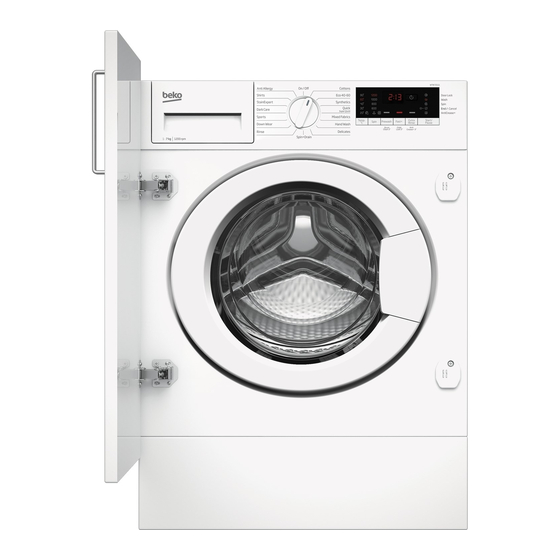
- Page 1 Washing Machine User Manual WTIK72111 Document Number : 2820528913_EN/ 22-07-20.(8:58)
- Page 2 Please read these instructions first before using your appliance Dear Customer, Thank you for choosing a Beko appliance. Please take some time to read this user manual before using your appliance, to ensure you know how to safely operate the controls and functions.
-
Page 3: General Safety Instructions
1 General safety instructions • While there is still water inside the product, never open the This section includes security loading door or remove the filter. instructions which may help prevent Otherwise, risk of flooding and the injuries and material damage risks. injury from hot water will occur. -
Page 4: Children's Safety
1.3 Children’s safety CAUTION! • Do not forget to close the CAUTION! loading door when leaving the • This product can be used room where the product is by children at and above 8 located. years old and by persons •... -
Page 5: Important Instructions For Environment
This product has been manufactured with high DANGER quality parts and materials which can be reused and are suitable for recycling. Do not dispose • Do not wash the product by of the waste product with normal domestic spraying or pouring water onto and other wastes at the end of its service life. -
Page 6: Technical Specifications
4 Technical specifications Supplier name or trademark Beko WTIK72111 Model name 7179242600 Rated capacity (kg) Maximum spin speed (rpm) 1200 Built-in Height (cm) Width (cm) Depth (cm) Single Water inlet / Double Water inlet • / - • Available Electrical input (V/Hz) -
Page 7: Appropriate Installation Location
4.1 Installation 4.1.3 Removing the transportation locks • Apply to the nearest authorised service agent for the installation of your product. 1 Loosen all bolts with an appropriate wrench until they turn freely. • Preparation of the location and electrical, tap water and waste water installations at 2 Remove the transport safety bolts by the place of installation is under customer's... -
Page 8: Connecting The Drain Hose To The Drain
• In case the drain hose is elevated after laying it on the floor level or close to the ground (less than 40 cm above the ground), water discharge becomes more difficult and the laundry may come out excessively wet. Therefore, follow the heights described in the figure. -
Page 9: Electrical Connection
Adjusting the feet with water level • The voltage specified in the “Technical specifications” section must be equal to your mains voltage. • Do not make connections via extension cables or multi-plugs. CAUTION! • Damaged power cables must be replaced by the Authorised Service Agents. - Page 10 4.1.8 Initial use Important Fitting a different plug Before starting to use the product make sure that As the colours of the the preparations wires in the mains are made which lead of this appliance are in line with the may not correspond “Important Safety with the coloured...
- Page 11 4.2 Preparation 4.2.3 Tips for energy and water saving Following information will help you use the 4.2.1 Sorting the laundry product in an ecological and energy/water- • Sort laundry according to type of fabric, efficient manner. colour, and degree of soiling and allowable •...
- Page 12 4.2.6 Using detergent and softener The detergent drawer compartments are indicated below: Choosing the detergent type 1) Left compartment with number “II” (Main Detergent type to be used depends on the wash compartment for powder detergent or washing programme, fabric type and color. powder bleach/stain remover) •...
- Page 13 Starch Do not fill the detergent above the maximum filling level line; otherwise the excess amount of • Add liquid starch, powder starch or the detergent will reach the laundry without water dyestuff into the softener compartment as and may cause stains on the garments.In this instructed on the package.
-
Page 14: Tips For Efficient Washing
4.2.7 Tips for efficient washing Clothes Delicates/ Light colours and whites Colours Dark colours Woolens/Silks (Recommended (Recommended (Recommended temperature (Recommended temperature temperature range temperature range range based on soiling level: range based on soiling level: based on soiling level: based on soiling level: 40-90ºC) cold-40ºC) cold-40ºC) -
Page 15: Operating The Product
4.3 Operating the product 1 - Programme Selection Knob (Uppermost position On / Off) 4.3.1 Control panel 2 - Display 3 - End Time Adjustment Button 4 - Programme Follow-up Indicator 5 - Start/Pause Button 6 - Auxiliary Function Button 3 7 - Auxiliary Function Button 2 8 - Auxiliary Function Button 1 9 - Spin Speed Adjustment Button... - Page 16 • : Selectable * : Automatically selected, cannot be cancelled. ** : Eco 40-60 ( ) is the test programme in accordance with EN 60456:2016 and energy label with Commission Delegated Regulation (EU) 1061/2010) ***: Eco 40-60 with 40 °C temperature selection is the test programme in accordance with EN 60456:2016/prA:2020 and energy label with Commission Delegated Regulation (EU) 2019/2014 - : See the programme description for maximum load.
-
Page 17: Main Programmes
4.3.5 Main programmes • Anti Allergy Depending on the type of fabric, use the Use this programme for laundry that requires following main programmes. an intense, long, anti-allergic and hygienic washing cycle at high temperature. A high • Cottons level of hygiene is ensured thanks to the long You can wash your durable cotton laundry heating and additional rinsing step. -
Page 18: Special Programmes
Mixed Fabrics • When the quick function is not selected: You can use this programme to wash cottons and Butter Food synthetics together without the need to sort them. Grass Mayonnaise Salad Dressing Coke Make-up Shirts • Sweat Machine Oil Use this programme to wash shirts made of Collar Soil Baby food... - Page 19 4.3.8 Temperature selection 4.3.10 Auxiliary function selection Whenever a new programme is selected, the Select the desired auxiliary functions before recommended temperature for the selected starting the programme. You can also select programme appears on the temperature indicator. or cancel auxiliary functions suitable for the running programme without pressing the Start/ To decrease the temperature, press the Pause button while the machine is operating.
-
Page 20: Functions/Programmes Selected By Pressing The Function Buttons For 3 Seconds
4.3.10.2 Functions/Programmes To disable Child Lock: Selected by Pressing the Function Press and hold the Auxiliary Function button 2 for 3 seconds while the programme is running. Buttons for 3 Seconds While you’re holding the button pressed for 3 • Drum Clean seconds, C03, C02 and C01 will be displayed To select this programme, press and hold the respectively. - Page 21 4.3.11 End Time Adjustment 2. Then, select the programme you want to run again. The End Time Adjustment function allows you to set the end time of the programme up to 19 hours. 3. Press Start/Pause button to start the programme. You can increase this time by 1-hour intervals.
-
Page 22: Loading Door Lock
4.3.14 Loading door lock 4.3.15 Changing the selections There is a locking system on the loading door of after programme has started the machine that prevents opening of the loading Switching the machine to pause mode door in cases when the water level is unsuitable. Press the Start/Pause to switch the machine Loading door light will start flashing when the to pause mode while a programme is running. -
Page 23: Cancelling The Programme
4.3.16 Cancelling the programme 4.3.18 Your machine has the To cancel the programme, turn the Programme "Pause Mode" function. Selection knob to select another programme. After using the On/Off button to switch on the Previous programme will be cancelled. End/ machine, if you do not start any programme in Cancel light will flash continuously to notify that the selection step or do not perform anything... -
Page 24: Maintenance And Cleaning
4.4 Maintenance and cleaning After every washing make sure that no foreign Service life of the product extends and substance is left in the frequently faced problems decrease if cleaned drum. at regular intervals. 4.4.1 Cleaning the detergent drawer If the holes on the bellow shown in the figure is Remove any powder residue buildup in the blocked, open the holes using a toothpick. -
Page 25: Draining Remaining Water And Cleaning The Pump Filter
2. Remove the nuts of the water intake hoses 2. Some of our products have emergency to access the filters on the water intake draining hose and some does not have. valves. Clean them with an appropriate Follow the steps below to discharge the brush. -
Page 26: Troubleshooting
5 Troubleshooting Loading door cannot be opened. • Loading door lock is activated because of the water level in Programmes do not start after the loading door is the product. >>>Drain the water by running the Pump or closed. Spin programme. •... - Page 27 Washing performance is poor: Laundry turns gray. (**) Washing machine does not rinse well. • Insufficient amount of detergent has been used over a long • The amount, brand and storage conditions of the detergent period of time. >>>Use the recommended amount of used are inappropriate.
- Page 28 Too much foam forms inside the product. (**) • Improper detergents for the washing machine is used. >>>Use detergents appropriate for the washing machine. • Excessive amount of detergent is used. >>>Use only sufficient amount of detergent. • Detergent was stored under improper conditions. >>>Store detergent in a closed and dry location.
-
Page 29: Built-In Installation
6 BUILT-IN INSTALLATION Ø 4 x 16mm M 5 x 10mm 5 8 0 6 0 0 m 50mm 29 / EN Washing Machine / User’s Manual... - Page 30 30 / EN Washing Machine / User’s Manual...
- Page 31 31 / EN Washing Machine / User’s Manual...
- Page 32 32 / EN Washing Machine / User’s Manual...
- Page 33 33 / EN Washing Machine / User’s Manual...
- Page 34 34 / EN Washing Machine / User’s Manual...
- Page 35 35 / EN Washing Machine / User’s Manual...
- Page 36 If you have purchased an American style Fridge freezer, the standard guarantee starts from the date of original purchase of the product, and lasts for a period of twenty four (24) months unless Beko plc (the “Manufacturer”) agrees to extend the guarantee for the product in writing.
- Page 37 If you are resident in the Republic of Ireland, this guarantee will be governed by Irish law and the Irish courts will have jurisdiction. This guarantee is provided by Beko plc. Beko House, 1 Greenhill Crescent, Watford, Hertfordshire. WD18 8QU. Beko plc is registered in England and Wales with company registration number 02415578.
- Page 38 Beko Free standing appliances come with a 12 month parts and labour guarantee as standard, Beko Built-in appliances come with a 12 month parts and labour guarantee as standard. This is extended to 24 months, free of charge, upon registration of the appliance. When you register your appliance for additional guarantee, you will automatically activate the ProSmart Motor 10 year guarantee.
- Page 39 Send us a secure message through our online contact us form. Please visit our website, click Contact Us and choose a product support topic from the list of options. Complete the required details and click send message. Product registrations For UK registrations please visit beko.co.uk/register and for the Republic of Ireland visit beko.ie/register.
Need help?
Do you have a question about the WTIK72111 and is the answer not in the manual?
Questions and answers