Table of Contents
Advertisement
Quick Links
Garmin inReach Owner's Manual
© 2019 Everywhere Communications, Inc. Additional portions © 2018 Garmin Ltd. or its subsidiaries
All rights reserved. Under the copyright laws, this manual may not be copied, in whole or in part, without the written consent of Garmin. Garmin reserves the right to
change or improve its products and to make changes in the content of this manual without obligation to notify any person or organization of such changes or
improvements. Go to
www.garmin.com
for current updates and supplemental information concerning the use of this product.
Garmin
, the Garmin logo, Earthmate
, and inReach
are trademarks of Garmin Ltd. or its subsidiaries, registered in the USA and other countries. MapShare
is a
®
®
®
™
trademark of Garmin Ltd. or its subsidiaries. These trademarks may not be used without the express permission of Garmin.
The Bluetooth
word mark and logos are owned by the Bluetooth SIG, Inc. and any use of such marks by Garmin is under license. Facebook
and the Facebook logo are
®
™
trademarks of Facebook and its affiliate companies. Iridium
is a registered trademark of Iridium Satellite LLC. TWITTER
and the Twitter logo are trademarks of Twitter, Inc. or its
®
™
affiliates. Other trademarks and trade names are those of their respective owners
Advertisement
Table of Contents

Related Manuals for EVERYWHERE COMMUNICATIONS Garmin inReach MINI

Summary of Contents for EVERYWHERE COMMUNICATIONS Garmin inReach MINI
- Page 1 Garmin inReach Owner’s Manual © 2019 Everywhere Communications, Inc. Additional portions © 2018 Garmin Ltd. or its subsidiaries All rights reserved. Under the copyright laws, this manual may not be copied, in whole or in part, without the written consent of Garmin. Garmin reserves the right to change or improve its products and to make changes in the content of this manual without obligation to notify any person or organization of such changes or improvements.
-
Page 2: Table Of Contents
Table of Contents Getting Started .............................. 1 Device Overview ............................1 Keys ................................1 Turning on the Device ..........................1 Status Icons ............................... 2 Activating the Device ..........................2 Iridium Satellite Network .......................... 2 Bluetooth Connected Features ........................2 Pairing Your Android Mobile App ......................2 Pairing Your iPhone Mobile App ....................... - Page 3 Stopping Navigation ..........................7 Compass ..............................7 Location ..............................7 Weather ................................ 7 Adding a Weather Location ........................8 Setting the Weather Location ........................8 Requesting a Weather Forecast ........................ 8 Deleting a Weather Location ........................8 Synching Contacts ............................8 Remote Control .............................
- Page 4 Viewing E-Label Regulatory and Compliance Information ..............14 Charging the Device ............................ 14 Specifications .............................. 15 Battery Information ..........................15...
-
Page 5: Getting Started
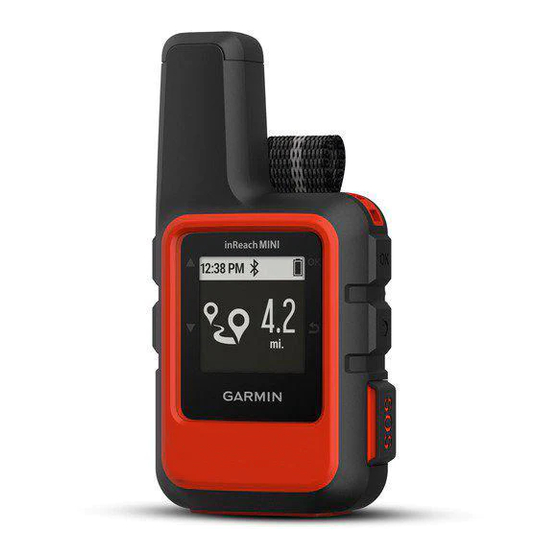
Getting Started WARNING See the Important Safety and Product Information guide in the product box for product warnings and other important information. Device Overview Internal Iridium ® antenna Keys Micro-USB port (under weather cap) SOS button (under protective cap) Power key Mounting screw Keys Select to scroll through menus, pages, and settings. -
Page 6: Status Icons
Status Icons Sending and receiving data Unable to send and receive data Tracking enabled Bluetooth ® technology connection status Charging battery Charging complete Activating the Device The EVERYWHERE Mini will arrive to you already activated and configured to track at the Track Rate associated with the Price Plan your organization has purchased on your behalf. -
Page 7: Pairing Your Iphone Mobile App
Pairing Your iPhone Mobile App To pair your Android mobile device, 1. Place the inReach device and the mobile device within 3m (10 ft.) of each other 2. From the inReach main menu, select Setup > Bluetooth > Pair 3. While the inReach is attempting to pair, an 8-digit code will appear at the top of the screen 4. -
Page 8: Checking For Messages
Checking for Messages Your device listens for new messages at regular listen intervals. Satellites announce recently sent messages, and your device receives the message at the next listen interval. NOTE: Your device must be in view of a satellite at the time of the listen to receive messages. You can force a check for messages by manually checking for messages, sending a message, or sending a track point. -
Page 9: Canceling An Sos Rescue
Mini – it cannot initiate SOS via cellular or Wi-Fi. NOTE: While in SOS mode, the device cannot be turned off. 1. Lift the protective cap 1 from the SOS button 2. 2. Hold the SOS button. 3. Wait for the SOS countdown. The device sends a default message to the emergency response service with details about your location. -
Page 10: Starting Tracking
NOTE: When the tracking log storage is full, your device overwrites older track points, but retains a lower-detail tracking line. Starting Tracking Your inReach Mini is configured to begin tracking when the device is powered up. However, should you stop tracking, it is possible to turn tracking back on. From the Tracking page, select OK. -
Page 11: Creating A Waypoint
Creating a Waypoint You can save your current location as a waypoint or create custom waypoints. 1. Choose an option: • To mark your current location as a waypoint, select Mark Waypoint from the main menu. To create a custom waypoint, select Navigate > Waypoints > New Waypoint from the main •... -
Page 12: Adding A Weather Location
can receive weather forecasts for your current location, a waypoint, or GPS coordinates. Weather forecasts incur data usage charges. Adding a Weather Location You can add waypoints as weather locations. 1. From the Weather page, select OK. 2. Select Change Location > New Location. 3. -
Page 13: Remote Control
2. Log into your EVERYWHERE Hub account (www.everywhere-hub.com) with your username and password 3. Under the main menu, select Devices 4. Find your inReach Mini and select it to open the Device Details screen; on the top left of the box, there will be a red or green Sync icon ( ) –... -
Page 14: Customizing The Device
Customizing the Device Display Settings From the main menu, select Setup > Display. Brightness: Sets the backlight brightness. Timeout: Sets the length of time before the backlight turns off. Tracking Settings From the main menu, select Setup > Tracking. Send Interval: Sets the frequency at which the device records a track point and transmits it over the satellite network when you are moving. -
Page 15: Sounds Settings
sent message for ten minutes. If the recipient replies quickly, you can receive the reply before the next scheduled listen interval. This setting is only available for professional customers. Sounds Settings From the main menu, select Setup > Sounds. Mute All: Mutes all device tones. Volume: Sets the device volume level. -
Page 16: Device Information
Device Information Attaching the Spine Mount Adapter 1. Remove the short screw 1 from the carabiner strap 2. 2. Secure the spine mount adapter 1 over the back of the device using the long screw 2 included with the device. TIP: The spine mount adapter fits over the carabiner strap. -
Page 17: Locking And Unlocking The Keys
Locking and Unlocking the Keys You can lock the keys to prevent inadvertent key presses. 1. Select > Lock Screen. 2. Select > Unlock to unlock the keys. Device Care Notice Avoid chemical cleaners, solvents, and insect repellents that can damage plastic components and finishes. -
Page 18: Resetting The Device
Resetting the Device If the device stops responding, you may need to reset it. This does not erase any of your data or settings. 1. Hold until the device turns off. 2. Hold to turn on the device. Restoring All Default Settings You can restore all device settings to the factory default values. - Page 19 1. Lift the weather cap 1. 2. Plug the small end of the power cable into the USB port 2 on the device. 3. Plug the other end of the power cable into an appropriate power source. 4. Charge the device completely. Specifications Battery type Rechargeable, built-in lithium-ion battery...
Need help?
Do you have a question about the Garmin inReach MINI and is the answer not in the manual?
Questions and answers