Advertisement
Available languages
Available languages
Quick Links
1
2
3
4
5
6
7
9
8
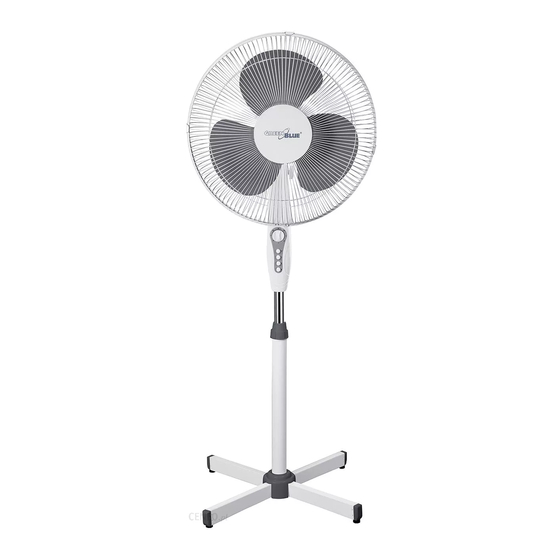
STAND FAN
I. TECHNICAL SPECIFICATION:
Rating voltage: 220V
Rating frequency: 50 Hz
Rating input power: 40W
II. ATTENTION:
1. Fan must be operated at rating voltage.
2. Only after assembling, can the fan be plugged in.
3. Nothing can be inserted into the fan that is working.
4. Unplug the fan before disassembling or cleaning.
1.
Front grill
GB510
2.
Blade
3.
Rear grill
4.
Motor
5.
Switch
Stand
6.
7.
Base cover
Screw
8.
9.
Base
III. INSTALATION: (refer to lconorraphy)
1. Instalation of the master tube and the base: insert the tube into the hole on
the on the base, and then fasten the screw on the base.
2. Instalation of the fan: set the fan in the adjustable pole, and fasten the fan.
3. Instalation of the rear guard: unscrew the blade nut and the guard, and fix
the rear guard. After that put back the rear guard, and fasten the guard nut.
4. Instalation of the blade: to set the blade into the crankshaft, insert the blade
from its back, notch into the soacer pin of the motor, then fasten the blade nut
anticlockwise.
5. Instalation of the front guard: pinch the clip of the rear guard, and attach the
front guard to the rear guard, then release the clip.
IV. OPERATION:
1. Press the buttons below to turn on or off the fan and to switch the fanning
speed : 0-stop, 1- low speed, 2- medium speed, 3- high speed.
2. Oscillation: to control the Oscillation, press or loft the Oscillation knob.
3. Pitching: to control the pitching, first unscrew the pitching knob, and adjust
the fan to the desired angle, then screw the knob.
V. MAINTENANCE:
1. Unplug the fan before cleaning and use soft cloth with cleanser; do not use
the cleanser handful to the surface of the fan.
2. Clean the fan thoroughly after a long period of use; drip some lubricant into
the joints of the fans, then keep it covered in the dry place.
VI. WARNING:
1. If the supply cord is damaged, it must be replaced by the manufacturer, it's
service agent or similarly qualified person in order to avoid a hazard.
2. This appliance does not prepare for the phisical ability frailly. Slow reaction or
the barrier person (including child) uses, only if it has the safety responsibility to
it under personnel's instruction or help safety handling. The child should
supervise, guaranteed they do not play the appliance.
Advertisement

Related Manuals for GREENBLUE GB510


Summary of Contents for GREENBLUE GB510
- Page 1 III. INSTALATION: (refer to lconorraphy) Front grill GB510 1. Instalation of the master tube and the base: insert the tube into the hole on Blade the on the base, and then fasten the screw on the base. 2. Instalation of the fan: set the fan in the adjustable pole, and fasten the fan.
-
Page 2: Parametry Techniczne
Montaż: Osłona przednia GB510 1. Włóż stojak do otworu w podstawie i dokręć śrubami. Śmigło 2. Umocuj wentylator na regulowanym stojaku 3. Montaż tylnej osłony: Odkręć śrubę śmigła i zamocuj tylną osłonę. Osłona tylnia 4. Mocowanie śmigła: aby zamocować śmigło na wał korbowy, nałóż wycięciem Silnik z tyłu śmigłą... -
Page 3: Montage
2. Stecken Sie das Motorgehäuse auf das Standrohr. Vergewissern Sie sich dabei, dass das untere Ende des Motorgehäuses genau auf die dafür Vorderes Schutz. GB510 vorgesehenen Löcher passt. Fixieren Sie beide Bauteile mit der Schraube. 3. Befestigen Sie die hintere Korbabdeckung am Motorgehäuse, indem Sie die Flügelrad... - Page 4 2. Installation du ventilateur: régle le ventilateur dans le pôle réglable, et fixer le Grille avant GB510 ventilateur. 3. Installation de l'arrière-garde: dévisser l'écrou de la lame et l'écrou de garde Pales de ventilateur et de fixer l'arrière-garde.
- Page 5 1. Ensamblaje del conjunto de la base: inserte el poste en el orificio de la base, Rejilla frontal GB510 luego inserte y apriete los tornillos de la base. 2. Fijando el motor: inserte el poste en el orificio del motor al y lo asegure Aspa deslizar hacia abajo.
- Page 6 – L'installazione della ventola; impostare il ventilatore nel polo regolabile e Griglia anteriore GB510 quindi fissare il ventillatore – L'installazione della retroguardia: svitare il dado della lama e fissare la Lama retroguardia. Dopo che ha messo di nuovo la retroguardia e fissare il dado di...
Need help?
Do you have a question about the GB510 and is the answer not in the manual?
Questions and answers