Advertisement
Quick Links
P
x2
E
Components
x4 pcs
S
x38 pcs
L
x3 pcs
Easy as 1-2-3
Assembly Instruction
R
H
x2
O
F
G
K
D
C
Return Policy
ZINUS believes you will absolutely love your new addition to your home, but
A
x1 pc
if for some reason you want to return the product, please contact us directly
before you decide to return your product to the retailer. Our Customer
Service organization can answer most concerns and can assist you with any
questions you may have about your new product.
B
x1 set
Please contact us first by emailing customerservice@zinusinc.com or by
submitting a request at https://support.zinus.com
The item must be returned in good condition, in original box, with all original
C
x1 set
proof of purchase, parts and accessories, within the time frame specified by
the retailer it was purchased from.
D
x1 pc
Please visit Zinus.com for warranty information on your
new product.
E
x1 pc
F
x1 set
G
x1 set
H
x2 pcs
I
x3 pcs
J
x8 pcs
K
x1 pc
O
x1 pc
T
x1 pc
P
x2 pcs
Q
x2 pcs
R
x1 pc
Numbers must Match for Secure Assembly
A
B
Q
FPPSTG-13
x2
Advertisement

Related Manuals for ZINUS FPPSTG-13


Summary of Contents for ZINUS FPPSTG-13
- Page 1 FPPSTG-13 Components Return Policy ZINUS believes you will absolutely love your new addition to your home, but x1 pc if for some reason you want to return the product, please contact us directly before you decide to return your product to the retailer. Our Customer Service organization can answer most concerns and can assist you with any questions you may have about your new product.
- Page 3 Tip: Position your screws towards the outer end of each slit. Tip: Position your screws towards the outer end of each slit.
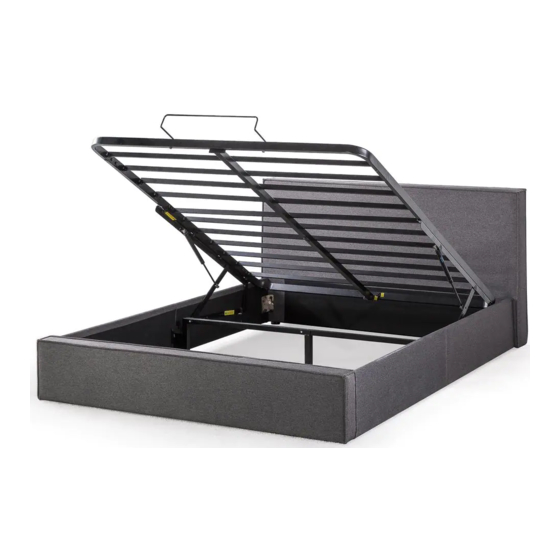
- Page 4 Tips: Please use the support bar when rising the bed frame. Be careful Do not hurt your hand.
Need help?
Do you have a question about the FPPSTG-13 and is the answer not in the manual?
Questions and answers