Table of Contents
Advertisement
Advertisement
Table of Contents

Summary of Contents for Everest VX
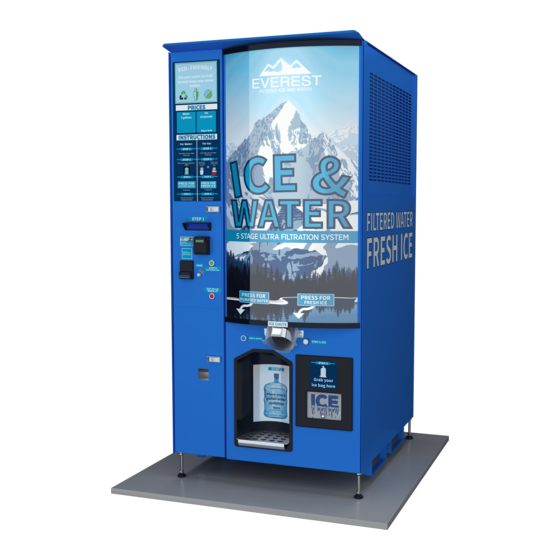
- Page 2 ICE AND WATER VENDING MACHINE - OPERATOR’S MANUAL EVEREST ICE AND WATER SYSTEMS CONTINUOUS OPTIMIZATION Vb000122015...
- Page 3 WATER & PLUMBING SYSTEM Changing Sub-Micron Filters Flushing Sub-Micron Water Filters Changing the Pre-Filter Changing the Scale Stick Backflush the Water Dispensing Line Changing Bulb on UV Unit USING MAINTENANCE MODE NON-EVEREST COMPONENTS EVEREST ICE AND WATER SYSTEMS WARRANTY Vb000122015...
- Page 4 WATER & PLUMBING SYSTEM Changing Sub-Micron Filters Flushing Sub-Micron Water Filters Changing the Pre-Filter Changing the Scale Stick Backflush the Water Dispensing Line Changing Bulb on UV Unit USING MAINTENANCE MODE NON-EVEREST COMPONENTS EVEREST ICE AND WATER SYSTEMS WARRANTY Vb000122015...
- Page 5 Please note that as the owner of this machine, it will be your responsibility to operate and maintain the machine and if there is an issue, you will need to help the Everest Service Team diagnose and sometimes assist in the repair. This is an electrical and mechanical machine and over time things will need to be addressed, and as the machine owner, the responsibility to keep your new machine operational falls to you.
- Page 6 ● Have the proper tools required to uncrate the machine. These tools are listed later in the manual. ● Send all machine shipping pictures to Everest regardless if there is or is not damage present. ● Follow the machine installation instructions detailed in this manual.
- Page 7 ● Diagnose and troubleshoot machine issues with help of Everest Service Team. ● Fix and repair issues and install parts that are provided by Everest Service Team or contract that work out to a third party if necessary.
- Page 8 MANUFACTURERS’ INFORMATION Your Everest Ice and Water Vending Machine consists of the following units which are made, serviced, and warrantied by the following manufacturers. For any questions related to your machine, please contact the Everest Service Team, however, if service or support is isolated to a component or part that is serviced or warrantied by another manufacturer, then our service team will direct you to the appropriate contact for that particular manufacturer.
- Page 9 IMPORTANT SAFETY INSTRUCTIONS This is a large and potentially dangerous piece of equipment if not operated or maintained properly. Basic precautions and correct operating and maintenance procedures must be followed when working with this machine. Save this operator manual and keep a copy inside the machine for reference.
- Page 10 Repairs and Maintenance Should Be Attempted By Trained Personnel Only If you do not know exactly what you are doing then you should not attempt any repairs or maintenance without contacting Everest first. Heavy and Top-Weighted The machine is “Top Heavy” especially when empty of ice. It should never be moved without proper training and proper material handling equipment.
- Page 11 MACHINE LAYOUT Left Door (Rear) Figure 1: Left Door (Rear) Vb000122015...
- Page 12 Left Door (Front) Figure 2: Left Front Door (Front) Vb000122015...
- Page 13 Right Door (Rear) Figure 3: Right Door (Rear) Vb000122015...
- Page 14 Right Door (Front) Figure 4: Right Door (Front) Vb000122015...
- Page 15 Machine Cabinet (Left) Figure 5: Machine Cabinet (Left) Vb000122015...
- Page 16 Machine Cabinet (Right) Figure 5: Machine Cabinet (Right) Vb000122015...
- Page 17 Machine Interior (Detailed) Figure 6: Machine Interior (Detailed) Vb000122015...
- Page 18 VersaVend Barrel Figure 7: VersaVend Barrel Vb000122015...
- Page 19 Electrical Boxes Figure 8: Electrical Boxes Vb000122015...
- Page 20 Water Manifold Figure 9: Water Manifold Vb000122015...
- Page 21 MACHINE AND SITE REQUIREMENTS AND CONSIDERATIONS The sides and rear machine panels are square to the frame so you can use the plumb of the sides and rear for level. Do not use the front doors as your baseline surface for leveling the machine.
- Page 22 handling equipment that can carry the 1,895 lb ice machine (empty weight) and properly position it on the foundation. Figure 13: Machine Rear Site Preparations Prepare foundation to meet physical requirements identified below. A reinforced concrete pad is recommended. If the machine is subject to vehicular traffic, install protective pipe bollards as needed.
- Page 23 For more information on this, please refer to the VFD Manual that was provided with your machine. If that is not accessible, please reach out to Everest’s service department. Water - The machine is intended for connection to an Inspected and approved water system only.
- Page 24 EXACTLY where the machine will be placed. This will eliminate all variables of “dead spots”. Some Everest machines operate on a 3G network, but you will want to check with your Everest salesperson or service technician to verify. If your machine was manufactured after 1/1/2020, you are operating on a 4G network.
- Page 25 The machine is reliable but it is NOT maintenance-free. To ensure the success and proper operation of the machine, Everest recommends preventive, once a week maintenance to maintain reliability. It also requires on-site maintenance for breakdown or repairs. The machine has a preventative maintenance schedule that must be followed for reliable operation.
- Page 26 MACHINE INSTALLATION AND INITIAL START UP Lifting the Machine The machine requires a fork truck, pallet jack, or similar material handling equipment to lift and move. The forks and/or lifting surfaces must be padded with cardboard or some other protective material to avoid damaging the powder coated surfaces along the rails on the bottom of the machine.
- Page 27 Installing Leveling Feet (if not already installed) Using a pallet jack or forklift, lift the machine to a minimum of 18 inches. As a safety precaution, block the machine anytime there is a risk of machine weight causing injury. Locate the leveling feet (found inside the machine).
- Page 28 Connecting Utility Services Drain - Connect a ¾ inch NPT drain fitting and hose under the machine. Route the drain hose to a dry well, storm drain or sanitary sewer as required by governing agencies. Water - Install a water shutoff valve outside the machine. Connect a water supply to ½ inch NPT bulkhead fitting on the lower back of the machine, labeled “Water In”.
- Page 29 before opening entirely. Turn on the main inlet valve in the machine manifold. Check the entire system for leaks. Flush Sub-Micron Water Filters - New filter cartridges must always be flushed. Do not turn on the machine power or do anything else until you flush the filters because various machine functions will draw water from the manifold, and the filters need to be flushed in a controlled process before being used.
- Page 30 Image 3: Printed Circuit Board (PCB) Update Firmware and Configuration (Automatic) - Once the machine establishes its GSM connection, it will begin automatically updating to the latest version of firmware, downloading all settings and variables from Akoona.net, and establishing a long-term connection to the server for ongoing machine operation.
- Page 31 After the machine is completely finished with all updates and configuration, then the main vending screen appears showing prices and vend amounts. At this point, you can continue with the next step. Check Water Pressures - Use the analog pressure gauge on the water filter manifold, to read the actual incoming water pressure.
- Page 32 MACHINE OPERATIONS Retail Operations The instructions clearly explain the operation of the machine. In order to make a purchase, customers make a payment using cash or credit card. For ice purchases, customers, either take a bag from the bag dispenser and hold it underneath the chute, or they position a clean, sanitary personal container/cooler under the chute for bulk vending.
- Page 33 Image 4: LCD home screen End Transaction / Coin Return Button The end transaction button and the coin return button are identical, except that the coin return button also performs a mechanical unjamming function by physically moving parts and levers within the coin manager, so that jammed coins can be dislodged.
- Page 34 The machines are configured at the factory to accept one country’s currency. The currency accepted can only be changed by physically swapping the coin manager and the bill acceptor. If changed, you must also contact Everest so that some setup changes can be made on Akoona.net Any combination of coins/bills can be inserted into the machine in any order.
- Page 35 ○ If they pass, but unable to provide change a message will appear and the bill wil not be returned. Accepting Credit Cards - Everest machines by default use credit card readers manufactured by USA Technologies. After a credit card is successfully read by the magnetic stripe reader (see user interface section for details) then the machine immediately attempts to send the credit card information to USA Technology servers via GSM cellular network for authorization.
- Page 36 USA Technologies. If the authorization is declined, then the USA Technologies notifies the machine and a message appears. Cards are declined by the cardholder’s bank for many reasons. The Everest machine does not track or display these reasons to the customer. It is simply declined.
- Page 37 USA Technologies account. Note: Everest recommends that the title used for the purposes of the card holder’s statement should have the words “ice vending” in the title. This will allow users to identify the source of the charge quickly and will reduce chargebacks on the operator’s credit card processor...
- Page 38 Quantity Dispensed Per Vend - The amount of ice dispensed per vend is not adjustable. All Everest ice vending machines are factory set and calibrated to dispense around an a 100lb ven The exact quantity of ice dispensed per vend is somewhat variable and is based on things like the ice cube size, the ice bridging width, saddle size, etc.
- Page 39 Changing these values immediately updates the machine and changes all future water vends and user interface. Unless otherwise stated by the customer, all Everest machines will be set at a 5 gallon water dispensed amount.
- Page 40 If this error occurs then the user’s funds for this vend are automatically added back to the LCD balance. MACHINE MAINTENANCE Recommended Weekly Maintenance Checklist ● Machine exterior ○ Check for any physical damage to exterior of machine or doors ○...
- Page 41 ○ Check bag door locking/unlocking mechanism ● Coin/Bill unit ○ Do par/float procedure to coin manager ○ Empty coin bin ○ Empty bill acceptor cartridge ● Payment tests ○ Insert one each coin denominations and test coin return button ○ Insert lowest bill denomination and test coin return button ●...
- Page 42 Winterizing is highly recommended by Everest. Any damage caused by freezing temperatures are not covered under the Everest warranty and also are not covered under the Scotsman warranty. Hard freezes or even longer periods of temperatures only slightly below freezing will...
- Page 43 “rust fix” spray, or coat it with “rust fix” gel that turns the rust into a black primer. At this point, you can spray paint this primer with “universal blend- sky blue” spray paint, which can be provided by Everest or can be color matched by a local auto body shop and put into spray cans.
- Page 44 Note: The machine is certified by the National Automatic Merchandising Association (https://www.namanow.org/), NAMA, to be safe and healthy. Strict adherence to the instructions below is necessary to maintain this very important certification. Equipment and Supplies Required ● Household unscented bleach - We recommend using Nu Calgon Sanitizing Concentrate ●...
- Page 45 For detailed instructions on how to clean and sanitize your Scotsman Ice Maker, please refer to your ice maker's operating manual. ● Note that the Scotsman Clear 1 amount varies based on which VX model you own. ○ VX1 - 10 oz ○...
- Page 46 Water should be tested every three (3) months for coliforms. In addition at every service visit water should be checked for taste, odor and turbidity. Post Disaster Operations In the event of contamination of the interior or the exterior of the machine due to hurricanes, flooding, mudslides, fires, or any other event causing contamination, the machine should immediately be taken out of service.
- Page 47 Procure two new sub-micron filter cartridges and then prepare to change the filters. Always use genuine Everpure filter cartridges with the machine. Everpure supplies are available from Everest or can be sourced locally. See specifications section of this manual for manufacturer’s reference model numbers.
- Page 48 Procure one new 10-micron pre filter cartridge and then prepare to change the filters. Always use genuine Everpure filter cartridges with the machine. Everpure supplies are available from Everest or can be sourced locally. See specifications section of this manual for manufacturer’s reference model numbers.
- Page 49 Procure a new scale stick cartridge and then prepare to change the cartridge. Always use genuine Everpure scale stick cartridges with the machine. Everpure supplies are available from Everest or can be sourced locally. See specifications section of this manual for manufacturer’s reference model numbers.
- Page 50 When you hear the beep you must change the bulb. Replacement UV bulbs are available from Everest or can be sourced locally. ● Shut off the main inlet valve.
- Page 51 USING MAINTENANCE MODE Everest operators are required to use Tera Term to connect to their machines directly. Tera Term is an open-source, free, software implemented, terminal emulator (communications) program. This will allow you to connect the machine’s PC board to access operational settings and perform machine diagnostics.
- Page 52 ● You are now ready to connect to the board to access Maintenance Mode. ● Locate the USB-to-Serial adapter and the Serial cable that is provided with your machine. ● Plug USB-to-Serial cable into the PCB (circuit board) mounted on back wall of machine by inserting the cable's end to the board allowing all of the pins to connect to the board.
- Page 53 WARNING: NEVER CHANGE SETTINGS IN CATEGORY A - MACHINE SETTINGS (FOR NEW INSTALLS ONLY) THESE PARAMETERS ARE SET IN FACTORY AND NEVER NEED TO BE CHANGED UNLESS TOLD TO DO SO BY AN EVEREST EMPLOYEE! A: MACHINE SETTINGS (FOR NEW INSTALLS ONLY) - These settings will never need to be changed.
- Page 54 Image 11: Maintenance Mode section A options B: Vending Settings - This screen allows you to change pricing and water vend sizes. Image 12: Maintenance Mode section B options C: Machine Operations Tests - This screen will allow you to test the operations of the machine Vb000122015...
- Page 55 Image 13: Maintenance Mode section C options D: Temperature and DC Voltage Tests - Allows you to check and monitor air temps (incoming/exhaust) as well as the DC voltage for the machine Image 14: Maintenance Mode section D options E: Switch Tests - Allows you to check for working switches as well as barrel rotation sensor Vb000122015...
- Page 56 Image 15: Maintenance Mode section E options F: Pressure and Flow Meters - Allows you to check pressure sensors of incoming water (Ice Level sensor is obsolete) Image 16: Maintenance Mode section F options G: MDB Bus Test - Checks coin/bill validator for signal and cash balance. This information will be auto filled when a coin/bill mech is connected.
- Page 57 Image 17: Maintenance Mode section G options H: LED Tests - Tests lights in buttons and on machine. (Ice, Water, and Trans End lights no longer incorporated in machine design) Image 18: Maintenance Mode section H options I: Relay Testing - Allows for testing of all relays on machine. Use lowercase letter for start, Uppercase letter to stop.
- Page 58 Image 19: Maintenance Mode section I options J: Mifare Card Reader (ONLY APPLICABLE TO EVEREST MODELS MANUFACTURED BEFORE 1/1/17.) - Shows Mifare Hardware information (and Pythio Credit Cards if applicable). This category can also link new key/manager cards to the machine.
- Page 59 Image 21: Maintenance Mode section K test L: External Memory Test - Runs test of RAM and memory on machine. Will show “test complete” when finished Vb000122015...
- Page 60 Image 22: Maintenance Mode section L test N: Local Card Database - Shows all cards linked with machine (key cards/ manager cards) (Machines with electronic locks only) Image 23: Maintenance Mode section N options O: LCD Test - Will run test on LCD screen to test. Scrolls from “Blank” to “Characters” to “Animation”...
- Page 61 Image 24: Maintenance Mode section N test P: Signal Test - Tests signal strength to the Akoona.net servers. Does not test USA Technologies CC reader signal strength. ● Signals must be registered on Bands 0 and 3. Bands 1 and 2 do not matter. ●...
- Page 62 Image 25: Maintenance Mode section P test S: Scotsman - This screen with auto fill when a Scotsman Cuber is installed in the machine. Vb000122015...
- Page 63 Image 26: Maintenance Mode section S information Vb000122015...
- Page 64 Adjusting the Ice Bridge Thickness - The ice bridge thickness is important in general to produce good quality ice and it is even more important when dispensing ice using the Everest machine. The ice bridge thickness should be monitored periodically and adjusted.
- Page 65 CPI Bill Acceptors and Coin Managers MEI CF7000 Series Coin Manager - All documentation for the MEI CF7000 coin manager is provided directly from MEI. If the CF7000 unit was factory installed then any hard copy documentation which was provided by the manufacturer is shipped with the machine. It is in the documentation folder inside the accessory box.
- Page 66 Assistance with CPI products - for all technical issues with your CPI units visit Southeastern Vending Services via http://vendingsvs.com/ or call their technical service line directly by calling 704-394-4911. Southeastern Vending Services is Everest’s vendor for all CPI units and will assist any and all issues with your CPI units. Vb000122015...
- Page 67 USA Technologies ePort G10 Telemetry System - All documentation for the USA Technology ePort G10 is provided directly from USA Technologies. If the G10 unit was factory installed then any hard copy documentation which was provided by the manufacturer is shipped with the machine. It is in the documentation folder hanging on the inside of the RF door of the machine.
- Page 68 Everpure (Pentair) HF CSR Twin-MC2 System - All documentation for the Everpure HF CSR Twin-MC2 Filtration System is provided directly from Everpure. If the HF CSR Twin-MC2 System unit was factory installed then any hard copy documentation which was provided by the manufacturer is shipped with the machine.
- Page 69 Manufacturer’s Operating Manual furnished with the product. Any replacement parts must be genuine Everest replacement parts or from a third party approved source. Failure to meet these obligations shall result in voiding of warranty.
- Page 70 Everest’s Service Department and shall be binding upon the parties. Any repaired or replaced warranty part will be incorporated under the original warranty terms.
- Page 71 THE ORIGINAL BUYER TO WHOM IT WAS DELIVERED. ANY SUCH ASSIGNMENT OR TRANSFER SHALL VOID THE WARRANTY HEREIN MADE AND SHALL VOID ALL WARRANTIES, EXPRESS OR IMPLIED, INCLUDING ANY WARRANTY OF MERCHANTABILITY OR FITNESS FOR A PARTICULAR PURPOSE. Vb000122015...
Need help?
Do you have a question about the VX and is the answer not in the manual?
Questions and answers
How to program Nayax bill collector