
Related Manuals for KAEL Muhendislik Elektronik VARkombi-12-PC-TFT-OG-SOLAR

Summary of Contents for KAEL Muhendislik Elektronik VARkombi-12-PC-TFT-OG-SOLAR
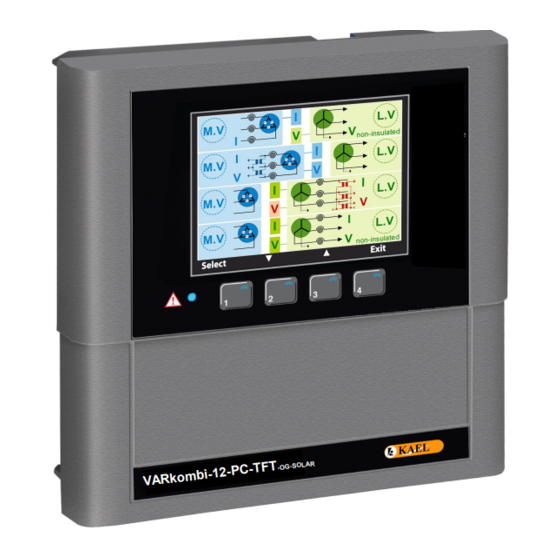
- Page 1 VARkombi-12-PC-TFT-OG-SOLAR Solar Plant compensation 12 Step Connection type selective Power Factor Controller KAEL Mühendislik Elektronik Tic. ve San. Ltd.Şti.
-
Page 2: Table Of Contents
Contents Introduction ........Warnings ........... Specifications........General ..........Step Panel .......... Making the Connections ....... Connections ........Alerts ..........Commisioning ........Main Screens ........% Instant Consumption......CosФ ..........PF Power Factor ......... Σ Accumulated Energy Ratios....Steps ..........MENU ..........Harmonics .......... - Page 3 Contents 1.7.10.6.1.1.3 Over Current........1.7.10.6.1.1.4 Over Compensation......1.7.10.6.1.1.5 Under Compensation ......1.7.10.6.1.1.6 No Phase ........... 1.7.10.6.1.1.7 THD on Voltage........1.7.10.6.1.1.8 HD on Voltage........1.7.10.6.1.1.9 THD on Current........1.7.10.6.1.1.10 HD on Current........1.7.10.6.1.2 General Alarms........1.7.10.6.1.2.1 Connector Failure(1)......1.7.10.6.1.2.2 Connector Failure(2)......1.7.10.6.1.2.4 Total Over Compensation.....
-
Page 4: Introduction
Introduction All the information you need to know and the warnings regarding 3 Phase controlled VARkombi-12-PC-TFT-OG-SOLAR reactive power control relay are described in the user manual. Prior to taking the circuit for the device read this booklet carefully for your system and your own safety. -
Page 5: Specifications
Specifications √ Solar Plant compensation √ Easy to use with English menu √ Advanced dynamic software √ Easy to commissioning √ Large color LCD screen ( 320 x 240 pixel 3,2” ) √ Enough number of steps needed ( 18 steps ) √... -
Page 6: General
A step indicator made by symbols that can be easily realized by the user, is located on the upper part of the screen of VARkombi-12-PC-TFT-OG-SOLAR. No matter which part of the user in, this panel is always located on the top of the screen. Step numbers, the phase or the phases they are... -
Page 7: Connections
Connections Current direction L3 (T) L2 (S) L1 (R) Fuse compatible to the capacitor power connections are shown at pages 10 and 11. 230Vac Power Supply 50/60 Hz L3 (T) L2 (S) connections are shown at pages 10 and 11 (Fan output) L1 (R) (Alarm output) -
Page 8: Commisioning
Commisioning 11 12 1. Step : Number of Steps Current from M.V / Voltage from L.V (non-insulated) When commissioning the first time, Current from M.V / Voltage from M.V (insulated) measurement type must be selected ( 4 types). The device waits for the user to select one of Current from L.V / Voltage from L.V (insulated) these types. -
Page 9: Main Screens
Main Screens VARkombi-12-PC-TFT-OG-SOLAR has color 3.2 "TFT screen. The switch between pages and the key terms are provided on the bottom line of the display. The keys have different meanings in different pages. Steps, to which phase or phases they are connected, whether they are capacitors and/or reactors, temperature value, whether the fan and the generator are activated or not, all these can be observed on all main screens. -
Page 10: Pf Power Factor
Power Factor The instant reactive power value (Q), active force values (P), power factor values (PF) calculated from their ratios (Q / P), vectoral representation of these forces, inductive - capacitive characterized loads, whether the systems is normal or not as per the accumulated energy can be monitored. -
Page 11: Menu
1. MENU This is the section in which many of the electrical measurements 11 12 are monitored and set-up are made. The parameters are MENU accessed by direction keys in the menu, parameters are inserted Harmonics ► by “Select” key and exit from the parameters by “Exit” key. Step Monitoring Voltage,Current,Frequency P.S.: Set-up section can only be accessed by password. -
Page 12: Energy
Energy 11 12 This is the section in which the actice, reactive (ind. and cap.) and apparent energies consumed one by one in each phase 000003035 137 (Active) and, the total active, reactive (ind. and cap.) and apparent KVARh 000000108 131 energy consumed in total of the system are monitored. -
Page 13: Measurement Types
Measurement Type Settings – The device offers the possibility of 4 types , according to the connection. 11 12 Current from M.V / Voltage from L.V (without voltage transformer) There are two settings 1) MV – LV Ratio : The ratio of medium voltage to the low voltage value (phase to phase). - Page 14 11 12 Current from M.V / Voltage from M.V (with voltage transformer) NOTE: The current transformer ratio must be entered in the section from the menu 1.7.8 Connection: MEDIUM VOLTAGE LOW VOLTAGE X/5A select ▼ ▲ exit 11 12 X/5A Enter Voltage Trans.
-
Page 15: Target Cosф
Target TanΦ ( % ±75 ) – CosΦ ( ± 0,800 ) Settings This is the section in which the required % value of the system is entered. CosΦ value corresponding to the % value is displayed automatically on the other side. The value is setup to the required step by using up and down keys starting from the digit where the blue line is. -
Page 16: Switch Off Time
Switch Off time (1 – 600 sec) – Settings This is the section in which the value of switch off time is entered (sec). The value is setup to the required step by using up and down keys starting from the digit where the blue line is. Then, left key is pressed and the blue line moves next to left digit. -
Page 17: Limit Of Inductive Penalty
Inductive penalty limit ( % 3 – 50 ) – Settings This is the section in which the limit value of inductive/active % acceptable in compensation, is entered. This value is determined by electric distribution company and is recommended to setup a value slightly lower than requested to avoid penalty. -
Page 18: Advanced Set-Up Menu
Advanced Setting Menu Settings – This is the section in which the parameters are not used very often. ΔT on Delay Time (0 – 3600 sec) Advanced Setting Menu - Settings – 1 7 10 This is the section in which the holding time between steps during step activating, is entered. The value is setup to the required step by using up and down keys starting from the digit where the blue line is. -
Page 19: Fast Step Mode
Fast Step Mode Advanced Setting Menu – 10 4 Settings – This is the section in which the fast step mode is enable or disable. In case “enable” is selected, the device can activate many steps at the same time as well as de-activate them. If “Off” is selected, then the device makes only one step attempt at each time. -
Page 20: Enter Step Powers
Step Parameters – Enter Step Powers 10 5 Settings – Advanced Setting Menu – This is the section in which the step powers are entered. The 11 12 device directs the user with subcommand display Kvar continuously. It is moved on the step of which the power is --------- --------- ---------... -
Page 21: Step Change Control
Step Parameters – Step Change Control – 10 5 Settings – Advanced Setting Menu It' a useful function in terms of warning the user. First, it' s 11 12 better to clarify some definitions step alteration control page: Step Change Old value : The first internalized power of step. -
Page 22: Phase Alarms
– Over Voltage (enable) 1 7 10 6 1 Phase Alarms In case of over voltage during the activation of alert, alert is given and device warns the user. In this case; - capacitors and devices in the system may be damaged. - “Voltage protection activated”... -
Page 23: General Alarms
– 1. connector failure (K1...K6) (enable) 1 7 10 6 1 General Alarms In case of this alarm; - (C1) common phase input may not be connected. - The fuse of (C1) common phase input may blowed out. - Compensation connection may be made prior to current transformers. - Removing the failure, steps internalized zero should be internalized again. -
Page 24: Alarm Setting Values
Alarm Setting Values 1 7 10 6 2 Alarm & Protection – Setting – Advanced Setting Menu – This is the section in which the alarm setup values are entered. – Over Voltage (230 – 270 V) 1 7 10 6 2 Alarm Setting Values This is the section in which the value of over voltage are entered. -
Page 25: Voltage Thd Setting
– THD Voltage Setting (% 1 – 100) 1 7 10 6 2 Alarm Setting Values This is the section in which total harmonic distortion value (THDV) are entered for voltage. You may enter a value between 1% and 100%. The value is setup to the required value by using the up and down key starting from the digit where the blue line is. -
Page 26: Fan Settings
Alarm & Protection – Fan Settings 1 7 10 6 3 Setting – Advanced Setting Menu – This is section in which the setup values of fan inputs are entered. – Fan Temperature Value (5 – 85 °C) 1 7 10 6 3 Fan Settings This is the section in which fan output activation value is entered. -
Page 27: Harmonic Protection
– Harmonics Protection 10 6 4 3 Step Protection Function This is the section in which the protection function is activated or de- 11 12 activated against voltage harmonics. Voltage harmonic alarms Harmonic Protection (THDV and/or HDV) should be activated in order to operate protection function. -
Page 28: Generator Parameters
– Generator Parameters 1 7 10 8 Setting – Advanced Setting Menu VARkombi-12-PC-TFT-OG does not have this function. – MODBUS RTU Settings 1 7 10 9 Setting – Advanced Setting Menu Data Write Protection 1 7 10 9 – MODBUS RTU Settings – Setting –... -
Page 29: Port Settings
Port Settings 1 7 10 9 – MODBUS RTU Settings – Setting – Advanced Setting Menu Modbus Settings Modbus Settings Modbus Settings 9600 9600 19200 Baud Rate Baud Rate Baud Rate Save Stop Bits Stop Bits Stop Bits Changes ? Parity Parity Parity... -
Page 30: Factory Defaults
Factory Defaults This is the section which is used to restore factory default values to the device. SETUP Factory Default Values : Power Target TanΦ(cosΦ) : % 0 Energy Switch on (Decharge) Time : 20 sec Counter Index Switch off Time : 15 sec Settings Factory Defaults... - Page 31 Technical Info Operating Voltage (Un) : (Phase-Neutral ) 230 Vac Operating Range : (0,8-1,1) x Un Operating Frequency : 50/60 Hz Supply Power Consumption : < 10VA Power Consumption of Measurement Inputs : < 1VA Contact Current : Max.3A/240 Vac Current Measurement Range : (as secondary current of current transformer) 0,01 - 6 Amp AC...
- Page 32 APPENDIX-A CALCULATION CHART ACCORDING TO CAPACITOR CONNECTION FORMAT 3 Phase Phase-Neutral Phase-Neutral Phase-Phase Phase-Phase Capacitor Connection Connection bridged Connection bridged Powers Connection Connection...
Need help?
Do you have a question about the VARkombi-12-PC-TFT-OG-SOLAR and is the answer not in the manual?
Questions and answers