Table of Contents
Advertisement
Quick Links
Advertisement
Table of Contents

Related Manuals for MOVETEC LC Series


Summary of Contents for MOVETEC LC Series
- Page 1 Installation and operating instruction LC/LTC Series Instruction LTC 11_4 - 1 -...
-
Page 2: Table Of Contents
Table of contents Table of contents ....................- 2 - 1 The LTC table controller ..................- 5 - 1.1 Application ..................... - 5 - 1.2 For whom this document is prepared for ............- 5 - 1.3 Preconditions for the use of this document ............ - 5 - 1.4 Safety instructions .................. - Page 3 3.7 Safety zone ....................- 27 - 3.8 Safety Input ....................- 28 - 3.9 Automatic motor recognition ................ - 29 - 4 Controlling through control panels ..............- 30 - 4.1 All Control panels ..................- 30 - 4.2 Control panels with memory keys ..............- 30 - 4.3 Recall memory position with 2-Button control panel without height indication - 30 4.4 Control panels with height indication ............
- Page 4 5.7.4 Choosing the HUB port for transferring the configuration by the “LD” control panel .. - 54 - 5.7.5 Displaying the last error in HUB mode by the “LD” control panel ......- 55 - 6 BLE Option ....................... - 55 - 7 WiFi Option .......................
-
Page 5: The Ltc Table Controller
1 The LTC table controller Thank you for choosing our controller. The well-shaped controllers can be easily mounted below a tabletop or into a crossbar of a height adjustable table. A variety of control panels and control modes enable the user to find the optimum solution for many applications. -
Page 6: Indications For All Laing Table Controllers And All Accessories (Products)
1.4.1 Indications for all Laing Table Controllers and all accessories (products) Before any work is done with the products, read the instruction manual and follow the instructions! Attention: The products may only be used as intended. Danger may occur if products are used in another way or in other applications than the intended ones. -
Page 7: Specifications
• The controller can be configured to a wide variety of applications by an easy-to-use configuration software • The aluminum housing provides superior heat dissipation which is why in most applications the cool down time is not determined by the controller but by the motors connected to the controller •... -
Page 8: Controller For Battery-Operation Ltcb
Input current 15 A 22 A 30 A Frequency Standby power 12 V 80 mW 100 mW 130 mW Standby power 24 V 180 mW 220 mW 250 mW 1.6.3 Controller for battery-operation LTCB Battery voltage 32 V 32 V 32 V Input current 13 A... -
Page 9: Dimensions Controller For Mains Connection Ltc
1.8 Dimensions controller for mains connection LTC 1.8.1 Controller without OptoSense Instruction LTC 11_4 Laing Innotech GmbH + Co. KG Althuette Germany - 9 -... -
Page 10: Controller With Optosense
1.8.2 Controller with OptoSense 1.9 Dimensions controller for DC-operation LTCD For the differing measurements of the OptoSense option see “controller for mains connection” - 10 - Laing Innotech GmbH + Co. KG Althuette Germany Instruction LTC 11_5... -
Page 11: Dimensions Controller For Battery-Operation Ltcb
1.10 Dimensions controller for battery-operation LTCB For the differing measurements of the OptoSense option see “controller for mains connection” 1.11 Options The following options can be ordered with the controller • WiFi module: the controller will be supplied with an integrated WiFi module. -
Page 12: Installation Of The Controllers
2 Installation of the controllers 2.1 Controllers without OptoSense The controller will be attached to the bottom of the tabletop by two screws, one on each fixing point at the ends of the controller. A suitable fastener size is #8 wood screw. -
Page 13: Controller With Optosense
2.3 Controller with OptoSense The picture shows the OptoSense sensor which has to be inserted into the top of the controller through a hole in the tabletop. The picture shows a cross section through controller tabletop. It can be seen, that the centering stud of the controller endcap reaches into the hole in the tabletop to position the controller. -
Page 14: Controller With Gyrosense / Gravisense
maximum of 90° until it can be inserted with little force into the controller. Once the edge of the transparent cover of the sensor reaches the table top the force must be increased up to about 200N to insert the cover into the hole. The cover must be pressed in until the rim of the cover reaches the surface of the tabletop. -
Page 15: Oval Control Panels
2.5.2 Oval control panels For the installation of the oval control panels an appropriate pocket and a ½” hole have to be machined into the tabletop. The cable will be put through the hole from the top, then the control panel will be pressed from the top into the pocket. While inserting the control panel make sure the control panel will not be pressed too hard, if required the size of the pocket has to be adjusted. -
Page 16: Electrical Connection
Cutout for control panels with six buttons IC series Cross section table cut-out 2.6 Electrical connection The picture shows the output connection side of the controller. • 1 Motor 1 • 2 Motor 2 • 3 Motor 3 (LTC 383 and LTC 384) •... -
Page 17: Connectable Motors
2.6.1 Connectable Motors The controllers are designed to be connected to motors with the following ratings. Besides the suitable rating, it is required that the motor connectors correspond to the pin assignment shown under “Pin assignment for motors” below. Nominal voltage 24 V Maximum current Number of hall sensors (90°) -
Page 18: Connection Of The Motors
Motor connection 2.7 Connection of the motors The motors must have an 8 pole Molex plug and must comply with the requirements described under “Connectable motors” The motors may then be plugged into the connectors of the controller in the order shown on the controller cover. -
Page 19: Connection Of Up To 11 Control Panels
Attention! It is not possible to connect two control panels with height indication or two control panels without height indication to one controller. This will result in a malfunction of the controller. Should more control panels be required see next step. -
Page 20: Connection
2.9.1 Connection The wireless keyboard LM4RW can be connected to any controller that is equipped with a BLE Module. Make sure the BLE module in the controller is activated through the Wizard or the LD control panel before using the keyboard. In addition to the wireless control panel, other control panels can be connected to the controller. -
Page 21: Battery Change
To connect another keyboard or to connect the keyboard to another controller, perform the described pairing procedure again with a different keyboard or a different controller. When a keyboard is paired with more controllers, all controllers will start moving, once they get the command by the keyboard. However, while the controllers start and stop simultaneously, they will not be synchronized. -
Page 22: Connection Ltcd
Attention: Make sure the power cable will be placed in a way what provides stain relief to the plug so that the plug cannot be pulled out of the controller. 2.11 Connection LTCD The controllers of the LTCD series are equipped with a 4-cored connection cable. Blue: ground Brown:... -
Page 23: Preconditions For The Start Of Operation Of The Controller
The battery can be charged inside or outside of the controller. Therefore, the battery charger has to be plugged into the charging socket and connected to the mains. While charging the first LED is blinking until the charging status exceeds 25 %, then the first LED is lighted permanently and the second LED is blinking. -
Page 24: Start Of Operation
3 Start of operation After mounting the controller and the control panels, making all electrical connections and making sure that the right parameter set is loaded to the controller, the table can be put into service. Upon power up, the table makes a reference run to acquire the reference position. -
Page 25: Gravisense Based Collision Detection
To sense such a change in position, the GyroSense equipped controller must be mounted to the tabletop. Placing the controller in the crossbar will not work! Attention: Even if the system will sense reliably even very small unusual movements of the table, it cannot be 100% insured that this will avoid injuries of the table users and persons around the table as also the mechanic of the table and the environment of the table can cause such injuries! This is why no liability can be accepted for personal injury or any other damage! It is the user’s sole... -
Page 26: Reference Run
For each type of collision detection there is a percentage set in the controller, by which the limit value of the sensitivity is being changed. When changing the sensitivity level from 2 to 3, each limit value is being multiplied by the according percentage and added to the limit value, when switching from 3 to 4 it is added once again. -
Page 27: Determining The Stroke By The Reference Run
3.6 Determining the stroke by the reference run When the stroke detection is activated in the Wizard, a reference run will not only establish the reference position but will also determine the stroke of the drive. To enable this, the drives must be equipped with a limit switch at bottom and at the top, or the drive must support, that the bottom and top mechanical stop can be hit to enable the controller to determine the end position without limit switch. -
Page 28: Safety Input
Alternatively, the controller can be set through the Wizard in a way, that the movement continues with the speed set for the safety zone when the set height is reached. In this case the button doesn’t have to be pushed again. Through P35 the starting point of the safety zone can be set. -
Page 29: Automatic Motor Recognition
The picture shows the connection The picture shows the connection of a ribbon switch or sensing of light curtains to the safety input bumper to the safety input of the of the controller. The left side controller. The left side shows the shows the content of the safety content of the safety adapter, on adapter, on the right side the part... -
Page 30: All Control Panels
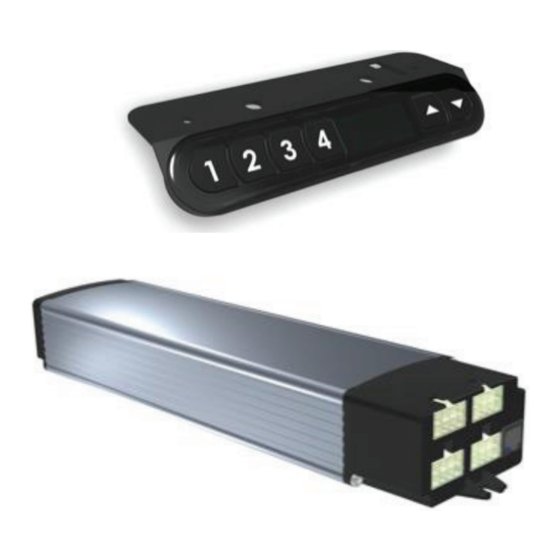
4 Control through control panels 4.1 All Control panels Table will move upward Keep the key pushed until the desired position is reached Table will move Keep the key pushed downward until the desired position is reached 4.2 Control panels with memory keys By use of the memory keys the user can assign individual heights to these keys what then can be recalled when the memory key is pressed. -
Page 31: Control Panels With Height Indication
4.4 Control panels with height indication Control panels with height indication show the actual height of the tabletop in centimeters or inches depending on the configuration. 4.5 Controlling the controller by OptoSense • Hold your hand about 5 cm or 2 inches on top of the OptoSense sensing element •... -
Page 32: Configuration Of The Controller Through The "Lm" Control Panels (Control Panels Without Height Indication)
4.6 Configuration of the controller through the “LM” control panels (control panels without height indication) In the Wizard can be chosen whether the menu is accessible through the control panel or not. If not, the user is only able to set the memory position and to request a reference run. -
Page 33: Minimum Stroke
Attention: The top and lower positions must keep a minimum distance so that the table can still move after the new limits have been adjusted. This minimum distance is defined in the parameter set entered into the controller. Saving a new upper or lower limit is not possible if the minimum distance is not maintained. -
Page 34: Initiating A Reference Run By "Lm" Control Panels
detection. In this case the sensitivity of the collision detection can be adjusted as follows: • Press the “up” arrow key 4 times quickly one after another • Reaching the program mode will be confirmed by a sound • Press the “down” arrow key 3 times quickly one after another •... -
Page 35: Configuration Of The Controller Through The "Ld" Control Panels (With Height Indication)
4.7 Configuration of the controller through the “LD” control panels (with height indication) In the Wizard can be chosen whether the menu is accessible through the control panel or not. If not, the user is only able to set the memory positions and to request a reference run. -
Page 36: User Height Limit Adjustment By The "Ld" Control Panels
• By using the arrow keys the indication can be toggled from “0” to “1” and from “1” to “0”. Once the right selection is made push the memory key “one” to confirm the selection, a sound will confirm that the setting is stored, the display will go back to normal operation and indicate the height •... -
Page 37: Stroke Limitation Adjustment By "Ld" Control Panels
4.7.4.2 Deleting the user height limits • Move the tabletop by use of the arrow keys to the minimum or maximum height (Keep the “up” or the “down” key pressed until the table stops moving) • Press the “up” arrow key 4 times quickly one after another •... -
Page 38: Minimum Stroke
• Press the memory key “one” shortly to store the selected limit, the successful storage of the user position will be confirmed by the sound displayed Attention: The top and lower limits must keep a minimum distance so that the table can still move after the new limits have been adjusted. -
Page 39: Changing The Sensitivity Of The Collision Detection By The "Ld" Control Panels
If for example the upper user height limit shall be decreased in a way, that the minimum stroke is undercut, the lower user height limit has to be decreased as well, so the minimum stroke is ensured again. 4.7.7 Changing the sensitivity of the collision detection by the “LD” control panels Over time the movement of the table may change due to wear or change of the lubrication properties. -
Page 40: Adjusting Direction Of The Reference Run
reference is recalibrated, the table is leveled, and the height indication is correct. If a power failure occurs or the mains plug is being pulled out while traveling, the controller will go to reference mode automatically. 4.7.9 Adjusting direction of the reference run If a reference run downwards isn’t possible, an upwards reference run can be set. -
Page 41: Entering The Info Menu By The "Ld" Control Panel
4.7.11 Entering the info menu by the “LD” control panel For service purposes certain values and settings can be indicated in the display. The service menu can be entered as follows: • Press the “up” arrow key 4 times quickly one after another •... -
Page 42: Resetting User Settings By The "Ld" Control Panel
• Press the “up” arrow key 4 times quickly one after another • Reaching the program mode will be confirmed by a sound • The display will now show “P01” • Press the “up” or “down” arrow key until the display shows “P12” •... -
Page 43: Resetting The Controller Name
• The display will now show “P01” • Press the “up” or “down” arrow key until the display shows “P13” • Press the memory key “one” shortly to enter the menu • The display now will show “P40” • Press the memory key “one” shortly to enter the setting mode •... -
Page 44: Deleting Connections To Wireless Control Panels
• Press the “up” or “down” arrow key until the display shows “P13” • Press the memory key “one” shortly to enter the menu • The display now will show “P40” • Press the “up” or “down” arrow key until the display shows “P42” •... -
Page 45: Entering The Option Menu By The "Ld" Control Panel
4.7.20 Entering the option menu by the “LD” control panel • Press the “up” arrow key 4 times quickly one after another • Reaching the program mode will be confirmed by a sound • The display will now show “P01” •... -
Page 46: Resetting The Number Of Connected Motors
4.7.21 Resetting the number of connected motors The controller can be configured in a way to automatically recognize the number of connected motors. The controller saves the recognized number as the actual number of drives connected. When a motor is added, the number will be increased automatically. -
Page 47: Setting The Starting Point For The Safety Zone
• Press the “up” or “down” arrow key until the display shows “P61” • Press the memory key “one” shortly to enter the menu item • The display will now show the currently set value • By pressing the “up” or “down” arrow key the desired setting can be selected: o “1”... -
Page 48: Displaying The Last Error By The "Ld" Control Panel
4.7.24 Displaying the last error by the “LD” control panel If the control panel displays an error, it is possible to check through the menu on which drive the error occurred. • Press the “up” arrow key 4 times quickly one after another •... -
Page 49: Synchronization Of Up To 6 Controllers By Hub
automatically will go back to normal mode after a reset is made by unplugging the controllers for a few seconds. 4.7.25.1 Displaying the last error when synchronizing 2 controllers by the “LD” control panel If the control panel displays an error, it is possible to check through the menu on which drive the error occurred when 2 controllers are synchronized trough the Sync-Y-Adapter. -
Page 50: Port Designation
5.1 Port designation 5.2 Configuration Attention: When delivered, the number of controllers connected to the HUB is set to 6. This insures, that the system will not start operating, before all anticipated controllers are connected to the HUB. Once the system is set up, the actual number of connected controllers has to be set through the menu 91. -
Page 51: Connecting The Controllers To The Hub
5.2.1 Connecting the controllers to the HUB Controllers and control panels can be connected to all of the 6 ports. The controllers will be connected by a 6P6C interface cable to the HUB. To any port connected to a control panel with height indication, a control panel without height indication can be added by use of a Y-adapter. -
Page 52: Operation
Wizard or Menu 91. The HUB checks every port for controllers, not only the ports once already used by controllers! The HUB will synchronize all drives of the connected controllers. For this it is mandatory, that the parameters used for the movement of the drives are exactly the same. -
Page 53: Hub Menu Handling
c. Plug in the new controller into the selected port. The controller already has to be connected to the mains d. The complete parameter set, not only the parameters relevant for the movement, is going to be loaded into the new controller. 5.7 HUB Menu handling The HUB and the controllers connected to the HUB can be configured by the control panels with height indication. -
Page 54: Adjusting The Number Of Controllers Connected To The Hub By The "Ld" Control Panel
• Press the memory key “one” to select the menu item • Now the present controller number the HUB is set for is shown • Press the “up” or “down” arrow key until the display shows “0” • Press the memory key “one” shortly to reset and restart the HUB 5.7.3 Adjusting the number of controllers connected to the HUB by the “LD”... -
Page 55: Displaying The Last Error In Hub Mode By The "Ld" Control Panel
• Press the “up” or “down” arrow key until the display shows the port, from which the configuration should be transferred • Press the memory key “one” to select the port and to activate the transfer • After the transfer is completed the port continues with its regular operation 5.7.5 Displaying the last error in HUB mode by the “LD”... -
Page 56: Wifi Option
7 WiFi Option Controllers with WiFi option have a WiFi module installed inside the controller that is able to connect to and communicate with WiFi networks. This allows the controller to be controlled for example by higher level controls. The network the controller should connect to can be entered by the Wizard to the controller. -
Page 57: Menu Codes For Control Panels Without Height Indication "Lm
Constantly on Controller is switched on If LED is not on, check and / or motors are the power cable running Single blink Controller is in standby mode Constantly blinking Controller is in reference Press up or down button mode to perform a reference run. -
Page 58: Menu Codes Indicated By The "Ld" Control Panels
Set user upper and Users can set individual lower limit upper and lower limits two sounds for their controller to avoid e.g. collision with a window board above or drawer container below the table Adjust sensitivity of For the current based as collision detection well as the GyroSense three sounds... - Page 59 use four key presses instead) Store memory position 2 The memory position two for the control panel (remains only for memory key two can be compatibility reasons, stored use four key presses instead) Store memory position 3 The memory position three for the control (remains only for panel memory key three...
- Page 60 Sensitivity level for the For the current based, collision detection as well as the GyroSense and GraviSense based collision detection in this menu item the sensitivity can be adjusted. Also, the collision detection can be deactivated Initiate reference mode If the table gets out of level or the height is not (remains only for indicated right, a...
- Page 61 Service menu Reset user settings All user settings will be reset to the factory settings Distance from top Set the distance from endpoint the top endpoint the travel will stop Distance from bottom Set the distance from endpoint the bottom endpoint the travel will stop Distance from the floor Set the distance from...
- Page 62 Clear paired control All connections to panels control panels saved in the controller will be deleted Reset private mode The private mode for the controller will be deactivated Activate OptoSense Activate or deactivate the OptoSense Activate WiFi Activate or deactivate the WiFi Info menu Charging state of the...
-
Page 63: Failure Codes Indicated By The Control Panels
Safety mode Reset safety mode to auto detect mode Reference run Select whether downwards/upwards reference run is done downwards or upwards Stroke detection Repeat the stroke detection, when “one- time” stroke detection is activated Error menu Last error Displaying the last error HUB menu Restart HUB The HUB can be... - Page 64 The following failure indications will be shown by the control panels with height indication. If control panels without height indication are used, an error will be shown through the LED by a SOS blinking sequence (short short short long long long short short short) Indicated Failure code Failure...
- Page 65 If the error reoccurs the controller may be damaged, contact the supplier EEPROM Read error Reset error by pressing any key If the error remains restart system by unplugging the power cable of the controller and plugging it in again after 20 seconds If the error reoccurs the controller may be...
- Page 66 Reset error by pressing any key Motor current reached Reduce load on the the error overcurrent table level. Reset error by pressing any key Motor current reached Try to reduce load on the fault overcurrent the table or ensure a level.
- Page 67 Maximum temperature Wait for some time to level of the controller allow the controller main main power supply power supply to cool reached back Reset error by pressing any key Maximum temperature Wait for some time to level of the controller’s allow the controller to motor one and two drive cool back...
- Page 68 Number of motors Check if all motors are connected to the properly connected to controller does not the controller correspond to the Reset error by pressing number of motors the any key controller was configured for Controller overloaded Reset error by pressing any key If the Error remains restart system by...
- Page 69 Safety-adapter missing The controller is configured for a safety- adapter; however, a safety-adapter is not connected Connect a safety- adapter! Safety-adapter active The safety adapter has been triggered Remove the reason for the safety-adapter trigger and push the button again One of two hall-sensors Check hall-sensors and is not giving any signal...
- Page 70 The battery reached the Reduce load of the table overcurrent level Battery short-circuit Solve short-circuit Battery overvoltage Battery may be damaged, contact the service Battery undervoltage Connect battery to charger Internal battery error Push the button on the battery pack 8 times shortly one after another Should the error remain, contact the service...
- Page 71 battery temperature out Temperature of the of range battery cells over 45°C/ 113°F → let battery cool down under 10°C/ 50°F → bring battery temperature in the permitted range Firmware versions of Use controllers with controllers connected to similar firmware versions the HUB or Sync-Y- Adapter are not similar Instruction LTC 11_4...
-
Page 72: Sound Signals
9 Sound signals The following sound signals are given out by the controller: Sound Meaning Explanation Acknowledgement signal The sound acknowledges a selection Fail signal The sound indicates that a selection could not be made as intended Deletion confirmation The sound indicates that a value has been deleted like the user height... -
Page 73: Directives And Approvals
10 Directives and approvals 10.1 Directives followed RoHS 2. 2011/65/EU Reach 2006/121/EC Low voltage 2014/35/EU EMC 2014/30/EU 10.2 Approvals for European Controllers (230V versions) The CE sign is based on the compliance to the following standards: EN 60335-1 2012 EN 61000-6-3 2007 EN 61000-6-2 2005 EN 61000-3-2 2006+A1 2009+A2 2009 EN 61000-3-3 2008... - Page 74 Laing Innotech GmbH + Co. KG Althuette Germany Instruction LTC 11_5 - 74 -...
Need help?
Do you have a question about the LC Series and is the answer not in the manual?
Questions and answers