Advertisement
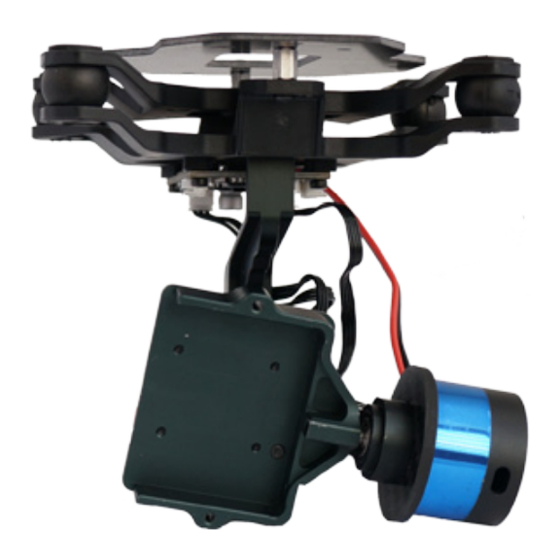
QUAD/Y6/X8 TAROT GIMBAL
Tarot brushless gimbal with
QUAD/Y6/X8 mounting plate
Three spacers
Three mounting screws
1 Attach camera
Your Tarot gimbal is compatible with a GoPro HERO3, available from store.3dr.com.
Important note: Make sure that the WiFi on your GoPro is
!
turned OFF at all times when in use with your aircraft.
1
Remove the two screws securing the blue face plate.
Remove the plate, and loosen the set screw.
remove
2
Slide camera into housing with the lens nearest
the top-right corner.
loosen
remove
face plate
Advertisement
Table of Contents

Summary of Contents for Robotics Quad/Y6/X8
- Page 1 QUAD/Y6/X8 TAROT GIMBAL Tarot brushless gimbal with QUAD/Y6/X8 mounting plate Three spacers Three mounting screws 1 Attach camera Your Tarot gimbal is compatible with a GoPro HERO3, available from store.3dr.com. Important note: Make sure that the WiFi on your GoPro is turned OFF at all times when in use with your aircraft.
- Page 2 Place the blue face plate over the camera, and secure from the back with the two original screws. tighten Add face plate. 2 Connect Locate the black and white two-wire cables protruding from the bottom of your copter and from the top of the gimbal. Connect the cables together by attaching the black connectors. 3 Power Connect the gimbal power cable with the red, JST connector to the matching red, JST connector on the copter.
- Page 3 4 Mount To mount the gimbal to your copter, add a mounting screw from below the gimbal to each of the three holes in the gimbal interface plate indicated below. Add a spacer to each screw above the gimbal plate, and attach the screws to the three holes in the lower body plate indicated below. The spacers should be between the gimbal interface plate and the lower body plate.
- Page 4 If you connected the gimbal to Pixhawk, use the knob shown below on the RC transmitter to control the tilt of the camera in flight. Spektrum FlySky Rotate counterclockwise to tilt the camera up. Rotate clockwise to tilt the camera down.
- Page 5 Support For customer support, contact us at help@3dr.com or call our support line at +1 (858) 225-1414 Monday through Friday, from 8 am to 5 pm, PST. Tarot Gimbal for Y6/X8 VB | ©3D Robotics, Inc. | 9 June 2014...
Need help?
Do you have a question about the Quad/Y6/X8 and is the answer not in the manual?
Questions and answers