
Related Manuals for Blaupunkt BPK-VCBB1XW


Summary of Contents for Blaupunkt BPK-VCBB1XW
- Page 1 XWIN BLUEBOT VIBRATE INSTRUCTION MANUAL Robot Window Cleaner BPK-VCBB1XW Enjoy it.
- Page 2 Congratulations! And thank you for buying a great new product from Blaupunkt. The BLAUPUNKT BLUEBOT XWIN VIBRATE is a wonderful helper to clean both framed and frameless windows “because of its gap sensors”. Its Unique and patented Vibrating- mopping pad removes stains and dirt easier and can be compared with the movements of a human hand.
-
Page 3: Table Of Contents
Contents 1. Important Safety Instructions..............1 2. Package Contents and Technical Specifications.........2 2.1 Package Contents..................2 2.2 Specifications....................2 2.3 Product Diagram..................3 3. Operating XWIN .....................4 3.1 Notes before Cleaning................4 3.2 Attach Cleaning Pad..................5 3.3 Assemble Power Adapter................5 3.4 Install Safety Tether..................5 3.5 Place Safety Pod..................6 3.6 Spray Cleaning Solution................6 3.7 Start......................7 3.8 Pause......................8... -
Page 4: Important Safety Instructions
6. Do not use the robot on cracked glass. 7. Only use accessories recommended or supplied by Blaupunkt Robotics. Only use the Power Adapter supplied by Blaupunkt Robotics. Please make sure your power supply voltage matches the power voltage marked on the Power Adapter. -
Page 5: Package Contents And Technical Specifications
Instruction Manual Extension Cord (1.5m/4’11 Safety Pod and Tether Remote Control Cleaning Pads Cleaning Solution 2.2 Unit Specification Model No BPK-VCBB1XW Working Voltage 24V DC Rated Power Remote Control Rated output voltage 3V DC Power Adapter: GQ90-240375-E2 Input:100-240v~50/60Hz 2.0A Max Output:24V DC... -
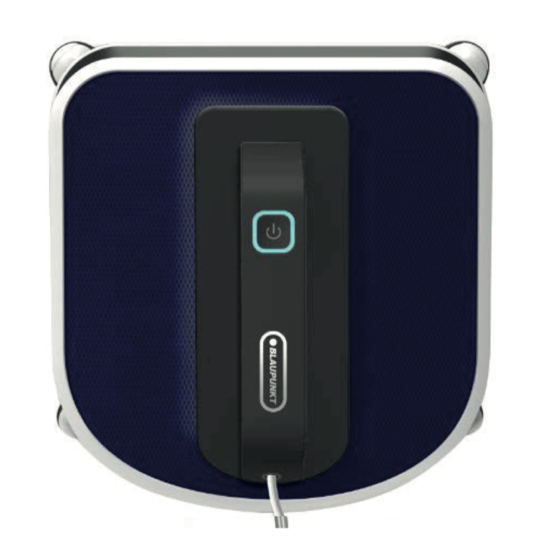
Page 6: Product Diagram
2. Package Contents and Technical Specific 2.3 Product Diagram XWIN Robot 10. Cleaning Pad Front Bumper 7、后档 13、风机 13、风机 1、前档 1、前档 7、后档 11. Squeegees Status Indicator Light 12. Cleaning Pad 14、驱动轮 14、驱动轮 2、状态指示灯 2、状态指示灯 8、电源线 8、电源线 START/PAUSE Button 13. Fan Handle 15、吸力传感器... -
Page 7: Operating Xwin
3. Operating XWIN 3.1 Notes Before Cleaning Do not use XWIN on a framed window XWIN can clean framed or frameless with a frame smaller than 5mm (0.2"). glass, larger than 50 x 50cm (19.7’’ x 19. 7’’). If XWIN ’s Status Indicator Light flashes If the window is covered with RED after powering ON, please connect excessive dirt, clean a small area on... -
Page 8: Attach Cleaning Pad
Please refer to the manufacturer's care and cleaning instructions before using robot on glass with an uneven surface, such as frosted, textured, patterned, or coated glass. Blaupunkt Robotics cannot be responsible for damage due to improper use on these surfaces. -
Page 9: Place Safety Pod
3. Operating XWIN Loop one end of the Connect end A and end B and tight. Loop the other end of the Safety Tether Safety Tether to end A around the Safety Pods channel and on the robot Power pull it tight. Cord and tight. -
Page 10: Start
3. Operating XWIN 3.7 Start 1. Plug in Robot CAUTION: * Do not unplug the Robot while it is cleaning. 2. Power ON Move the Power Switch to the "--" position. Robot is powered ON when the Status Indicator Light flashes BLUE. CAUTION: * Keep objects away from robot Fan to avoid blockage. -
Page 11: Pause
3. Operating XWIN " N " Cleaning Mode is Best " Z " Cleaning Mode is best for tall windows robot cleans in an " for wide windows. Robot N " path. cleans in a " Z " path. CAUTION: If the remote control is not able to command the robot. Please check below steps match code for robot and the remote control. -
Page 12: Stop
3. Operating XWIN 3.9 Stop When the robot completes its cleaning cycle, it returns to the place it started and beeps. Remove Robot Power OFF Grasp robot’s Handle. Press and hold for Move the Power Switch to the "o" approximately 5 seconds and the fan will position. -
Page 13: Maintenance
4. Maintenance Before performing cleaning and maintenance on robot, Power OFF and unplug robot from the glasses. 4.1 Cleaning Pad Turn Robot over and remove the Cleaning Pad. Soak the Cleaning Pad in 20℃, clean water for 2 minutes. Hand wash with mild detergent and lay flat to dry. -
Page 14: Driving Treads
4. Maintenance 4.3 Driving Treads Turn robot over and move the Power Switch to "--" position. The fan motor will shut down about 8 seconds later.P ress the "Wheel Clean" button on remote control to start to clean the wheels. Inspect the Driving Treads by using the START/PAUSE button on the Remote Control. -
Page 15: Status Indicator Light And Sounds
5. Status Indicator Light and Sounds Twinkles Blue (slowly) Robot will not clean until the Back-Up Battery is properly charged. Flashes Blue (quicker) Robot is powered ON and ready to be placed on the glass. Solid Blue Robot has successfully adhered itself to the glass and is ready to clean. Flashes Red Robot power connection has a problem or the vacuum is not good enough. -
Page 16: Troubleshooting
6. Troubleshooting Malfunction Possible Causes Solutions Cleaning pads are installed Remove the cleaning pad and adhere neatly onto the Velcro. not properly Status Indicator light flashes BLUE when Robot adhered Edge detection sensors with Check if the edge detection sensors are stuck by cleaning pad or dirt. to glass problem There is too much dirt and debris on...
Need help?
Do you have a question about the BPK-VCBB1XW and is the answer not in the manual?
Questions and answers