Page 1
User Manual 
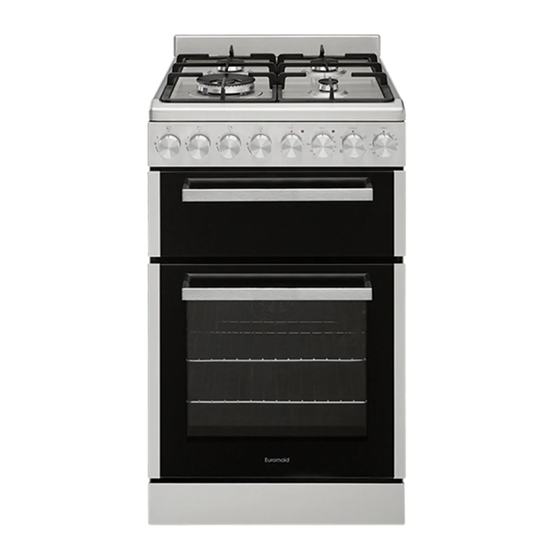
Description: 54cm Freestanding Cooker Front Control Models: MODEL NO. EFS54FC-DCW / EFS54FC-DDS Rear Control Models: MODEL NO. EFS54RC-DRW / EFS54RC-DCW / EFS54RC-DCB euromaid.com.au PG 1 USER MANUAL...
CONTENTS Conditions of use....................4 Safety precautions....................4 Other important safety information..............4 Warnings for use (of grill, oven, and appliance hob)........5 Disposal of packaging ..................5 Installation, cleaning and servicing..............5 Product description..................... 6 First time use of the appliance................8 Using the oven.....................
SAFETY PRECAUTIONS • This appliance is not intended for use by persons (including children) with reduced physical, sensory or mental capabilities, or lack of experience and knowledge, unless they have been given supervision or instruction concerning use of the appliance by a person responsible for their safety. •...
WARNINGS FOR USE GRILL WARNINGS • DO NOT leave grill on unattended. • DO NOT cover the grill tray wire rack with foil. • Trying to grill food more than 25mm thick under grill can be a fire hazard. Trim excess fat from fatty meats, such as pork and lamb.
PRODUCT DESCRIPTIONS REAR CONTROL MODELS DESCRIPTION OF COOKER WITH SEPERATE GRILL AND REAR CONTROLS Hob (solid, coil and ceramic) Heat shield (coil element models only) Grill door Oven shelf (2 supplied) Enamelled oven baking tray (1 supplied) Oven inner door glass Oven door Control panel Grill element (inside compartment)
Page 7
PRODUCT DESCRIPTIONS FRONT CONTROL MODELS DESCRIPTION OF COOKER WITH SEPERATE GRILL AND FRONT CONTROLS Hob (Solid, coil, ceramic and gas). Gas model supplied with cast iron trivets and WOK adapter. Gas Model - Wok burner (1) (highlighted) with removable cap, distributor, other burners (2x semi rapid, 1x auxiliiary). Control panel Grill door Oven shelf (2 supplied)
Page 8
Front Control Panels: EFS54FC - DCW Rear Control Panels EFS54RC - DRW Rear Control Panels EFS54RC - DCW and EFS54RC - DCB Radiant (coil) Hotplate Control Knob • Adjusts temperature of hotplate. Hotplate Indicator Light (where fitted) • Comes on when a hotplate is turned on. Grill Indicator Light •...
USING THE OVEN PREPARING YOUR APPLIANCE FOR THE FIRST TIME • Please wipe out the oven interior prior to operation with warm soapy water and polish dry with a soft clean cloth. • New appliances can have an odour during first operation from components manufactured with the aid of oils.
Page 10
USING THE OVEN OVEN SAFETY WARNINGS • Always follow the instructions for putting the shelves and side racks into the oven, to avoid accidents. • DO NOT line the oven with foil, it will damage the enamel coating. • DO NOT place cookware or anything else on the bottom of oven as trapped heat will damage the oven enamel coating.
Page 11
PROGRAMMABLE CLOCK 1. Heating indication 2. Clock indication 3. Hour indication 4. Second indication 5. Minute indication 6. Up 7. Set 8. Down Starting-up procedure After power on, the screen will display “00:00” and “ ” clock indicator will be on. Setting the time NOTE: Digital clock is displayed in 24 hour format When “...
Page 12
OVEN COOKING GUIDE The following is intended as a guide only. It is often required to set oven 10-20 degrees above or below this guide to get the result you want. Also adjustments are needed for the cooking time to suit personal desired results.
Page 13
UNDERSTANDING COOKING PROBLEMS Problem Causes What to do Uneven cooking Incorrect shelf position Select shelf that puts food in centre of oven Oven tray too large Remove oven tray. Use smaller trays or dishes Trays not in centre Put trays in centre Oven fan causing uneven browning or small Rotate food during cooking, or use cakes to lean over...
USING THE GRILL Grill safety warnings • Always turn off the grill immediately after you have finished cooking and pull drawer out or remove grill tray otherwise fat left in the tray in the hot grill compartment will continue to smoke or could catch fire. •...
USING THE HOTPLATES OF YOUR COOKER Hotplates safety warnings • Do not use pots and pans which are unsteady, as these could overbalance. • Do not use mats, heat diffusers or wok stands. These will cause a temperature build-up which can damage the cook top.
Page 16
Ceramic hotplates • DO NOT use the cooktop if the glass is cracked. • Contact the service department immediately to have this repaired. • The ceramic cooktop is made from ceramic glass, a tough, durable material that withstands heating and cooling without breaking. •...
USING THE GAS BURNERS The hob control knobs The symbols on the control knobs mean the following: No gas flow Maximum gas flow Minimum gas flow All operating positions must be set between the maximum and minimum flow settings, and never between the maximum setting and the closed position.
Page 18
CLEANING THE COOKER SAFETY WARNINGS ABOUT CLEANING • Always make sure that the cooker is turned off before cleaning. • Always clean cooker immediately after use. • Do not use steam cleaners. These may cause moisture build-up. • Do not use caustic- based cleaners. These will damage aluminums parts, and remove enamel gloss. CLEANING THE ENAMEL •...
FITTING OVEN ACCESSORIES & CLEANING Cleaning the Gas Hob Removing the trivets (Refer Figure 1) • The trivets locate in the recessed area of the hob. • They can be removed for cleaning by carefully lifting them from the hob. •...
Page 20
CLEANING THE OVEN DOOR / HOW TO REMOVE THE OVEN DOOR For a more thorough clean, you can remove and disassemble the oven door. Proceed as follows: • Open the door to the full extent (fig. 1) • Open the lever A completely on the left and right hinges (fig. 2) •...
Page 21
INFORMATION ABOUT THE COOLING FAN NOTE: Your cooker is fitted with a cooling fan that will run after the oven has been turned off. The reduce the time of the cooling fan running time it is suggested to open door ajar to assist in cooling down of oven.
If you have a problem with your appliance, check the table below before calling service. You may be able to avoid a service call by and avoid unnecessary inconvenience and expense. For cooking problems, refer to Handling Baking Problems. Note: Only Euromaid Authorised service agents should carry out servicing otherwise warranty may be void. PG 22 USER MANUAL...
INSTALLING COOKER - POWER CONNECTIONS FITTING A POWER SUPPLY CABLE WARNING: Installation MUST ONLY be carried out by a qualified approved installer, ie. an Electrician. Connecting appropriate power supply ` terminal board/ connector block: NOTE: REFER to TECHNICAL tables at the rear of this manual for correct rating for your corresponding model purchased.
INSTALLING THE GAS COOKER Unpacking Do not fit the burner crowns, burner caps and trivets until after the cooker has been installed. Checking gas pressures Before installation check that the cooker is suitable for the gas supply. To do this check the gas type on the carton sticker or on the data plate behind the bottom of the oven door.
Page 25
Operation on natural gas Read these points about operation on NG/SNG and look carefully at the diagram: • The appliance regulator provided must be orientated to give access the manometer test point. • The arrow showing the direction of the flow must be facing the correct way from gas source into the cooker.
TESTING THE OPERATION OF THE GAS COOKER NOTE: You must test the cooker after installation, before you hand it over to the customer. You must have a manometer and a connecting tube. Checking gas supply • Check the manometer zero point is correct. •...
INSTALLING YOUR NEW COOKER SAFETY WARNINGS ABOUT INSTALLATION • The cooker must be installed and serviced only by an authorised person. • A certificate of compliance must be supplied by Installer and is to be kept by the customer. • The packing materials must be removed before you install the cooker.
Page 28
Locating the cooker Front control models - gas Study the diagrams below to be sure of the dimensions required to locate the cooker safely. Make sure that The installation of splash back • To fit splash back, align the 2 tabs of the the top of the cooker is at least 10mm higher than the splash back with the corresponding holes in level of the bench tops.
Page 29
(Refer to diagram relating to minimum clearances required for correct installation) • Determine position of cooker and ant-tilt plate. • Securely fix the anti-tilt plate to the floor with appropriate fasteners. • Slide the cooker into the anti-tilt plate to double check. And then slide out the cooker. •...
In the case of Euromaid products used for personal, domestic or household purposes, a period of 2 years from the date the product is purchased as a brandnew product from a retailer located in Australia / New Zealand.
Page 33
MANUFACTURER GUARANTEE 4. How to make a claim. You may make a claim under this warranty through our website, contacting our customer care line or via email. Contact details for Glen Dimplex Australia and New Zealand can be found at the end of this document To make a valid claim under this warranty, you must: a) Lodge the claim with us as soon as possible and no later than 14 days after you first become aware of...
Page 34
READ THE INSTRUCTION BOOKLET BEFORE INSTALLING AND USING THE APPLIANCE. The manufacturer will not be responsible for any damage to property or to persons caused by incorrect installation or improper use of the appliance. The manufacturer is not responsible for any inaccuracies, due to printing or transcription errors, contained in this manual.
Need help?
Do you have a question about the EFS54FC-DCW and is the answer not in the manual?
Questions and answers