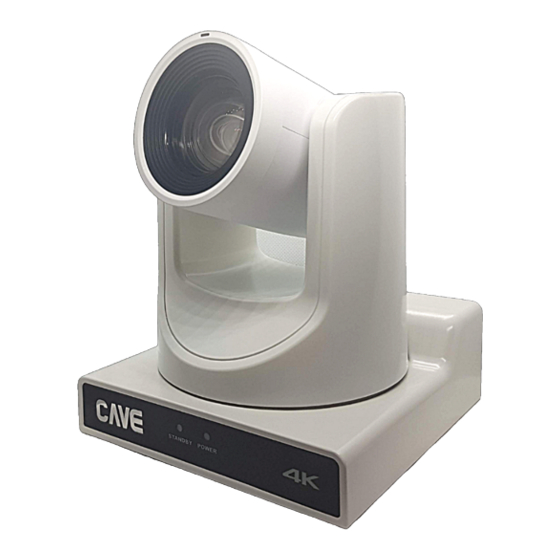
Summary of Contents for CAVE TeamUp TX20i
- Page 1 CAVE-TEK TeamUp TX20i Camera User Guide CAVE-TEK TeamUp TX20i Camera User Guide English (V1.0)
-
Page 2: Table Of Contents
CAVE-TEK TeamUp TX20i Camera User Guide Table of content Packing List Quick Start About TX20i Interfaces and Buttons Dimension Remote Control RS-232 Interface Serial Communication Control GUI Settings MENU EXPOSURE COLOR IMAGE P/T/Z NOISE REDUCTION SETUP COMMUNICATION SETUP RESTORE DEFAULT... -
Page 3: Packing List
CAVE-TEK TeamUp TX20i Camera User Guide Packing List Open the box, you will find below items: Name Quantity TeamUp TX20i Camera AC Power Adaptor Power Cable RS232 Cable Mount Kit Remote Control Quick Installation Guide Quick Start 1) Please check below connects first. -
Page 4: About Tx20I
CAVE-TEK TeamUp TX20i Camera User Guide About TX20i 3.1 Interfaces and Buttons Item Name AUDIO IN Interface LINE OUT Interface System Select Switch RS485 Interface RS232 IN Interface RS232 OUT Interface Network Interface HDMI Interface USB 3.0 Interface 3G-SDI Interface... -
Page 5: Remote Control
CAVE-TEK TeamUp TX20i Camera User Guide 3.3 Remote Control 7. Zoom Key Slow Zoom: Zoom In [+] or Zoom Out [-] slowly Fast Zoom: Zoom In [+] or Zoom Out [-] fast 8. Left/Right Setting Key Press with 1 button and 2 buttons setting the direction of the Pan-Tilt. -
Page 6: Rs-232 Interface
● RS485 Communication Control Control camera via RS485, half-duplex mode: Baud rate: 2400/4800/9600/38400 bit/s; Starting position: 1 bit Data bit: 8 bits Stop bit: 1 bit Check digit: None ● List of protocols For a detailed list of VISCA/Pelco-D/Pelco-P protocols, please check www.cave-tek.com. -
Page 7: Gui Settings
CAVE-TEK TeamUp TX20i Camera User Guide GUI Settings 4.1 MENU Press the [MENU] button to display the main menu on the display, using the arrow button to move the cursor to the item. Press the [HOME] button to enter the corresponding sub-menu. -
Page 8: Color
CAVE-TEK TeamUp TX20i Camera User Guide 4.3 COLOR Move the main menu cursor to [COLOR], and press [HOME] key enter the color page, as shown in the following figure. COLOR WB Mode Auto RG Tuning BG Tuning Saturation 100% AWB Sens... -
Page 9: P/T/Z
CAVE-TEK TeamUp TX20i Camera User Guide 4.5 P/T/Z Move the main menu cursor to [P/T/Z], and press [HOME] key enter the P/T/Z page, as shown in the following figure. P/T/Z SpeedByZoom AF-Zone Center AF-Sense High L/R Set Display Info Image Freeze... -
Page 10: Communication Setup
CAVE-TEK TeamUp TX20i Camera User Guide Auto Scan Shoot: On, Off. Auto Inversion: On, Off. SDI-3G Mode: LEVEL-A, LEVEL-B. Tracking Mode: On, Off. Tally Mode: On, Off. 4.8 COMMUNICATION SETUP Move the main menu cursor to [COMMUNICATION SETUP], and press [HOME] key enter the communication setup page, as shown in the following figure. -
Page 11: Network Function
CAVE-TEK TeamUp TX20i Camera User Guide Network Function 5.1 Operating Environment Operating System: Windows 7/8/10, Mac OS X, Linux, Android Network Protocol: TCP/IP System Requirement: Intel Duo Core /256M RAM/40G HDD/ Graphics card support DirectX 9.0 or later version. 5.2 Equipment Installation 1) Connect internet camera to your internet or to your PC directly via network cable. -
Page 12: Login Ip Camera Admin
CAVE-TEK TeamUp TX20i Camera User Guide Note: IP camera default IP address "192.168.100.88", the username is "admin", password is "admin". 5.4.2 Login IP Camera admin Enter 192.168.100.88 on browser, a login window pop up, input login name: admin, password: admin,... -
Page 13: Open Network Stream With Vlc Player
CAVE-TEK TeamUp TX20i Camera User Guide Note: If users first use this camera by internet (only for new user), they must install a player software (VLC). Please go to VLC website http://www.videolan.org/vlc/#download and Install VLC (player software). After installation, login again, will show as above. -
Page 14: Camera Setup
CAVE-TEK TeamUp TX20i Camera User Guide 5.5 Camera Setup 5.5.1 Homepage Introduction A. Preview window 1) Video playback pause button: control real-time video pause, stop the last picture, click recoverable video again. 2) Audio control buttons: can set silent mode. - Page 15 CAVE-TEK TeamUp TX20i Camera User Guide Method 2: Type the name into the Presets Information. Click "Set" button, when PTZ turn to other position, click "Call" button or click "No." of the Presets Information, PTZ will turn back to preset position.
-
Page 16: Video Settings
CAVE-TEK TeamUp TX20i Camera User Guide 5.5.2 Video Settings 1) Video Format Support 50Hz (PAL) and 60Hz (NTSC), and Dial Priority three formats. 2) Encode Level Support baseline, mainprofile, highprofile and svc-t four levels. 3) Encode Protocol Support H.264, H.265 and MJPEG three formats. -
Page 17: Image Settings
CAVE-TEK TeamUp TX20i Camera User Guide Set interval between 2 I frame, the bigger interval is the response will be lower from viewing window. 8) Bit Rate Control Constant Bit Rate: Video encoder will be encoding according to preset speed. -
Page 18: Audio Settings
CAVE-TEK TeamUp TX20i Camera User Guide 5.5.4 Audio Settings 1) Audio Switch Enable or disable audio switch. 2) Audio Type Audio type: G711A, AAC. 3) Sample Rate Sample rate 44.1K and 48K selectable. 4) Bit Rate Bit rate 96K, 128K, 256K selectable. -
Page 19: System Settings
CAVE-TEK TeamUp TX20i Camera User Guide 5.5.5 System Settings 1) Work Mode The default work mode is RTSP. Optional items: RTSP, SDK, Multicast. 2) Reboot Click the "Reboot" button, system restart. 3) Username and password The user can modify the password (letters and numbers only). -
Page 20: Device Information
CAVE-TEK TeamUp TX20i Camera User Guide 1) LAN Settings Default the IP address is 192.168.100.88, the MAC address can not be modified. 2) Port Settings A. HTTP Port The port setting is to set up a web server program using which port to transmit. When port mapping, need to be consistent with the port number (default port: 80).


Need help?
Do you have a question about the TeamUp TX20i and is the answer not in the manual?
Questions and answers