Table of Contents
Advertisement
Quick Links
Advertisement
Table of Contents

Related Manuals for TimeTronics MacFinish 2HS 500


Summary of Contents for TimeTronics MacFinish 2HS 500
- Page 1 Manual MacFinish 2HS 500 Version: 2014 v1...
-
Page 2: Table Of Contents
2.4.6 Serial port for FieldTerminal (FT) ..............9 2.4.7 Power = 12 VDC battery, with optional battery charger ........9 3.SOFTWARE INSTALLATION..................10 3.1 Framework .NET 4....................10 3.2 Pylon installation:....................10 3.3 MacFinish 2HS 500 software installation..............10 4.SOFTWARE........................11 4.1 In general......................11 4.2 File/Camera tab....................12 4.2.1 File......................12 4.2.2 Viewer check box..................12... -
Page 3: Preface
(32) 14 / 23.19.11 Please also contact us if you have any remarks or advise regarding this user manual; info@timetronics.be. Good luck with MacFinish 2HS 500 and thank you for your confidence in the TimeTronics products and services. The editors. -
Page 4: How Do We Connect All Cables
At the back of the MacFinish 2HS 500 camera, you have two connections. In the “A” connection you need to plug in the Ethernet cable, which is used to make the direct connection with your photo- finish computer. -
Page 5: Steamy Lenses
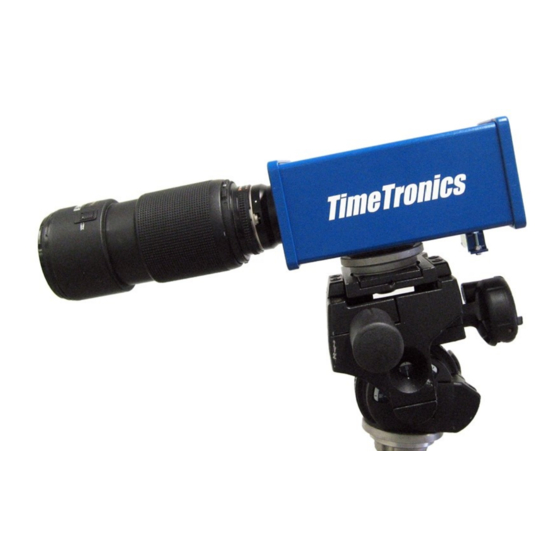
MacFinish 2HS 500 manual Photo: Camera lens 2.3 Steamy lenses You could sometimes struggle with a steamy lens in hot and moist countries. When having stored the equipment in a cool or air-conditioned room, the wet air may start condensing on the cold lens glass during the first quarter of an hour when exposed to this ‘tropical’... -
Page 6: Start Detector/Start Pistol
Photo: Start detector Note: TimeTronics also offers their customers a DOUBLE CHANNEL start detector, which is completely compatible with the (older) single channel (=standard) start detector. This double channel version has TWO build-in start sensors, and two electronic circuits, to avoid a timing problem if suddenly their would be a breakdown of a sensor. -
Page 7: Finish Detection
MacFinish 2HS 500 manual 2.4.2 Finish detection The system can use different finish signal sources, depending on the sport for which the system is being used: • photocells, for example with athletics • manual finish push button, for example with road cycling races of many hours. -
Page 8: Manual Finish Push Button
Note: TimeTronics also offers their customers a DOUBLE CHANNEL photocell pole, which is completely compatible with the (older) single channel (=standard) finish detector. This double channel version is a blue lacquered aluminium bar with TWO build-in photocell beams, and an electronic circuit, to give the MacFinish an arrival signal only when BOTH parallel beams are broken. -
Page 9: Serial Port For Scoreboard (Sb)
2.4.4 Serial port for ScoreBoard (SB) - Not for 2HS 500 This connection should be connected by means of a TimeTronics serial cable with product number 'P244' to a RS232 serial port of your MacFinish computer, if you want to drive a timing scoreboard (of any brand of type). -
Page 10: Software Installation
Depending on the computer system you are using you have to install the 32bit or 64bit ● Basler pylon x86 4.1.0.3660.exe (windows 32bit) ● Basler pylon x64 4.1.0.3660.exe (windows 64bit) During the installation you have choose following components: 3.3 MacFinish 2HS 500 software installation Install the following: MacFinish_2H5500.msi... -
Page 11: Software
4. SOFTWARE 4.1 In general Open the software by double clicking on the MacFinish 2HS 500 icon Photo: MacFinish 2HS 500 icon If you open the software, you will see the main page of the software. Our software has a particular structure. -
Page 12: File/Camera Tab
MacFinish 2HS 500 manual On your right hand side, you will see the camera window. This is the window where your camera will display the photo finish. On top of the camera window, there is a time ruler which indicates the arrival time. -
Page 13: Position
MacFinish 2HS 500 manual 4.3.1 Position In the Position part you have 8 buttons. From left to right: Upper row: 1. Shifting backward rapidly in the picture 2. Shifting backward in the picture 3. Shifting forward in the picture 4. Shifting forward rapidly in the picture... -
Page 14: Black/White Calibration
MacFinish 2HS 500 manual Photos: Before using Pixel Shift After using Pixel Shift 4.4.2 Black/White Calibration This part can be used for fixing the colors of your picture manually. If you want to set the level of darkness of your picture, click on the black pixel and then on a black point in your picture which you define as being the 'perfect' black. -
Page 15: Export
MacFinish 2HS 500 manual Photo: 100 lines after time indicating line (green) If you would like to see again all the parts you deleted (for instance to check), then mark the 'Show hidden' check box. If you want to undo your delete actions, click on the 'Undel All' button. - Page 16 MacFinish 2HS 500 manual Explanation of the different columns: Pos: position of the competitor. Bib: ID number of the competitor. Name: Name of the competitor. Time: time of the competitor. Gap: difference with competitor. Gap: difference with first horse. Distance: calculated formula for distance difference with first competitor.
-
Page 17: Advanced User Settings
MacFinish 2HS 500 manual 5. ADVANCED USER SETTINGS 5.1 Data file All pictures, results and configuration files can be found in the MF DATAFOLDER. This file can be found on C:/MF DATAFOLDER. All pictures will be stored here. Three files will be created for every picture: •... - Page 18 MacFinish 2HS 500 manual MIN_CHECK_TIME=1050 - --- Under construction --- NEW_TIME=1000 - --- Under construction ---...
-
Page 19: Shortcut Keys
MacFinish 2HS 500 manual 6. SHORTCUT KEYS Action Keyboard Mouse What mode? Modes Switch to Position mode Left button Switch to Zoom mode Middle button Navigating between Zoom and Position mode Switch to Pixel Shift mode Switch to Photocell mode Switch to Delete mode “delete”...
Need help?
Do you have a question about the MacFinish 2HS 500 and is the answer not in the manual?
Questions and answers