
Related Manuals for INNOLIVING INN-581


Summary of Contents for INNOLIVING INN-581
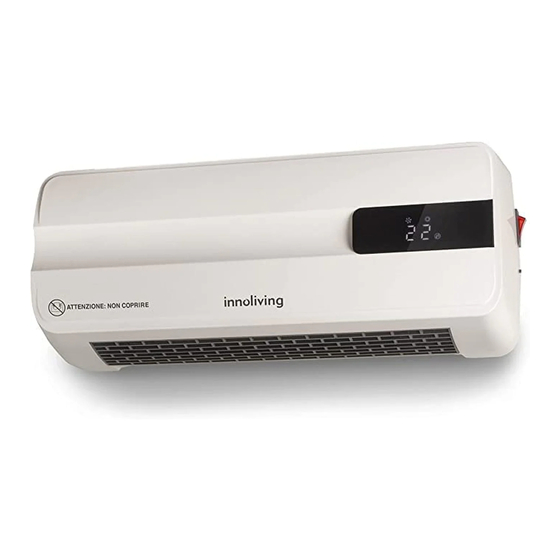
- Page 1 TERMOVENTILATORE PTC A PARETE WALL MOUNTED PTC HEATER INN-581 MANUALE D’USO USER MANUAL...
- Page 3 TERMOVENTILATORE PTC A PARETE Grazie per aver acquistato il termoventilatore INNOLIVING modello INN-581. Leggere attentamente le avvertenze e istruzioni d’uso e conservare il presente manuale per eventuali consultazioni future. Prima dell’uso leggere attentamente il seguente manuale di istruzioni e conservarlo per future consultazioni.
- Page 4 • Non usare l’apparecchio per asciugare la biancheria. Non ostruire le griglie di entrata e uscita dell’aria (pericolo di surriscaldamento). • Non immergere l’apparecchio o il cavo in acqua o in altri liquidi. • Non toccare l’apparecchio con le mani bagnate. •...
- Page 5 • Non tirare il cavo di rete per sollevare, trasportare o togliere la spina dalla presa di corrente. • Assicurarsi che il cavo non presenti nodi o piegature. • Verificare lo stato del cavo elettrico. Cavi danneggiati o annodati aumentano il rischio di scossa elettrica. •...
-
Page 6: Installazione
riscaldamento. • Se si desidera spegnere la macchina, premere l’interruttore on / off su off. La ventola continuerà a funzionare per altri 30 secondi fino a quando non smetterà di funzionare. • Non utilizzare questo termoventilatore in bagno. • Il termoventilatore deve essere installato in modo tale che interruttori e altri comandi non possano essere utilizzati dalla vasca da bagno o nella doccia. - Page 7 Utilizzare i componenti in dotazione (viti e tasselli di espansione) per il fissaggio alla parete come illustrato nella figura seguente, e procedere poi ad agganciare la macchina. Nota: il peso massimo è di 4,1 kg, il muro deve essere in grado di sopportare questo peso.
- Page 8 1. Accendere l’apparecchio tramite l’interruttore. Così facendo il termoventilatore entrerà in modalità standby. 2. Sul lato destro dell’apparecchio c’è un pulsante “START / STOP”, premendolo l’apparecchio si avvierà di default in “calore massima potenza”, premendo di nuovo, l’apparecchio si spegnerà. 3.
- Page 9 TELECOMANDO Premendo “ ” si selezionano Accensione (modalità ventole attiva), Spegnimento (La ventola lavora per altri 30 secondi dopo lo spegnimento). Accensione / spegnimento Premendo “ ”: si selezionano Calore potenza minima, Calore potenza massima, modalità ventola (temperatura ambiente). Calore Premendo “...
- Page 10 La prima volta che viene impostato il timer (per esempio un avvio dopo un’interruzione di corrente), è necessario impostare l’ora corrente. Metodo di impostazione: a. Impostare il giorno della settimana: sul display Impo- compare 01, premere + o - per regolare il giorno stazione corrente, da 01 a 07 ovvero da lunedì...
- Page 11 Premendo , LED mostrerà P6, premere OK, verrà impostata modalità P6. (se non viene premuto OK entro 10 secondi, il timer non verrà impostato) LED mostra di default 1, premere + o - da 1 a 7 per impostare il giorno della settimana da Lunedì a Domenica.
-
Page 12: Pulizia E Manutenzione
1. Quando è in funzione il timer settimanale, premere e poi per cancellare questa impostazione. Cancellare 2. Quando invece la temperatura da raggiungere è stata modalità in raggiunta, premere prima per cancellare questa funzione impostazione. Spegnimento La massima temperatura supportata è di 51°C, una volta automatico di raggiunti la macchina si spegne. - Page 13 ETICHETTA DATI Questo prodotto è conforme a tutte le direttive europee applicabili. Leggere attentamente le istruzioni per l’uso. Non coprire l’apparecchio durante il funzionamento, onde evitare rischi d’incendio. Apparecchio con isolamento elettrico di classe II NFORMAZIONI AGLI UTENTI ai sensi del Decreto Legislativo N° 49 del 14 Marzo 2014 “Attuazione della Direttiva 2012/19/UE sui rifiuti di apparecchiature elettriche ed elettroniche (RAEE)”...
- Page 14 INFORMAZIONI PER GLI APPARECCHI PER IL RISCALDAMENTO DI AMBIENTE LOCALE ELETTRICI Il telecomando di questo apparecchio funziona con una batteria del tipo CR2025 che rientra nella direttiva europea 2013/56/UE e che non possono essere smaltite con i normali rifiuti domestici. Informarsi sulle normative locali relative alla raccolta differenziata delle batterie: un corretto smaltimento permette di evitare conseguenze negative per l’ambiente e la salute.
- Page 16 WALL MOUNTED PTC HEATER Thank you for purchasing the fan heater INNOLIVING INN-581. Please read the following instructions carefully and save this manual for possible future consultation. Before using this appliance, please read the operating instructions carefully, in particular the safety notes and follow them.
- Page 17 or the necessary knowledge, as long as they are supervised or after they have received instructions relating to the safe use of the appliance and an understanding of the dangers inherent to it. Children must not play with the appliance. Cleaning and maintenance intended to be carried out by the user must not be carried out by unsupervised children.
- Page 18 it cool down before cleaning. • Do not use aggressive detergents to clean the appliance. • Do not allow the appliance or the cable to come in contact with hot surfaces. • Always unplug the heater when not in use. •...
-
Page 19: Installation
FEATURES 1. High quality and long lasting plastic shell. 2. PTC ceramic heating elements, high efficiency heating, fast, quiet, odorless, non-polluting. 3. Two-level heat setting, to adjust the temperature according to your needs. 4. There is a safety device to prevent overheating. The appliance switches off automatically when the air outlet is blocked and switches on again when it is free. - Page 20 USAGE 1. Connect to a 220-240 V ~ 50-60 Hz mains socket 2. Insert the plug into the wall socket. 3. Turn on the appliance using the switch “0” is “OFF” “I”: is “ON”. 4. Run the fan heater via control buttons or via remote control.
-
Page 21: Remote Control
REMOTE CONTROL Pressing “ ” the device can be turned On (fan mode active), Off (The fan works for another 30 seconds after switching off).. ON/OFF Pressing “ ”it is possible to select minimum heat, maximum heat power, fan mode (room temperature). Heat Pressing “... - Page 22 The first time the timer is set (for example turning it on after a power failure), the current time must be set. Setting method: a. Set the day of the week: the display shows 01, Setting press + or - to adjust the current day, from 01 current to 07 (from Monday to Sunday).
- Page 23 Pressing , , the display will show P6, push OK to set mode P6. (If you don’t press OK within 10 seconds, the timer will not be set). The display will show as default number 1, push + or - from 1 to 7 to set the day of the week among Monday/Sunday.
-
Page 24: How To Replace Batteries
1. 3.When the weekly timer is on, press 3.to delete this setting. Delete 4. When the target temperature is reached, press functions to delete this setting. Automatic The maximum temperature to reach is 51°C, once reached the safety switch device will turn off. HOW TO REPLACE BATTERIES Slide the batteries compartment out from the bottom of the remote control. -
Page 25: Data Label
DATA LABEL This product complies with all the applicable EU directives. Read carefully the instruction manual. Do not cover the appliance when in operation to avoid the risk of fire. Class II insulated electrical appliance. INFORMATION FOR USERS pursuant to Legislative Decree N ° 49 of 14 March 2014 “Implementation of Directive 2012/19 / EU on waste electrical and electronic equipment (WEEE)”... - Page 26 INFORMATION FOR ELECTRICAL LOCAL ROOM HEATING APPLIANCES The remote control of this appliance works with a CR2025 type battery which falls under the European directive 2013/56 / EU and which cannot be disposed of with normal household waste. Find out about local regulations relating to separate collection of batteries: proper disposal allows you to avoid negative consequences for the environment and health.
- Page 28 Innoliving Spa Via Merloni, 2/B 60131 Ancona Italy Tel 071 2133550 www.innoliving.it MADE IN CHINA...
Need help?
Do you have a question about the INN-581 and is the answer not in the manual?
Questions and answers