Advertisement
Quick Links
Advertisement

Summary of Contents for Winter ONE V12
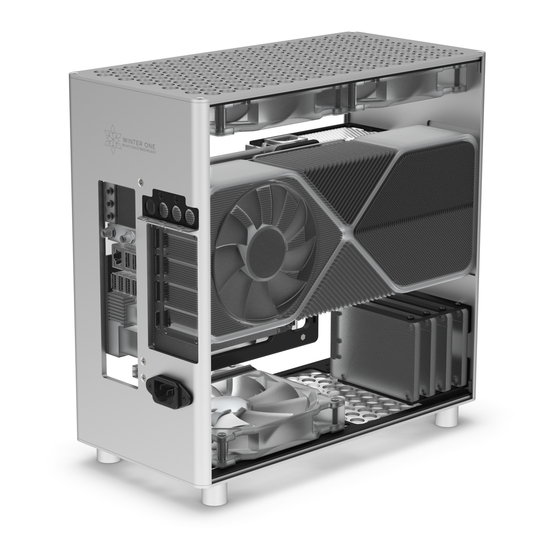
- Page 1 WINTER ONE User Guide Revision 9 Last updated on 25 May 2021...
-
Page 2: Table Of Contents
Table of Contents Fastener Specifications Cable Specifications Airflow & Cooling Guide Air Cooling Build Instructions Water Cooling Build Instructions Warranty Information Disclaimers... -
Page 3: Fastener Specifications
Fasteners Count Thread Length [mm] Type Image Drive Cage Spacer Count Thread Length [mm] Type Image M3x0.5 M3x0.5 M3x0.5 Pump Bracket M3x0.5 Count Thread Length [mm] Type Image M3x0.5 M3x0.5 Required Tools Philips No. 1 Fasteners | 03... -
Page 4: Cable Specifications
Cable Lengths SFX Power Supply SFX-L Power Supply Cable Destination Length [mm] Cable Destination Length [mm] 24 Pin ATX Motherboard 24 Pin ATX Motherboard 8 Pin EPS Motherboard 8 Pin EPS Motherboard 8 Pin PCIE → GPU Graphics Card 8 Pin PCIE → GPU Graphics Card 6 Pin →... -
Page 5: Airflow & Cooling Guide
Airflow & Cooling Guide Recommended airflow configurations for Winter One Airflow & Cooling | 05... - Page 6 Not recommended airflow configurations for Winter One Airflow & Cooling | 06...
- Page 7 For adequate ventilation and optimal thermal performance, leave a minimum of 2 cm on all sides of Winter One. A good general fan curve for air cooling Winter One (balanced noise and cooling). For liquid cooling, set fans to maintain a coolant temperature between 35-45 ºC and set a...
- Page 8 If your case airflow is bottom → top, plan your loop as shown on the right, so coolant flows through the radiators from top → bottom. Having the air and water flowing in opposite directions maximizes ∆T at every point in the loop. If your case is set up for all- exhaust flow, plan your loop as shown on the left.
-
Page 9: Air Cooling Build Instructions
Air Cooling Build Instructions... - Page 10 WARNING: DO NOT SKIP If you did not opt for a PCIE Gen 4.0 Riser, and your motherboard and GPU use PCIE 4.0, connect GPU directly to motherboard, and change the bios BIOS to PCIE 3.0 before proceeding. 4x PAN 5mm Air Cooling | 10...
- Page 11 Socket the CPU and attach the heat sink, You can leave cables from the previous step RAM, M.2 drives, and plug in all motherboard plugged into the motherboard. power cables before attaching the riser. 3x CSK 8mm Air Cooling | 11...
- Page 12 2x PAN 5mm Air Cooling | 12...
- Page 13 Orient the switch so the connector pins are Once the bracket is secured, plug in the GPU further from the raised rectangular bar, and power cable(s). closer to the spine and hollowed GPU area. 2x CSK 5mm 2x Spacer 2x CSK 5mm Air Cooling | 13...
- Page 14 Attach up to four 2.5-inch drives using PAN 4mm screws. 3x CSK 5mm 4x PAN 4mm Air Cooling | 14...
- Page 15 Holes towards the outside are for 140mm mounts, and holes towards the inside are for 120mm mounts. 4x CSK 5mm Leave the Bottom Front Fan off if you plan to use a drive cage. Air Cooling | 15...
- Page 16 2x CSK 5mm 2x PAN 8mm Air Cooling | 16...
- Page 17 Tighten the screws in an “X” pattern. 4x CSK 12mm Air Cooling | 17...
- Page 18 Route and secure cables before mounting the power supply. The PSU fan should face outwards for perforated panels, and inwards for solid panels. Air Cooling | 18...
- Page 19 Tighten the screws in an “X” pattern. 4x CSK 12mm Air Cooling | 19...
- Page 20 Share Your Build Go to http://winterdesign.co/ community to share your build and have it featured on our website.* *subject to our approval Air Cooling | 20...
-
Page 21: Water Cooling Build Instructions
Water Cooling Build Instructions... - Page 22 WARNING: DO NOT SKIP If you did not opt for a PCIE Gen 4.0 Riser, and your motherboard and GPU use PCIE 4.0, connect GPU directly to motherboard, and change the bios BIOS to PCIE 3.0 before proceeding. 4x PAN 5mm Water Cooling | 22...
- Page 23 Socket the CPU and attach the heat sink, You can leave the cables from the previous RAM, M.2 drives, and plug in all motherboard step plugged into the motherboard. power cables before attaching the riser. 3x CSK 8mm Water Cooling | 23...
- Page 24 This is a good time to plug in all cables and route them to where the PSU will go. Use velcro or zipties to secure cables to the spine. 2x PAN 5mm Water Cooling | 24...
- Page 25 Orient the switch so the connector pins are further from the raised rectangular bar, and closer to the spine and hollowed GPU area. 2x CSK 5mm 2x Spacer 2x CSK 5mm Water Cooling | 25...
- Page 26 PSU bracket may be flipped 180º if fittings Tabs face inward. 140mm mounts to the require clearance. Recommended for SFX outside, and 120mm mounts to the inside. PSU’s only (reduces clearance underneath) 3x CSK 5mm Water Cooling | 26...
- Page 27 If foot washers interfere with radiator If you are having trouble aligning the spine, mounting screws, they can be shifted to perform steps #13 and #14 first, then do this adjacent holes toward the front / rear. step. 2x PAN 8mm 4x CSK 5mm Water Cooling | 27...
- Page 28 This is a good time to add fittings to the bottom radiator, and check that they clear the power cable. Typically, you will need Tighten the screws in an “X” pattern. a 90º rotary and a 90º Koolance LP fitting. 4x CSK 12mm Water Cooling | 28...
- Page 29 The cork pad included with the pump bracket is for vibration dampening. Cut it to size for your pump, and stack 2-3 rectangles or squares. It should decouple the pump from the rest of the case. The pump bracket can be mounted vertically or horizontally. You may need to attach the pump to the bracket before mounting the bracket to the case.
- Page 30 The PSU fan should face outwards for perforated panels, and Cut and size all tubing at this time. You can mount the top plate to inwards for solid panels. secure the top fan / radiator mounting strips for this process. Finish routing all tubing and connect the loop at this time.
- Page 31 Tighten the screws in an “X” pattern. 4x CSK 12mm Water Cooling | 31...
- Page 32 Share Your Build Go to http://winterdesign.co/ community to share your build and have it featured on our website.* *subject to our approval Water Cooling | 32...
-
Page 33: Warranty Information
Warranty Winter Design products should last more than a decade when treated with care. Winter One is covered with a 10-year limited warranty from the date of shipping. We automatically register you for the this warranty at the time of purchase. Need help? Visit http://www.winterdesign.co/support. -
Page 34: Disclaimers
Disclaimers Winter One’s large holes facilitate excellent cooling but may be a hazard for children or pets. If this is a concern, please use solid panels, and keep the system out of reach of pets and children. Winter Design will not be responsible or liable for any harm that comes from irresponsible use of its products.
Need help?
Do you have a question about the ONE V12 and is the answer not in the manual?
Questions and answers