Advertisement
Available languages
Available languages
Quick Links
MERCIER PRIVACY
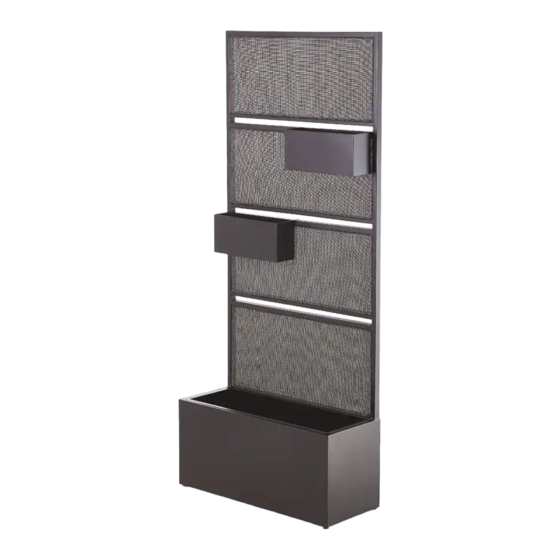
SCREEN PLANTER
PRODUCT NO. 088-2294-0
ASSEMBLY INSTRUCTIONS
HAVING TROUBLE?
TOLL-FREE:
1-888-670-6684
IMPORTANT: Please read this manual carefully
before beginning assembly of this product.
Keep this manual for future reference.
Advertisement

Related Manuals for Canvas 088-2294-0


Summary of Contents for Canvas 088-2294-0
- Page 1 MERCIER PRIVACY SCREEN PLANTER PRODUCT NO. 088-2294-0 ASSEMBLY INSTRUCTIONS HAVING TROUBLE? TOLL-FREE: 1-888-670-6684 IMPORTANT: Please read this manual carefully before beginning assembly of this product. Keep this manual for future reference.
- Page 2 We would love to hear from you and welcome your thoughtful feedback. Visit our website at canadiantire.ca to tell us about your experience, and share your photos with us using #mycanvasstyle. Show us how you bring CANVAS ® products to life. We can’t wait to see!
- Page 3 TABLE OF CONTENTS Parts List Step-by-step Guide Warranty WARNING! TO REDUCE THE RISK OF SERIOUS INJURY, READ THE FOLLOWING SAFETY INSTRUCTIONS BEFORE ASSEMBLING AND USING THE PRODUCT. • Please read and understand this entire manual before attempting to assemble, operate, or install the product. •...
- Page 4 PARTS LIST ITEM DESCRIPTION THUMBNAIL QUANTITY Underframe Upperframe Big Planter Small Planter MERCIER PRIVACY SCREEN PLANTER...
- Page 5 EXPLODED PARTS MERCIER PRIVACY SCREEN PLANTER...
- Page 6 HARDWARE LIST ITEM DESCRIPTION THUMBNAIL QUANTITY Foot Flange Bolt Wall Anchor Strap M6x15 Combination Bolt and Washer Hex Key MERCIER PRIVACY SCREEN PLANTER...
- Page 7 STEP-BY-STEP GUIDE STEP 1 Attach the upperframe to underframe by lining up the bolt holes on the upperframe with the corresponding bolt holes on the underframe . Using M6x15 combination bolt and washer , lightly tighten the bolts using the hex MERCIER PRIVACY SCREEN PLANTER...
- Page 8 STEP 2 Place small planter on the underframe or upperframe and place big planter on the underframe as shown. MERCIER PRIVACY SCREEN PLANTER...
- Page 9 CONDITION 1: WHEN THERE ARE NO WALLS OR HANDRAIL. Secure the privacy screen to the ground by using the foot flange as shown. MERCIER PRIVACY SCREEN PLANTER...
- Page 10 CONDITION 2: IF YOU WANT TO SECURE ON THE HANDRAIL. Use strap to secure privacy screen to the handrail as shown. MERCIER PRIVACY SCREEN PLANTER...
- Page 11 CONDITION 3: IF YOU WANT TO ATTACH PRIVACY SCREEN TO BRICK WALL. STEP 1 REQUIRES PART B, C, D Drill holes in the wall, then insert wall anchors into the holes. Secure the strap to the wall using the bolt NOTE: Do not completely tighten.
- Page 12 STEP 2 REQUIRES PART D Use strap to secure the privacy screen as shown. MERCIER PRIVACY SCREEN PLANTER...
- Page 13 CONDITION 4: IF YOU WANT TO SECURE THE PRIVACY SCREEN TO A STUD WALL OR WOODEN WALLS. Secure the strap to the wall using the bolt at marked stud or wood locations. NOTE: Do not completely tighten. MERCIER PRIVACY SCREEN PLANTER...
- Page 14 STEP 2 Use strap to secure the privacy screen as shown. MERCIER PRIVACY SCREEN PLANTER...
- Page 15 WARRANTY INFORMATION This CANVAS™ product carries a one (1) year warranty against defects in workmanship and materials. Trileaf Distribution agrees to replace the defective product free of charge within the stated warranty period, when returned by the original purchaser with proof of purchase. This product is not guaranteed against wear or breakage due to misuse and/or abuse.
- Page 16 ÉCRAN D’INTIMITÉ À JARDINIÈRES MERCIER NO D’ARTICLE : 088-2294-0 INSTRUCTIONS D’ASSEMBLAGE DES DIFFICULTÉS? NUMÉRO SANS FRAIS : 1 888 670-6684 IMPORTANT : Veuillez lire attentivement le présent guide avant de commencer l’assemblage de cet article. Conservez ce guide à titre de référence.
- Page 17 à sa capacité de façonner votre maison. C’est pourquoi nous nous inspirons des gens du pays et de leur mode de vie pour concevoir la collection de CANVAS Qu’il soit question de meubles tendance, de décorations des Fêtes ou d’articles essentiels...
- Page 18 TABLE OF CONTENTS Liste des pièces Directives détaillées Garantie AVERTISSEMENT! POUR RÉDUIRE LE RISQUE DE BLESSURES GRAVES, LISEZ LES CONSIGNES DE SÉCURITÉ SUIVANTES AVANT D’ASSEMBLER ET D’UTILISER CET ARTICLE. • Veuillez lire attentivement et bien comprendre le présent guide avant d’assembler, d’utiliser ou d’installer cet article.
- Page 19 LISTE DES PIÈCES ÉLÉMENT DÉSIGNATION VIGNETTE QUANTITÉ Cadre inférieur Cadre supérieur Grande jardinière Petite jardinière ÉCRAN D’INTIMITÉ À JARDINIÈRES MERCIER...
- Page 20 VUE ÉCLATÉE ÉCRAN D’INTIMITÉ À JARDINIÈRES MERCIER...
- Page 21 LISTE DU MATÉRIEL ÉLÉMENT DÉSIGNATION VIGNETTE QUANTITÉ Bride de pied Boulon Ancrage mural Sangle Boulon et rondelle M6x15 Clé hexagonale ÉCRAN D’INTIMITÉ À JARDINIÈRES MERCIER...
- Page 22 DIRECTIVES DÉTAILLÉES ÉTAPE 1 Fixez le cadre supérieur 2 au cadre inférieur 1 en alignant les trous de boulon du cadre supérieur 2 avec les trous de boulon correspondants du cadre inférieur 1. À l’aide des boulons et rondelles M6x15 E, serrez légèrement les boulons à...
- Page 23 ÉTAPE 2 Placez la petite jardinière 4 sur le cadre supérieur 2 et placez la grande jardinière 3 sur le cadre inférieur 1 comme illustré. ÉCRAN D’INTIMITÉ À JARDINIÈRES MERCIER...
- Page 24 CONDITION 1 : LORSQU’IL N’Y A PAS DE MUR OU DE RAMPE. Fixez le paravent au sol à l’aide de la bride de pied A, comme illustré. ÉCRAN D’INTIMITÉ À JARDINIÈRES MERCIER...
- Page 25 CONDITION 2 : SI VOUS VOULEZ LE FIXER SUR LA RAMPE. Utilisez la sangle D pour fixer le paravent 1 à la rampe, comme illustré. ÉCRAN D’INTIMITÉ À JARDINIÈRES MERCIER...
- Page 26 CONDITION 3 : SI VOUS VOULEZ FIXER LE PARAVENT À UN MUR DE BRIQUES. ÉTAPE 1 NÉCESSITE LES PIÈCES B, C, D Percez des trous dans le mur, puis insérez les ancrages muraux C dans les trous. Fixez la sangle D au mur à l’aide du boulon B.
- Page 27 ÉTAPE 2 NÉCESSITE LA PIÈCE D Utilisez la sangle D pour fixer le paravent comme illustré. ÉCRAN D’INTIMITÉ À JARDINIÈRES MERCIER...
- Page 28 CONDITION 4 : SI VOUS VOULEZ FIXER LE PARAVENT À UN MUR À MONTANTS OU À UN MUR EN BOIS. Fixez la sangle D au mur à l’aide du boulon B aux emplacements indiqués sur les montants ou sur le bois. REMARQUE : Ne serrez pas au complet.
- Page 29 ÉTAPE 2 Utilisez la sangle D pour fixer le paravent comme illustré. ÉCRAN D’INTIMITÉ À JARDINIÈRES MERCIER...
- Page 30 Cet article n’est pas garanti contre l’usure ou un bris causé par un usage abusif ou inapproprié. D’ARTICLE : 088-2294-0 Fabriqué en Chine Importé par Trileaf Distribution Trifeuil Toronto, Canada M4S 2B8...
Need help?
Do you have a question about the 088-2294-0 and is the answer not in the manual?
Questions and answers