
Subscribe to Our Youtube Channel
Related Manuals for Trane Technologies Thermo King T-590 Series


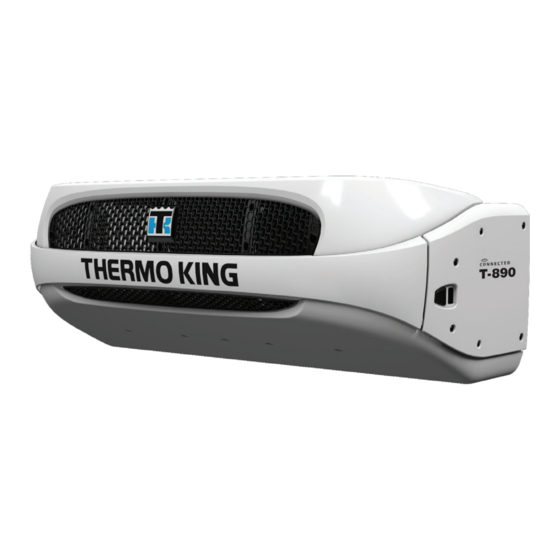
Summary of Contents for Trane Technologies Thermo King T-590 Series
- Page 1 Operator’s Manual T-590, T-690, T-890 and T-1090 Series Single Temperature Units with Premium HMI Revision B T T K K 5 5 6 6 7 7 0 0 2 2 - - 1 1 - - O O P P - - E E N N August 2020...
- Page 2 Introduction This manual is published for informational purposes only and the information furnished herein should not be considered as all-inclusive or meant to cover all contingencies. If more information is required, consult your Thermo King Service Directory for the location and telephone number of the local dealer.
- Page 3 I I n n t t r r o o d d u u c c t t i i o o n n Customer Satisfaction Survey Let your voice be heard! Your feedback will help improve our manuals. The survey is accessible through any internet-connected device with a web browser.
-
Page 4: Table Of Contents
Table of Contents S S a a f f e e t t y y P P r r e e c c a a u u t t i i o o n n s s ..................8 8 Danger, Warning, Caution, and Notice . - Page 5 T T a a b b l l e e o o f f C C o o n n t t e e n n t t s s Unit Protection Devices ........22 Engine Compartment Components.
- Page 6 T T a a b b l l e e o o f f C C o o n n t t e e n n t t s s Prevent Alarms........54 Pretrip Alarm Codes.
- Page 7 T T a a b b l l e e o o f f C C o o n n t t e e n n t t s s Electrical Control System Specifications ..... 93 Fuses .
-
Page 8: Danger, Warning, Caution, And Notice
Safety Precautions Danger, Warning, Caution, and Notice Thermo King® recommends that all service be performed by a Thermo King dealer and to be aware of several general safety practices. Safety advisories appear throughout this manual as required (refer to examples below). Your personal safety and the proper operation of this unit depend upon the strict observance of these precautions. - Page 9 S S a a f f e e t t y y P P r r e e c c a a u u t t i i o o n n s s D D A A N N G G E E R R H H a a z z a a r r d d o o u u s s G G a a s s e e s s ! ! Refrigerant in the presence of an open flame, spark, or electrical short produces toxic gases that are severe respiratory irritants which can cause...
-
Page 10: Automatic Start/Stop Operation
S S a a f f e e t t y y P P r r e e c c a a u u t t i i o o n n s s Automatic Start/Stop Operation C C A A U U T T I I O O N N R R i i s s k k o o f f I I n n j j u u r r y y ! ! The unit can start and run automatically any time the unit is turned on. -
Page 11: Low Voltage
S S a a f f e e t t y y P P r r e e c c a a u u t t i i o o n n s s W W A A R R N N I I N N G G R R i i s s k k o o f f I I n n j j u u r r y y ! ! The unit power plug must be clean and dry before connecting it to a power source. -
Page 12: Refrigerant Oil Hazards
S S a a f f e e t t y y P P r r e e c c a a u u t t i i o o n n s s D D A A N N G G E E R R R R e e f f r r i i g g e e r r a a n n t t V V a a p p o o r r H H a a z z a a r r d d ! ! Do not inhale refrigerant. - Page 13 S S a a f f e e t t y y P P r r e e c c a a u u t t i i o o n n s s breathing, if necessary. Stay with victim until emergency personnel arrive.
-
Page 14: Welding Precautions
S S a a f f e e t t y y P P r r e e c c a a u u t t i i o o n n s s victim away from the current. DO NOT TOUCH the victim. You will receive a shock from current flowing through the victim’s body. -
Page 15: Safety Nameplates
S S a a f f e e t t y y P P r r e e c c a a u u t t i i o o n n s s Safety Nameplates Observe all safety nameplates placed in various locations on the unit. Figure 1. -
Page 16: General Description
Unit Description General Description The T-90 Series units are one-piece, front-mounted, diesel powered cooling and heating systems designed for straight trucks. The condensing portion of the unit is mounted on to the front of a truck cargo box with the evaporator portion protruding into the box. -
Page 17: Design Features
U U n n i i t t D D e e s s c c r r i i p p t t i i o o n n Design Features • Microprocessor Controlled • Continuous System Monitoring • In-Cab HMI Controller •... -
Page 18: Unit Options
U U n n i i t t D D e e s s c c r r i i p p t t i i o o n n Unit Options • Body Mount HMI Enclosure • Door Switch •... -
Page 19: Engine
U U n n i i t t D D e e s s c c r r i i p p t t i i o o n n Engine Engine power for the T-590, T-690, and T-890 is provided by the TK374F, a three-cylinder, EPA Tier 4, special clean and quiet diesel engine rated at 13.27 continuous horsepower (9.9 kW) at 2200 RPM and 14.61 continuous horsepower (10.9 kW) at 2425 RPM. -
Page 20: Clutch
U U n n i i t t D D e e s s c c r r i i p p t t i i o o n n N N o o t t e e : : The use of 50/50% pre-mixed ELC is recommended to ensure that deionized water is being used. -
Page 21: Defrost
U U n n i i t t D D e e s s c c r r i i p p t t i i o o n n The system monitors and maintains the compartment temperature, the engine block temperature, and battery charge levels at a point where quick, easy starts are possible. -
Page 22: Smartpower Standard Features
U U n n i i t t D D e e s s c c r r i i p p t t i i o o n n D D A A N N G G E E R R H H a a z z a a r r d d o o u u s s V V o o l l t t a a g g e e ! ! High voltage AC power is present whenever the unit is operating in the Electric Standby mode and whenever the unit is connected to external... -
Page 23: Engine Compartment Components
U U n n i i t t D D e e s s c c r r i i p p t t i i o o n n S S u u c c t t i i o o n n P P r r e e s s s s u u r r e e R R e e g g u u l l a a t t o o r r ( ( S S P P R R , , T T - - 5 5 9 9 0 0 O O n n l l y y ) ) : : This component is a mechanical control device used to limit the suction pressure to the compressor. -
Page 24: Unit Components
U U n n i i t t D D e e s s c c r r i i p p t t i i o o n n C C o o m m p p r r e e s s s s o o r r O O i i l l S S i i g g h h t t G G l l a a s s s s : : The compressor oil sight glass is used to check the relative level of compressor oil in the compressor sump. - Page 25 U U n n i i t t D D e e s s c c r r i i p p t t i i o o n n Figure 8. Engine Compartment Components T-590 and T–690 Units (T-890 and T-1090 similar). RAJ547 Alternator Engine Oil Dipstick (on side of...
-
Page 26: Truck Premium Display Hmi Control Panel
Operating Instructions for Premium HMI Control Panel Truck Premium Display HMI Control Panel The Truck Premium Display is used to operate the unit, display unit information, and access all Maintenance and Guarded Access Menus. The Truck Premium Display communicates with the Base Controller via the Controller Area Network (CAN) bus. -
Page 27: Display
O O p p e e r r a a t t i i n n g g I I n n s s t t r r u u c c t t i i o o n n s s f f o o r r P P r r e e m m i i u u m m H H M M I I C C o o n n t t r r o o l l P P a a n n e e l l •... -
Page 28: Hard Keys
O O p p e e r r a a t t i i n n g g I I n n s s t t r r u u c c t t i i o o n n s s f f o o r r P P r r e e m m i i u u m m H H M M I I C C o o n n t t r r o o l l P P a a n n e e l l Hard Keys Figure 11. -
Page 29: Soft Keys
O O p p e e r r a a t t i i n n g g I I n n s s t t r r u u c c t t i i o o n n s s f f o o r r P P r r e e m m i i u u m m H H M M I I C C o o n n t t r r o o l l P P a a n n e e l l Soft Keys Figure 12. -
Page 30: If More Than One Language Is Enabled
O O p p e e r r a a t t i i n n g g I I n n s s t t r r u u c c t t i i o o n n s s f f o o r r P P r r e e m m i i u u m m H H M M I I C C o o n n t t r r o o l l P P a a n n e e l l N N o o t t e e : : With extremely cold ambient temperatures, it may take up to 15 seconds for the display to appear on initial startup. - Page 31 O O p p e e r r a a t t i i n n g g I I n n s s t t r r u u c c t t i i o o n n s s f f o o r r P P r r e e m m i i u u m m H H M M I I C C o o n n t t r r o o l l P P a a n n e e l l Figure 15.
- Page 32 O O p p e e r r a a t t i i n n g g I I n n s s t t r r u u c c t t i i o o n n s s f f o o r r P P r r e e m m i i u u m m H H M M I I C C o o n n t t r r o o l l P P a a n n e e l l Figure 18.
- Page 33 O O p p e e r r a a t t i i n n g g I I n n s s t t r r u u c c t t i i o o n n s s f f o o r r P P r r e e m m i i u u m m H H M M I I C C o o n n t t r r o o l l P P a a n n e e l l When the unit is ready to run, the Standard Display appears.
-
Page 34: The Standard Display
O O p p e e r r a a t t i i n n g g I I n n s s t t r r u u c c t t i i o o n n s s f f o o r r P P r r e e m m i i u u m m H H M M I I C C o o n n t t r r o o l l P P a a n n e e l l The Standard Display The Standard Display is the default display that appears if no other display function is selected. - Page 35 O O p p e e r r a a t t i i n n g g I I n n s s t t r r u u c c t t i i o o n n s s f f o o r r P P r r e e m m i i u u m m H H M M I I C C o o n n t t r r o o l l P P a a n n e e l l The setpoint display appears as shown (Figure 26, p.
- Page 36 O O p p e e r r a a t t i i n n g g I I n n s s t t r r u u c c t t i i o o n n s s f f o o r r P P r r e e m m i i u u m m H H M M I I C C o o n n t t r r o o l l P P a a n n e e l l Figure 28.
-
Page 37: Starting The Diesel Engine
O O p p e e r r a a t t i i n n g g I I n n s s t t r r u u c c t t i i o o n n s s f f o o r r P P r r e e m m i i u u m m H H M M I I C C o o n n t t r r o o l l P P a a n n e e l l •... -
Page 38: Starting The Electric Motor
O O p p e e r r a a t t i i n n g g I I n n s s t t r r u u c c t t i i o o n n s s f f o o r r P P r r e e m m i i u u m m H H M M I I C C o o n n t t r r o o l l P P a a n n e e l l Figure 31. -
Page 39: Switching From Diesel To Electric
O O p p e e r r a a t t i i n n g g I I n n s s t t r r u u c c t t i i o o n n s s f f o o r r P P r r e e m m i i u u m m H H M M I I C C o o n n t t r r o o l l P P a a n n e e l l Figure 33. -
Page 40: Switching From Electric To Diesel
O O p p e e r r a a t t i i n n g g I I n n s s t t r r u u c c t t i i o o n n s s f f o o r r P P r r e e m m i i u u m m H H M M I I C C o o n n t t r r o o l l P P a a n n e e l l Figure 35. - Page 41 O O p p e e r r a a t t i i n n g g I I n n s s t t r r u u c c t t i i o o n n s s f f o o r r P P r r e e m m i i u u m m H H M M I I C C o o n n t t r r o o l l P P a a n n e e l l Figure 37.
-
Page 42: Initiating A Manual Defrost Cycle
O O p p e e r r a a t t i i n n g g I I n n s s t t r r u u c c t t i i o o n n s s f f o o r r P P r r e e m m i i u u m m H H M M I I C C o o n n t t r r o o l l P P a a n n e e l l If unit operation is required, the diesel engine will start as shown previously in Starting The Diesel Engine. -
Page 43: Terminating A Defrost Cycle
O O p p e e r r a a t t i i n n g g I I n n s s t t r r u u c c t t i i o o n n s s f f o o r r P P r r e e m m i i u u m m H H M M I I C C o o n n t t r r o o l l P P a a n n e e l l Figure 42. - Page 44 O O p p e e r r a a t t i i n n g g I I n n s s t t r r u u c c t t i i o o n n s s f f o o r r P P r r e e m m i i u u m m H H M M I I C C o o n n t t r r o o l l P P a a n n e e l l Figure 43.
-
Page 45: Using The Gauges Key
O O p p e e r r a a t t i i n n g g I I n n s s t t r r u u c c t t i i o o n n s s f f o o r r P P r r e e m m i i u u m m H H M M I I C C o o n n t t r r o o l l P P a a n n e e l l Figure 46. -
Page 46: Gauges Available
O O p p e e r r a a t t i i n n g g I I n n s s t t r r u u c c t t i i o o n n s s f f o o r r P P r r e e m m i i u u m m H H M M I I C C o o n n t t r r o o l l P P a a n n e e l l The gauges and I/O conditions available are shown below. -
Page 47: Using The Sensors Key
O O p p e e r r a a t t i i n n g g I I n n s s t t r r u u c c t t i i o o n n s s f f o o r r P P r r e e m m i i u u m m H H M M I I C C o o n n t t r r o o l l P P a a n n e e l l Using the Sensors Key The SENSORS key allows the operator to view the temperatures read by the unit temperature sensors. -
Page 48: Using The Main Menu
O O p p e e r r a a t t i i n n g g I I n n s s t t r r u u c c t t i i o o n n s s f f o o r r P P r r e e m m i i u u m m H H M M I I C C o o n n t t r r o o l l P P a a n n e e l l E E v v a a p p o o r r a a t t o o r r C C o o i i l l T T e e m m p p e e r r a a t t u u r r e e : : Displays the temperature of the evaporator coil sensor. -
Page 49: Main Menu Choices
O O p p e e r r a a t t i i n n g g I I n n s s t t r r u u c c t t i i o o n n s s f f o o r r P P r r e e m m i i u u m m H H M M I I C C o o n n t t r r o o l l P P a a n n e e l l Figure 52. -
Page 50: Languages
O O p p e e r r a a t t i i n n g g I I n n s s t t r r u u c c t t i i o o n n s s f f o o r r P P r r e e m m i i u u m m H H M M I I C C o o n n t t r r o o l l P P a a n n e e l l E E l l e e c c t t r r i i c c S S t t a a n n d d b b y y : : If the Electric Standby option is present and the Diesel to Electric Auto-switch feature is set NO, this feature allows the operator to manually select electric mode operation. - Page 51 O O p p e e r r a a t t i i n n g g I I n n s s t t r r u u c c t t i i o o n n s s f f o o r r P P r r e e m m i i u u m m H H M M I I C C o o n n t t r r o o l l P P a a n n e e l l Figure 54.
- Page 52 O O p p e e r r a a t t i i n n g g I I n n s s t t r r u u c c t t i i o o n n s s f f o o r r P P r r e e m m i i u u m m H H M M I I C C o o n n t t r r o o l l P P a a n n e e l l Figure 57.
-
Page 53: Alarms
O O p p e e r r a a t t i i n n g g I I n n s s t t r r u u c c t t i i o o n n s s f f o o r r P P r r e e m m i i u u m m H H M M I I C C o o n n t t r r o o l l P P a a n n e e l l Figure 59. -
Page 54: Check Alarms
O O p p e e r r a a t t i i n n g g I I n n s s t t r r u u c c t t i i o o n n s s f f o o r r P P r r e e m m i i u u m m H H M M I I C C o o n n t t r r o o l l P P a a n n e e l l Check Alarms Check Alarms are indicated by an Alarm Icon in the display. -
Page 55: Pretrip Alarm Codes
O O p p e e r r a a t t i i n n g g I I n n s s t t r r u u c c t t i i o o n n s s f f o o r r P P r r e e m m i i u u m m H H M M I I C C o o n n t t r r o o l l P P a a n n e e l l •... -
Page 56: Alarm Code Notification
O O p p e e r r a a t t i i n n g g I I n n s s t t r r u u c c t t i i o o n n s s f f o o r r P P r r e e m m i i u u m m H H M M I I C C o o n n t t r r o o l l P P a a n n e e l l configured for electric to diesel autoswitch, it automatically starts and runs in diesel mode if an electric shutdown occurs. -
Page 57: Displaying And Clearing Alarm Codes
O O p p e e r r a a t t i i n n g g I I n n s s t t r r u u c c t t i i o o n n s s f f o o r r P P r r e e m m i i u u m m H H M M I I C C o o n n t t r r o o l l P P a a n n e e l l If the Limited Alarm Restarts feature is enabled, the following additional alarm codes may only be cleared from the Guarded Access Menu. - Page 58 O O p p e e r r a a t t i i n n g g I I n n s s t t r r u u c c t t i i o o n n s s f f o o r r P P r r e e m m i i u u m m H H M M I I C C o o n n t t r r o o l l P P a a n n e e l l Figure 64.
- Page 59 O O p p e e r r a a t t i i n n g g I I n n s s t t r r u u c c t t i i o o n n s s f f o o r r P P r r e e m m i i u u m m H H M M I I C C o o n n t t r r o o l l P P a a n n e e l l After the alarm situation is resolved, press the CLEAR key to clear the alarm.
-
Page 60: Table Of Alarm Codes
O O p p e e r r a a t t i i n n g g I I n n s s t t r r u u c c t t i i o o n n s s f f o o r r P P r r e e m m i i u u m m H H M M I I C C o o n n t t r r o o l l P P a a n n e e l l •... - Page 61 O O p p e e r r a a t t i i n n g g I I n n s s t t r r u u c c t t i i o o n n s s f f o o r r P P r r e e m m i i u u m m H H M M I I C C o o n n t t r r o o l l P P a a n n e e l l Sensor Calibration Check Manually monitor load temperature.
- Page 62 O O p p e e r r a a t t i i n n g g I I n n s s t t r r u u c c t t i i o o n n s s f f o o r r P P r r e e m m i i u u m m H H M M I I C C o o n n t t r r o o l l P P a a n n e e l l Electric Motor Failed to Run If unit is shut down repair immediately.
-
Page 63: Datalogger
O O p p e e r r a a t t i i n n g g I I n n s s t t r r u u c c t t i i o o n n s s f f o o r r P P r r e e m m i i u u m m H H M M I I C C o o n n t t r r o o l l P P a a n n e e l l Auto Switch from Diesel to Electric Report alarm at end of the day. - Page 64 O O p p e e r r a a t t i i n n g g I I n n s s t t r r u u c c t t i i o o n n s s f f o o r r P P r r e e m m i i u u m m H H M M I I C C o o n n t t r r o o l l P P a a n n e e l l Figure 69.
-
Page 65: Hourmeters
O O p p e e r r a a t t i i n n g g I I n n s s t t r r u u c c t t i i o o n n s s f f o o r r P P r r e e m m i i u u m m H H M M I I C C o o n n t t r r o o l l P P a a n n e e l l Figure 71. -
Page 66: Hourmeter Names And Definitions
O O p p e e r r a a t t i i n n g g I I n n s s t t r r u u c c t t i i o o n n s s f f o o r r P P r r e e m m i i u u m m H H M M I I C C o o n n t t r r o o l l P P a a n n e e l l The Language Menu or Alarm Menu will appear. -
Page 67: Mode
O O p p e e r r a a t t i i n n g g I I n n s s t t r r u u c c t t i i o o n n s s f f o o r r P P r r e e m m i i u u m m H H M M I I C C o o n n t t r r o o l l P P a a n n e e l l •... - Page 68 O O p p e e r r a a t t i i n n g g I I n n s s t t r r u u c c t t i i o o n n s s f f o o r r P P r r e e m m i i u u m m H H M M I I C C o o n n t t r r o o l l P P a a n n e e l l If enabled in Guarded Access, Sleep Mode is used to keep the engine warm and the battery charged when the unit is not in use.
-
Page 69: Selecting Cycle-Sentry Or Continuous Mode
O O p p e e r r a a t t i i n n g g I I n n s s t t r r u u c c t t i i o o n n s s f f o o r r P P r r e e m m i i u u m m H H M M I I C C o o n n t t r r o o l l P P a a n n e e l l Figure 77. - Page 70 O O p p e e r r a a t t i i n n g g I I n n s s t t r r u u c c t t i i o o n n s s f f o o r r P P r r e e m m i i u u m m H H M M I I C C o o n n t t r r o o l l P P a a n n e e l l Figure 79.
- Page 71 O O p p e e r r a a t t i i n n g g I I n n s s t t r r u u c c t t i i o o n n s s f f o o r r P P r r e e m m i i u u m m H H M M I I C C o o n n t t r r o o l l P P a a n n e e l l Pressing the Select key will change the mode from CYCLE-SENTRY to Continuous.
-
Page 72: Selecting Temperature Display Units
O O p p e e r r a a t t i i n n g g I I n n s s t t r r u u c c t t i i o o n n s s f f o o r r P P r r e e m m i i u u m m H H M M I I C C o o n n t t r r o o l l P P a a n n e e l l Select key again allows the operator to change back to CYCLE-SENTRY mode operation. - Page 73 O O p p e e r r a a t t i i n n g g I I n n s s t t r r u u c c t t i i o o n n s s f f o o r r P P r r e e m m i i u u m m H H M M I I C C o o n n t t r r o o l l P P a a n n e e l l Figure 87.
-
Page 74: Keypad Lockout
O O p p e e r r a a t t i i n n g g I I n n s s t t r r u u c c t t i i o o n n s s f f o o r r P P r r e e m m i i u u m m H H M M I I C C o o n n t t r r o o l l P P a a n n e e l l confirms the new setting for two seconds and then returns to the Standard Display. - Page 75 O O p p e e r r a a t t i i n n g g I I n n s s t t r r u u c c t t i i o o n n s s f f o o r r P P r r e e m m i i u u m m H H M M I I C C o o n n t t r r o o l l P P a a n n e e l l Figure 92.
-
Page 76: Selecting Sleep Mode
O O p p e e r r a a t t i i n n g g I I n n s s t t r r u u c c t t i i o o n n s s f f o o r r P P r r e e m m i i u u m m H H M M I I C C o o n n t t r r o o l l P P a a n n e e l l Selecting Sleep Mode Normal CYCLE-SENTRY mode starts and stops the unit as required to maintain the desired setpoint temperature, maintain the unit battery in a... - Page 77 O O p p e e r r a a t t i i n n g g I I n n s s t t r r u u c c t t i i o o n n s s f f o o r r P P r r e e m m i i u u m m H H M M I I C C o o n n t t r r o o l l P P a a n n e e l l Figure 96.
- Page 78 O O p p e e r r a a t t i i n n g g I I n n s s t t r r u u c c t t i i o o n n s s f f o o r r P P r r e e m m i i u u m m H H M M I I C C o o n n t t r r o o l l P P a a n n e e l l Figure 99.
- Page 79 O O p p e e r r a a t t i i n n g g I I n n s s t t r r u u c c t t i i o o n n s s f f o o r r P P r r e e m m i i u u m m H H M M I I C C o o n n t t r r o o l l P P a a n n e e l l The display will prompt the operator for the DAY the unit is to restart in normal operation.
- Page 80 O O p p e e r r a a t t i i n n g g I I n n s s t t r r u u c c t t i i o o n n s s f f o o r r P P r r e e m m i i u u m m H H M M I I C C o o n n t t r r o o l l P P a a n n e e l l Figure 104.
-
Page 81: Pretrip
O O p p e e r r a a t t i i n n g g I I n n s s t t r r u u c c t t i i o o n n s s f f o o r r P P r r e e m m i i u u m m H H M M I I C C o o n n t t r r o o l l P P a a n n e e l l The unit will restart at the programmed time (in this example 4:30 am) and perform a Pretrip Test (if selected). -
Page 82: Pretrip Test Considerations
O O p p e e r r a a t t i i n n g g I I n n s s t t r r u u c c t t i i o o n n s s f f o o r r P P r r e e m m i i u u m m H H M M I I C C o o n n t t r r o o l l P P a a n n e e l l •... - Page 83 O O p p e e r r a a t t i i n n g g I I n n s s t t r r u u c c t t i i o o n n s s f f o o r r P P r r e e m m i i u u m m H H M M I I C C o o n n t t r r o o l l P P a a n n e e l l Figure 107.
- Page 84 O O p p e e r r a a t t i i n n g g I I n n s s t t r r u u c c t t i i o o n n s s f f o o r r P P r r e e m m i i u u m m H H M M I I C C o o n n t t r r o o l l P P a a n n e e l l Figure 110.
-
Page 85: Diesel/Electric Menu
O O p p e e r r a a t t i i n n g g I I n n s s t t r r u u c c t t i i o o n n s s f f o o r r P P r r e e m m i i u u m m H H M M I I C C o o n n t t r r o o l l P P a a n n e e l l Figure 112. - Page 86 O O p p e e r r a a t t i i n n g g I I n n s s t t r r u u c c t t i i o o n n s s f f o o r r P P r r e e m m i i u u m m H H M M I I C C o o n n t t r r o o l l P P a a n n e e l l HIGH, MEDIUM, LOW, and OFF.
-
Page 87: Time
O O p p e e r r a a t t i i n n g g I I n n s s t t r r u u c c t t i i o o n n s s f f o o r r P P r r e e m m i i u u m m H H M M I I C C o o n n t t r r o o l l P P a a n n e e l l Figure 116. - Page 88 O O p p e e r r a a t t i i n n g g I I n n s s t t r r u u c c t t i i o o n n s s f f o o r r P P r r e e m m i i u u m m H H M M I I C C o o n n t t r r o o l l P P a a n n e e l l The Language Menu or Alarm Menu will appear.
- Page 89 Loading and Enroute Inspections I I m m p p o o r r t t a a n n t t : : Make sure cargo is pre-cooled to the proper temperature before loading. The Thermo King unit is designed to maintain temperature, not cool an above-temperature load.
-
Page 90: L L O O A A D D I I N N G G A A N N D D E E N N R R O O U U T T E E I I N N S S P P E E C C T T I I O O N N S
L L o o a a d d i i n n g g a a n n d d E E n n r r o o u u t t e e I I n n s s p p e e c c t t i i o o n n s s Inspecting the Load Never assume that the product has been loaded properly. - Page 91 L L o o a a d d i i n n g g a a n n d d E E n n r r o o u u t t e e I I n n s s p p e e c c t t i i o o n n s s N N o o t t e e : : You can cancel defrost by turning the unit off, then restarting the unit.
-
Page 92: Engine Specifications
Specifications Engine Specifications Engine T-590, T-690, and T-890: TK374F (Tier 4) T-1090: TK380F (Tier 4) Fuel Type Ultra low sulfur diesel (ULSD) fuel only [conforming to ASTM D975] No. 2 diesel fuel under normal conditions No. 1 diesel fuel is acceptable cold weather fuel Oil Capacity T-590, T-690, and T-890: 9.0 quarts (8.5 liters/litres) crankcase and oil filter... -
Page 93: Refrigeration System
S S p p e e c c i i f f i i c c a a t t i i o o n n s s Important: Only OAT extended life coolants (Chevron Delo® XLC or equivalent) should be added to Thermo King systems. -
Page 94: Units)
S S p p e e c c i i f f i i c c a a t t i i o o n n s s Fuse Size Function 8X Power (Install fuse in right position) None No Fuse 2A Power to CAN Connector J13 8FC Circuit (Remote Status Light/Optional Power) -
Page 95: Standby Power Requirements
S S p p e e c c i i f f i i c c a a t t i i o o n n s s T-890 Horse- Voltage/ Kilowatts Full Load Overload power Phase/ (amps) Relay Frequency Setting (amps) 230/3/60... - Page 96 Unit Maintenance A regular inspection and maintenance program will help to keep your unit in top operating condition. While pre-trip inspections can be performed by the operator (e.g., checking oil and coolant levels), all major and minor service requirements should be handled by a Thermo King dealer for four very important reasons: •...
-
Page 97: U U N N I I T T M M A A I I N N T T E E N N A A N N C C E
U U n n i i t t M M a a i i n n t t e e n n a a n n c c e e Maintenance Inspection Schedule Pre- 2,000 Inspect/Service These Items trip nual/ Hour- 3,000 Hour-... - Page 98 U U n n i i t t M M a a i i n n t t e e n n a a n n c c e e Pre- 2,000 Inspect/Service These Items trip nual/ Hour- 3,000 Hour- —...
- Page 99 U U n n i i t t M M a a i i n n t t e e n n a a n n c c e e Pre- 2,000 Inspect/Service These Items trip nual/ Hour- 3,000 Hour- •...
- Page 100 Serial Number Locations The serial number of your unit, the engine, or the compressor may be required when contacting a Thermo Dealer or the Emergency Cold Line service. Record these numbers for quick access when needed. Figure 121. Engine Serial Number Location Shown (All Models) ARA578 Figure 122.
-
Page 101: S S E E R R I I A A L L N N U U M M B B E E R R L L O O C C A A T T I I O O N N S
S S e e r r i i a a l l N N u u m m b b e e r r L L o o c c a a t t i i o o n n s s Figure 123. - Page 102 Emergency Cold Line TK 56702-1-OP-EN...
-
Page 103: Epa And Arb Supplemental Emissions Warranty
Unit Warranty Please contact your nearest Thermo King dealer for terms of the Thermo King North American Self Powered Truck Unit Limited Warranty. EPA and ARB Supplemental Emissions Warranty Statement Your Thermo King unit is covered by the diesel engine manufacturer’s EPA and ARB Supplemental Emissions Warranty. - Page 104 Thermo King – by Trane Technologies (NYSE: TT), a global climate innovator – is a worldwide leader in sustainable transport temperature control solutions. Thermo King has been providing transport temperature control solutions for a variety of applications, including trailers, truck bodies, buses, air, shipboard containers and railway cars since 1938.
Need help?
Do you have a question about the Thermo King T-590 Series and is the answer not in the manual?
Questions and answers