Advertisement
Quick Links
Advertisement

Related Manuals for A4Tech G9-500


Summary of Contents for A4Tech G9-500
- Page 1 User Manual Model: G9-500 www.a4tech.com...
- Page 2 THIS DEVICE COMPLIES WITH PART 15 OF THE FCC RULES. OPERATION IS SUBJECT TO THE FOLLOWING TWO CONDITIONS: (1) THIS DEVICE MAY NOT CAUSE HARMFUL INTERFERENCE AND (2) THIS DEVICE MUST ACCEPT ANY INTERFERENCE RECEIVED, INCLUDING INTERFERENCE THAT MAY CAUSE UNDESIRED OPERATION. Federal Communications Commission Requirements The equipment has been tested and found to comply with the limits for Class B Digital Device, pursuant to part 15 of the FCC Rules.
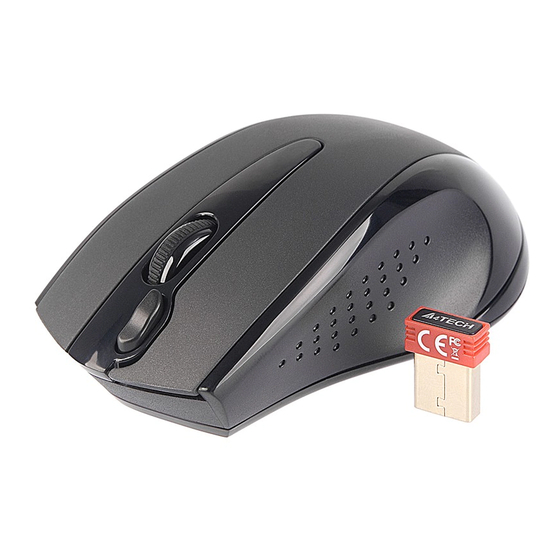
- Page 3 1. Hardware Installation 1). Connect the Multi-link receiver Take out the Multi-link receiver from bottom of the mouse and connect it to your computer. 2). Insert the batteries Open the battery cover and insert the supplied batteries. Note: Make sure the positive (+) and negative (-) ends of the battery match the polarity indicators inside the battery compartment.
- Page 4 (Otherwise, installation is failed and you have to remove the software and re-install.) To remove the software, follow the steps: Go to Start >> Programs >> A4TECH Software >> G9 16-in-1 >> Uninstall G9 16-in-1 To launch the software Double click on the icon "...
- Page 5 3. Knowing the "16-in-1" software "16-in-1" software offers programmable 16 functions in 1 click with RIGHT button. Display current mouse settings Adjustable DPI: 800-1000-1200- 1600-2000 DPI Selectable report rate: 125 / 250 / 500 Hz for office, drawing or gaming applications Main Menu of "16-in-1"...
- Page 6 Gesture 16-in-1 1). Click " " of "Gesture Button " at the "Main Menu" page and select "Gesture 16-in-1". The setup screen will pop up as below. Setup Screen 2). Click any " " at "Setup Screen", you will see the function list. Now you may setup 16 most-frequently- used commands to the "Gesture Button ", and then click "Apply"...
- Page 7 You may setup the "Gesture Button " to open a file or program by one-click during Open a File presentation. Usage: 1). Select “Open a File” from the pull-down menu of the "Gesture Button " as "Figure 1" shows. Figure.1 Figure 2 2).
- Page 8 You may setup any one of Office command sets such as: “Zoom In, Zoom Out, Paste Office Sets Text” to the "Gesture Button ". 1. Zoom In/Out:One click to perform zoom in or zoom out function, applicable to CAD, ACDSee, Windows or text editing programs. 2.
- Page 9 a. Start: Press the "Gesture Button " b. Track of the drawing line: Draw the line as the arrow direction. c. End: Release the "Gesture Button " d. Then the picture has been zoomed in. Example 2: See the contrast in EXCEL after drawing the line. Now let's take "...
- Page 10 Original After Drawing Line, the picture has been enlarged DPI Setting Click " " on "DPI Settings" of the Main Menu of "G9 16-in-1" software to adjust 5-level sensitivities among 800-1000-1200-1600-2000 DPI depending on different display applications The icon will be displayed at the system tray when you adjust the DPI-level. You also can change the DPI-level directly by pressing the DPI shift button(upon the model used).
- Page 11 800DPI 1000DPI 1200DPI 1600DPI 2000DPI Mouse Report Rate Mouse Report Rate is the term that how many times the mouse sends data to the computer in one second. For instance, "Report Rate 500Hz" means "the mouse sends 500 times of data to the computer in one second". G9 16-in-1 offers 3 report rates, e.g., 125Hz, 250Hz and 500Hz respectively.
- Page 12 1X Speed: USB report rate is 125Hz, suitable for office and general users, power consumption is the lowest. 2X Speed: USB report rate is 250Hz, suitable for CAD users, power consumption is normal. 4X Speed: USB report rate is 500Hz, suitable for heavy-duty game players, power consumption is high. Task listing of G9 16-in-1 Left or Right click on the icon "...
- Page 13 1). Auto Launch on Boot If this task is selected, G9 16-in-1 will be auto-executed when the system boots up. 2). Mouse-Control Panel Select "Mouse-Control Panel" will open "Mouse Properties" setup screen of your Windows system, e.g., you may setup mouse pointers and other often -used mouse settings.
- Page 14 A. The 4-way Wheel is the latest scrolling technology. It splits working screen into 2 areas, A and B as shown. Depending on cursor position, the wheel will perform vertical or horizontal scrolling. For instance, when the cursor locates within A area, the wheel will perform vertical scrolling, and when the cursor locates within B area, the wheel will perform horizontal scrolling.
- Page 15 Click on the icon at the right-down corner of your system tray and select "Power Management" to define wake-up modes and sleeping time. According to the stand-by status, the intelligent power-saving management supports "Slight, Little, Middle & Deep" 4 working modes. User may define the time interval to enter into the Deep Sleeping Mode, and 6 seconds enter into Deep Sleeping Mode after the PC is power off.
- Page 16 Low Battery Inform: When the mouse power is low, Low Battery Inform page will pop up at the right corner of your screen to remind you to replace the batteries in time. Low Battery Inform Page 5). RF Channel Setting: Click on the icon at the right-down corner of your system tray and select "RF Channel Setting"...
- Page 17 Detect Receiving Signal Level: Moving the mouse, the indicator will display current signal level. The less level value means the better receiving signal, value under 120 means the devices are working in good condition. The value may increase when working in a long range venue, or there is strong interference. Try different allocation of mouse and receiver till the best improvement is secured.
- Page 18 Multi-link receiver is designed with memory, The “New Mice/KBs ID Pairing” program allows to link up to 3 sets XFAR G3/ G5/ G7/ G9/ G10 series of mice & KBs to operate on the same computer. The “A4tech G-Family” program provides the best sharing of meeting to consolidate all member intelligences.
- Page 19 The red-colored of Multi-link G9 receiver is also available with single gift box. It is back compatible and supports A4Tech's G3, G5, G7 and G10 series, making them reunion as a family. Note that functions of multiple buttons will be restricted for those limited buttons of some back models. And Multi-link function does not applicable to G6 series.
- Page 20 Into G-Family Management: In this section, you will be able to manage the linked mouse and keyboard. Click “Into G-Family Management” will bring the management screen as shown on the right. Management of Linked Mice and Keyboards: From the screen, you may see the listing of linked mice and keyboards with their IDs.
- Page 21 ④Press any key to wake up the mouse before “ID pairing” is performed. >>Locate the power switch (Normally you can find it on the mouse bottom side). >> Make sure the power switch is in OFF position and then switch it to ON position within 30 seconds.
- Page 22 (Low Power Consumption, High Performance Optical Engine) Innovative GlassRun Technology The "GlassRun" is the new technology that it collects all the diffusion light and improves image quality. It saves 30% power consumption than a conventional mouse and works even on the slightly dusty glass. Note: In case the cursor movement is not smooth when working on the Schematic Diagram of extremely clean glass, put on some handprints will get immediate...
- Page 23 3. Ensure the Multi-link receiver is inserted. 4. Check battery and battery installation. Product Support Need help with technical support? Please go to: http://www.a4tech.com/ennew/support.asp and our support team will respond within 72 hours. **Features and specifications of all A4TECH products are subject to change without notification.
Need help?
Do you have a question about the G9-500 and is the answer not in the manual?
Questions and answers