Table of Contents
Advertisement
Quick Links
Advertisement
Table of Contents

Related Manuals for Panther EASY RIDER

Summary of Contents for Panther EASY RIDER
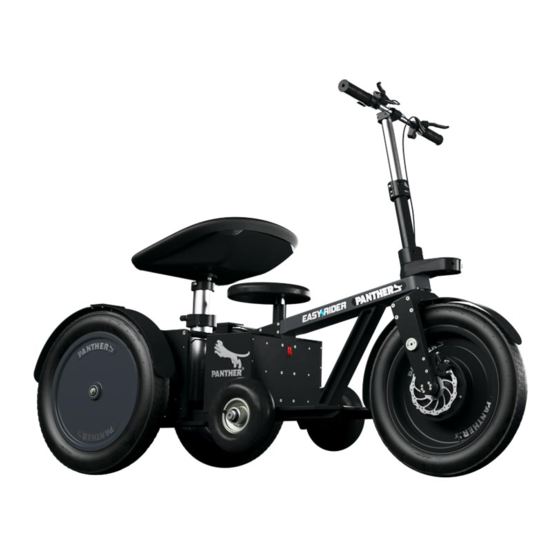
- Page 1 EASY RIDER USER MANUAL www.panther.tv...
- Page 2 The Easy Rider is a new type of dolly, developed by specialists for specialists in order to meet the expectations of every cameraman or grip.
-
Page 3: Table Of Contents
TABLE OF CONTENTS TOPIC PAGE Safety Instructions Technical Data Basic Knowledge Overview Allen Key Rickshaw Mode Height Adjustment Suspenstion Adjustment Sledge Seat Foot Rest Support Wheel Counter Weight Clamps Bracket 48-80mm E-Drive Mode Setup Battery Steering Bar Drive Safety Support Wheels... - Page 4 TABLE OF CONTENTS TOPIC PAGE Counter Weight Seat Bracket Foot Rest Fender Track Mode Transport Notes...
-
Page 5: Safety Instructions
All parts must be secured against falling. The center of gravity of the load should always be as low as possible. Do not switch on the Easy Rider before the operator/driver is ready in order to avoid unintentionally movements by pressing the thumb lever. -
Page 6: Technical Data
TECHNICAL DATA Rickshaw Mode (Sideview / Topview) Length (Dolly) 78 cm / 30,7“ Width (Dolly) 61 cm / 24“ | 70 cm / 27,6“ (w/o suspension) (with suspension) max. Payload 250 kg / 551 lbs E-Drive Mode (Sideview / Topview) Length (Dolly) 185 cm / 72,8“... -
Page 7: Basic Knowledge
BASIC KNOWLEDGE OVERVIEW 313043 Easy Rider 313044 Easy Rider 311983 Brake Kit (Rickshaw Mode) (Rickshaw Mode Suspension) 311809 Drive Unit 312755 Assembly Wheels 312553 Safety Support (Facilitates assembling the Drive Unit) Wheels (Increases safety when cornering dynamically) 312610 Clamp 311810 Push Bar... - Page 8 BASIC KNOWLEDGE OVERVIEW for the driver for the cameraman 312462 Adjustable Seat 311815 Seat and 122149 312753 Fender (Set) Column Eccentric Seat for the Driver (heat insulated) 311814 Foot Rest 312427 Foot Rest Extention 312461 Seat Bracket 25- 80mm 311812 Bracket 48-80mm 312859 Charger 110-230V (for 302577 Battery one battery)
-
Page 9: Allen Key
ALLEN KEY Integrated Allen Key We designed the Easy Rider to be used almost tool-free in order to ensure a fast and easy operating. If there is a tool needed it is always the same: only one Allen Key which has its parking position directly on side of the dolly. -
Page 10: Rickshaw Mode
RICKSHAW MODE HEIGHT ADJUSTMENT Rickshaw without suspension There are 3 different height positions possible. MIDDLE HIGH Adjusting height is done by opening the Take off the wheel and bring it back to the screw. desired position. Then tighten the screw. - Page 11 RICKSHAW MODE HEIGHT ADJUSTMENT Rickshaw with suspension There are 3 different height positions possible. HIGH MIDDLE Open the screw and reposition the Rickshaw Then tighten the screw. height. Support the platform to prevent falling down when changing height position. Sometimes it might be useful to adjust the height differently to compensate unevenness.
-
Page 12: Suspenstion Adjustment
RICKSHAW MODE SUSPENSION ADJUSTMENT Suspension adjustment First make sure you open the locking screw. Turn the golden knob of dampening all the way to „-“ (minus) To adjust the suspension correctly you have to make sure that the suspension travel (Easy Rider loaded) is balanced. - Page 13 RICKSHAW MODE SUSPENSION ADJUSTMENT Lock the adjusted suspension. Adjust dampening to your needs by turning to „+“ (plus)
- Page 14 RICKSHAW MODE SUSPENSION ADJUSTMENT Suspension adjustment There is an option to remove the roll bar if you want to have each wheel dampened individually. To remove the roll bar open the two marked screws and take out the bar.
-
Page 15: Sledge
RICKSHAW MODE ACCESSORIES Sledge The sledge can be used to mount accessories with 80mm Tube Mount / Euro Mount. Push the sledge onto the dove tail bar. Slide it into the desired position. 1. for locking 80mm Tubes / Euromounts 2. -
Page 16: Seat
RICKSHAW MODE ACCESSORIES Seat Push the seat into the Seat Column. Tighten the screw. You can use every 25mm Pin Seat. Adjusting height is done by opening the lever. Be careful with the spring loaded seat! If needed you can use the 80mm tube separately. To do so, remove the tube by opening the screw. -
Page 17: Foot Rest
RICKSHAW MODE ACCESSORIES Foot Rest There are Foot Rests and extentions available. Mounting the Foot Rest is done by tighten the You can change the left/right position by screw. opening the screw. If you need more length you can mount Finally mount the foot rest. -
Page 18: Support Wheel
RICKSHAW MODE ACCESSORIES Support Wheel Additional Support for the Rickshaw Mode. To mount the Support Wheel you need a Adjusting height is done by opening the black sledge. Mount the 80mm tube into it. lever and repositioning height. Mounting a drawbar is done by opening the Mount as shown in the picture and tighten black lever of the drawbar. -
Page 19: Counter Weight
RICKSHAW MODE ACCESSORIES Counter Weight You can mount counter weights to the Support Wheel. Mount the Holder (178530) to the Support Tighten the screw with the integrated Allen Wheel. Key. Now you can mount weights. -
Page 20: Clamps
RICKSHAW MODE ACCESSORIES Clamps We offer black anodized 48mm scaffold tubes which can be combined with clamps (312610). The Clamp is mounted with one screw that is Scaffold tubes can be mounted tool free. mounted on the side plate. With the Clamp rotating Ø 33m - 48 mm (180075) you can mount in any direction. - Page 21 RICKSHAW MODE ACCESSORIES Clamps The clamps can be also used to extend the push bar for 1 or 2 operators with scaffold tubes. The clamp can be mounted with the Place washer between pushbar and clamp. integrated Allen Key. Mount scaffold tubes up to 2m length.
-
Page 22: Bracket 48-80Mm
RICKSHAW MODE ACCESSORIES Bracket 48-80mm The Bracket 48-80mm can be mounted to We recommend to use 2 for save operating. every 80mm tube. To mount a 48mm tube (scaffold tube) open It is also possible to attach foot rests directly the black lever. -
Page 23: E-Drive Mode
E-DRIVE MODE SETUP Drive Unit You can transform the Rickshaw Mode into the E-Drive Mode with the Drive Unit (311809). Drive Unit (311809) Hold the Rickshaw at an angle and move it to Both elements are now in position. the Drive Unit until the magnets „click in“. (Topview) Tighten all 4 screws. - Page 24 Remove the Grip from the Push Bar. Mount it to the front steering bar. Make sure to tighten the screw. Attach the brake hose onto the Easy Rider with straps for safety. Open the knob of the assembly wheels. Make sure to bring the Assembly Wheels up...
-
Page 25: Battery
SETUP Switch Off Dolly before charging batteries. Otherwise battery connector may be burned (shortcut). Battery The Easy Rider is powered by 4 Panther batteries (302577). Open the lid for the batteries. Insert the batteries and make sure that it locks. -
Page 26: Steering Bar
E-DRIVE MODE SETUP Steering bar Adjust height Before operating make sure that the steering Use the integrated allen key to adjust the bar is adjusted to your body size. height. -
Page 27: Drive
Do not switch on the Easy Rider before the operator/driver is ready in order to avoid unintentionally movements by pressing the thumb lever. Always make sure to turn off the Easy Rider when you are not operating to increase the battery life. -
Page 28: Safety Support Wheels
E-DRIVE MODE ACCESSORIES Safety Support Wheels For dynamic curving, use the Safety Support Wheels to increase stability. The danger of rolling over is reduced. Position the Safety Support Wheels as shown Attach the holders (left and right) with the in the picture. integrated allen key. -
Page 29: Counter Weight
E-DRIVE MODE ACCESSORIES Counter Weight If there is not enough grip on the front wheel you can use counter weights. Mount Double Euro Adapter (125137) and Attach a Counter Balance Rod (310836) to the Holder (178530). Holder. Now you can put weights on it. As an alternative to the Double Euro Adapter you can use a Blocker + 80mm tube (8cm). -
Page 30: Seat Bracket
E-DRIVE MODE ACCESSORIES Seat Bracket Remember: the lower the weight of the seat, the more stability you have. Mounting „overslung“. Mounting „underslung“. You are able to mount foot rests and Now you can mount the seat to the front. extentions directly onto it. Foot Rest To maximise driving stability you can mount foot rests directy to the front wheel. -
Page 31: Fender
E-DRIVE MODE ACCESSORIES Fender Fender backside (Rickshaw) Slide the fenders onto the axis. Make sure it holds by itself Tighten the screw. The fender for the front is mounted wth 4 Tighten the screws. screws. -
Page 32: Track Mode
TRACK MODE SETUP Track Kit The Track Kit (4x 204777 + 1x 204793) transforms the Easy Rider into a track dolly. Open the 4 screws with the integrated Allen Take the Base Plate. Key. For the track configuration you only need the Mount Arms (4x 204777) and mount one Base Plate. -
Page 33: Transport
TRANSPORT Easy Rider might delivered in a backpack setup. To detach open the screw and remove the Rickshaw Unit. This backpack setup my be useful for compact storage. -
Page 34: Notes
NOTES... - Page 35 NOTES...
- Page 36 FURTHER ASSISTANCE If you need any further assistance with this instructions (or also other questions) please contact our service department. SERVICE PHONE: SERVICE MAIL: (+49) 8095 71230 - 05 eric.suchetet@panther.tv ADDRESS PHONE / FAX ONLINE Phone: Am Bahnhof 19 (+49) 8095 71230 - 00 contact@panther.tv...
Need help?
Do you have a question about the EASY RIDER and is the answer not in the manual?
Questions and answers