
Summary of Contents for BM KAPTOR MINI
- Page 1 KAPTOR MINI User Manual Firmware Revision: Flow-V1.3.4 / Standard-V1.0.0 App Revision: Easysetup 1.5.1 Manual Revision: V0.1 dtd 30/03/2020...
- Page 2 B.M. TECNOLOGIE INDUSTRIALI s.r.l. Via Dell’ Industria, 12- 35035 RUBANO (PD)- ITALY Tel. +39(0)49-8841651 – Fax +39(0)49-8841654 e-mail: bm@bmtecnologie.it web: www.bmtecologie.it KAPTOR – User Manual – V0.1 - pg.1 MINI...
- Page 3 Documents revision REV. Type of Revision Approval Date First Version in English 30/03/2020 KAPTOR – User Manual – V0.1 - pg.2 MINI...
-
Page 4: Table Of Contents
1 Summary 1 Summary 2 Introduction 2.1 Manual feasability 3 General information 3.1 Main sensors 3.2 Main applications 3.3 Technical, functional, electrical and mechanical features 3.4 Functional features 4 Dimensions and fixing system 4.1 Mouting bracket 4.2 Quick release wall mounting support 4.3 Combined mounting bracket 5 Case opening and closure 6 Power supply... - Page 5 11.1 Device features for App EasySetup Installation 11.2 Installation and update 11.3 Authorizations 11.4 How does EasySetup works? 11.4.1 App working mode (live and off-line) 11.4.2 Status bar 11.4.3 App Settings 11.4.4 Codes and Passwords 11.5 Wi-Fi Connection to the device 11.6 Profiles management 11.6.1 Duplication and association of profiles 11.7 “Save”...
- Page 6 12.10.2 Users 12.10.3 Digital events 12.10.4 Download events 12.10.5 Reset alarms 12.10.6 Diagnostics 12.11 Service Function 12.11.1 Reboot 12.11.2 Firmware Update 12.11.3 Wi-Fi password 12.11.4 Set modem profile 12.11.5 Battery calibration 12.11.6 Factory settings 13 Conformity standards 14 Conformity certificates of manufacturer 15 Maintenance 16 Service 17 Warranty...
-
Page 7: Introduction
2 Introduction Please read this part carefully before starting using the device. Dear Customer, congratulations for choosing a product manufactured by B.M. Tecnologie Industriali. This manual is the main source of information for the right use of KAPTOR MINI This manual includes important information, advices and warnings for the right use of the device and its potentials. -
Page 8: Manual Feasability
2.1 Manual feasability This manual describes features, functions, and instructions for using KAPTOR . For installation and MINI start-up of the sensors, please refer to their specific manuals. KAPTOR – User Manual – V0.1 - pg.7 MINI... -
Page 9: General Information
3 General information KAPTOR is the evolution of KAPTOR MULTI, successfully used in thousands of applications. MINI This device was developped and realized by B.M. Tecnologie Industriali as a central element of a system managing measures, data acquisitions and transmissions. Its unique features make it a milestone in the whole panorama of similar devices. -
Page 10: Main Sensors
3.1 Main sensors ✓ Area velocity doppler sensor for flow measurement on part filled pipes and open channels. ✓ Transit Time module for flow measurement on full pipes. ✓ Pressure sensor for pressure measurement of full pipes. ✓ Ultrasonic sensor for level/flow measurement on open channels. ✓... -
Page 11: Technical, Functional, Electrical And Mechanical Features
3.3 Technical, functional, electrical and mechanical features HARDWARE FEATURES DATALOGGER KAPTOR MINI 2 Analog Inputs 4 wires – 4..20mA and 0..10V – Active 42mA@24V – Resolution: 16 bit 4 Digital inputs (active) Digital inputs (clean contact) – Max frequency: 60 Hz RS485 (supplied) RS485 interface powered from Standard voltage power supply 4 Digital inputs (events) -
Page 12: Functional Features
In, the user can download data and events, monitor the values read, diagnose the device. Kaptor mini is connected to the user's device (tablet, smartphone) via a secure Wi- Fi connection. - Page 13 I/O CONFIGURATION Analog inputs: measuring range, entering a linearization curve on 16 points, entering offset. Calibration on low and full range. Current or voltage input selection. Digital counter inputs: pulse weight, counter increase, calculation of average pulses in the unit of time Event digital inputs: check on/off status (activation), log status, sampling rate change on event.
- Page 14 Alarm events can be sent via SMS to 3 users max. If the transmission fails, the device could be setup to retry sending SMS to selected intervals. DATE/TIME SYNCHRONIZATION If enabled, the device can synchronize the date and time of its internal clock with that of the server to ensure that multiple instruments can have the same time.
-
Page 15: Dimensions And Fixing System
4 Dimensions and fixing system KAPTOR was designed to be wall mounted with a bracket made of stainless steel. The bracket keeps MINI the device in vertical position in order to reach external connectors easily. KAPTOR – User Manual – V0.1 - pg.14 MINI... -
Page 16: Mouting Bracket
4.1 Mouting bracket This bracket is used to hook up the device through the closing clamp. The bracket can be wall mounted by using two plugs (hole diameter in the bracket is 10mm). 4.2 Quick release wall mounting support If you plan to replace the device frequently, it is possible to use a wall support that allows the quick release of the mounting bracket. -
Page 17: Combined Mounting Bracket
4.3 Combined mounting bracket If your device has an external battery, or in other peculiar cases including two devices, a combined mounting system is foreseen. It consists of two brackets with a coupler. The coupler allows two mounting brackets to be hold together, in order to reduce installation space and use a single quick-release system. -
Page 18: Case Opening And Closure
5 Case opening and closure In standard operating conditions, it is not necessary to open or close the KAPTOR case. MINI But it could be in these cases: ✓ Primary battery replacement ✓ SIM card Installation/replacement/removal ✓ Data transmission Antenna replacement If necessary, unscrew the collar external clamp nut and use the quick-release system to remove the device. - Page 19 The IP68 protection degree of the case is guaranteed by two O-rings: before closing, check that they are present, correctly positioned, lubricated and not damaged. Cracks, cuts and deformations can seriously affect the IP68 seal of the case. Long periods of closure, exposure to high or low temperatures are natural conditions of deterioration of the O-rings In the event of damage, it is necessary to replace them by requesting them from the assistance service.
-
Page 20: Power Supply
Application analog/digital inputs. 6.1.1 Internal battery replacement Kaptor Mini can be equipped with an Internal Battery of 3,6V. Follow these steps for battery replacement: 1. Open the case by using the external collar; 2. Pay attention to the cable to the antenna (if the device has a built-in antenna);... -
Page 21: Exernal Rechargeable Battery
3. Unscrew the screw as shown in the picture (if present) and the battery holder: 4. Remove the battery pack (exhausted) and disconnect the white connector: 5. Now connect the new battery pack, by reconnecting the white connector and screw the holder; 6. -
Page 22: Battery Charging
Main Medium and Long term monitoring activities (6/12 months) with sensors connected to Application RS485. Elevate sampling frequency: < 5 minutes. Data transmission: frequency < 12 hours 6.2.1 Battery charging Battery must be charged only with our battery charger, by following these steps: 1. -
Page 23: External Primary Battery (Not Rechargeable) - 14,4V
6.3 External primary battery (not rechargeable) – 14,4V Chemical Lihtium component Tension 14,4V – 57AH Sensors Power supply of digital/analog inputs and built-in pressure sensor. It can also supply sensors connected to RS485. Main Long term monitoring activities (>12 months) with sensors connected to RS485. Low Application sampling frequency or on event. - Page 24 If necessary, it is possible to select the right power source by following these steps: 1. Open the case and find the CN24 jumpers as shown in the figure, near the internal battery connector; 2. Remove the resin on the jumpers, if any; 3.
-
Page 25: Wiring And Connections
7 Wiring and connections KAPTOR is equipped with IP68 connectors that guarantee protection degree if used in the right way. MINI All the connectors, arranged on the low side of the KAPTOR , are MINI specifically of different sizes or polarity to facilitate the user in their correct wiring, this precaution prevents the connection of sensors/peripherals in incorrect inputs. -
Page 26: Wiring Id Colours
7.1 Wiring ID colours Connector Colour Function POWER Positive external supply SUPPLY Black Negative external supply RS485 White RS485-A PORT Green RS485-B Blue Sensor supply (from external source) max 1A Pink AUX1 Brown AUX2 ANALOG +24VAN1 (sensor supply) INPUT Green Voltage Input AN1 Grey Current Input AN1... - Page 27 The functionality linked to the AUX1..4 auxiliaries is determined during the instrument's production phase. Contact the assistance service in case of doubt. The configuration of the AUX1..4 can only be carried out if its connector is mounted on the instrument. The selection of the connectors on the instrument is made during the ordering process according to the purchase code.
-
Page 28: Sim Card
8 SIM card Kaptor Mini is equipped with a SIM card holder for data transmission in 2G/3G. To access the slot, follow these steps: 1. Open the case by acting on the external collar; 2. Remove the upper cover, paying attention to the built-in antenna cable (if present);... - Page 29 5. Slide the metal part to lift the SIM card holder: 6. Insert the SIM card with low sided contacts and the cut corner in the right position: 7. Lower the SIM card holder and slide the metal part. Make sure it remains in position: 8.
-
Page 30: Working Modes
9 Working modes KAPTOR has two different operating modes: continuous mode and discontinuous mode. In both cases, MINI data transmission can be activated. The two different modes allow the user to make the device perform according to the needs of their applications, which may need to guarantee: ✓... -
Page 31: Data Transmission
The acquisition frequency (sampling time) can be set by the user based on the needs of the measurement campaign, always keeping in mind that according to the settings, the battery life changes. Depending on the measurement and battery life requirements you want to obtain, you will have to find the right compromise. -
Page 32: Status Led
10 Status led KAPTOR could have four led indicating status and working mode of the device. MINI Function Continuous Mode / Wake-up Sleep-mode Green Wi-Fi Fixed: Wi-Fi module is ON, you can Blinking: reading and logging. Connection connect to the device. Blinking: conneting to the App. -
Page 33: App Easysetup
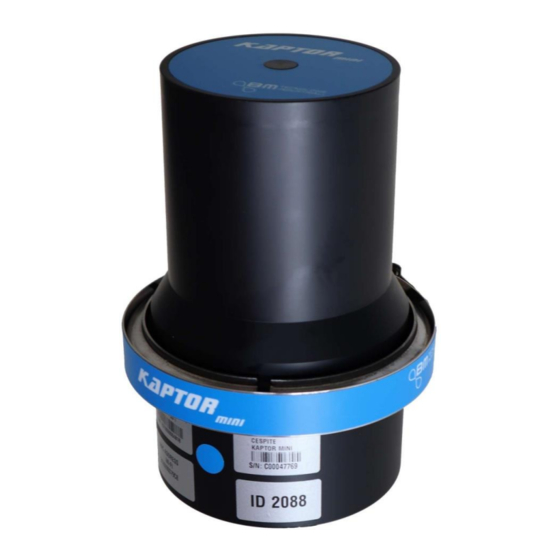
11 App EasySetup KAPTOR is completely configurable via EasySetup, a dedicated Android app that connects to the MINI device via Wi-Fi network. Each device has a unique ID number consisting of an alphanumeric sequence of 12 characters (numbers from 0 to 9 and letters from A to F) shown on a label stick outside the case. -
Page 34: Installation And Update
11.2 Installation and update The installation file is provided directly by the sales network or by the assistance service. EasySetup is pre- installed if a tablet for configuration is purchased together with KAPTOR MINI Download (copy) the APK installation file to a folder of the tablet's internal memory or SD card (if any). Once the file is located, tap on it to start the installation or update and follow the instructions. -
Page 35: How Does Easysetup Works
11.4 How does EasySetup works? The App comes with different screens designed to be as intuitive as possible. Each of them has navigation buttons between the various functions of the device and sections dedicated to setting the related parameters. In any case, at the top, there is a status bar that indicates, through different icons and colors, the connection status, any warnings and/or errors and other information that will be detailed later. -
Page 36: Status Bar
11.4.2 Status bar The status bar, at the top, provides indications regarding the status of the instrument and allows the user a quick access to some of the functions. The block on the right indicates the connection status with the instrument and allows the user to start the connection and disconnection procedure: Disconnected Connected... -
Page 37: App Settings
11.4.3 App Settings In the settings section, the user can view information related to the application and its settings. General Information The first section (“General information”) shows the application and database versions, useful for a possible reference in case os support request. Through the “Check for updates” button it is possible to check if a newer version of EasySetup is available. -
Page 38: Codes And Passwords
11.4.4 Codes and Passwords Codes and password used in EasySetup, are necessary to access some definite functions. The table below is a resume, detailed functions are explained in their referring paragraphs. Wi-Fi Connection to the device SSID (network name): written on the external label Password (default): users password Delete device memory 1234... -
Page 39: Profiles Management
Once the network has been chosen, the App starts the recognition process and, when finished, it shows a summary window with the main data of the instrument. Continuing, the reading of the entire configuration (profile) is completed. Now the App checks whether at least one profile for the instrument has already been saved on the tablet and asks the user how he wants to proceed: A. -
Page 40: Duplication And Association Of Profiles
Use it for configuration: allows the user to use a profile saved on the tablet memory, to change it or load it. Rename: it gives a new name to the profile. Duplicate: profile duplication. This function is useful for changing the profile configuration keeping the copy of a previous one. -
Page 41: Save" And "Save And Upload" Buttons
11.7 “Save” and “Save and upload” buttons Configurations displays have normally two different buttons: “Save” and “save and upload”. The "save" button allows you to save the changes made only and exclusively on the tablet in use: the changes are saved only locally and not sent to the KAPTOR . -
Page 42: Configuration
12 Configuration 12.1 Sensors connected to RS485 port This button on the left is used to access the settings of the RS485 port of the KAPTOR MINI There are two firmware versions of the instrument that allow different management of the port: EasySetup, based on the instrument firmware, will show different configuration screens. - Page 43 The KAPTOR connector has two pins for serial communication and two power pins whose MINI voltage is that of the connected external battery. Before proceeding with the connection, make sure to make the correct connection of the external sensor to avoid, for example, inverting the polarity of the supply voltage. Refer to the chapters “Wiring and connections”...
- Page 44 Using the “+” button it is possible to insert the definition of a new variable. By holding down on an existing variable, you can edit or delete it. In both cases, the variable management window will appear similar to the one shown in the figure.
-
Page 45: Rs485 Flow
The interpretation of the bits and the transformation into a decimal numeric value (integer or comma) or in a sequence of states (for example coil) depends on the setting of the type of data performed during the configuration of the variables themselves. By performing a type change, unfortunately, the interpretation of the old saved data cannot be performed correctly. - Page 46 The configuration of the Doppler sensor is divided into three sections: ✓ Pipe geometry ✓ General settings ✓ Advanced settings Shape: it is possible to select one of the standard shapes (circular, rectangular, etc ...) or the customized shape that allows you to model a non-standard channel by defining a maximum of 32 widths at as many dimensions (see dedicated paragraph).
- Page 47 ✓ Integrated: read directly by the doppler sensor via a hydrostatic cell; ✓ External: read by an additional sensor connected to analog input 1. The value must be expressed in millimeters (the configuration of the sensor must be made in the appropriate analog menu); ✓...
- Page 48 ✓ A is wet area (m ), automatically calculated based on the read level, deposit and geometry set. KsIf: is the coefficient used to calculate flow rate �������� = �� ∙ �� �� KsIf automatic evaluation: allows to enable the automatic calculation of the KsIf coefficient.
- Page 49 Salinity: in which the sensor is installed. The type of water is useful to correct the read level based on the sality of water. Hydraulic factor: is a multiplicative value of velocity used only by the device (reading only). Velocity calibration: it allows to set a multiplier of velocity. Use this coefficient to eventually calibrate the read velocity.
- Page 50 The following table shows some examples TXT file EasySetup Resume Note Height;Width 1 header line Correct File including 4 points 0;10 4 lines 15;20 No errors 25;30 100;100 Height;Width 1 header line File including errors. While saving, it will be 0a;10 2 lines mentioned no 0 level is specified.
- Page 51 12.1.2.2 TTFM sensor The TTFM (Transit Time Flow Meter) sensor allows to carry out the bidirectional measurement of the flow rate in full pipes, using ultrasound transit time technology. The measurement is made by using two transducers positioned on the external pipe surface (non-invasive technique) in a specific geometric configuration and distance.
- Page 52 Liquid: it is the fluid flowing into the pipe. It is possible to choose it among a list of standard fluids. Speed of sound in liquid: it is the propagation of sound into the fluid. It has to be specified only if the fluid is not included among the standard ones.
- Page 53 Hold for low signal: the device could keep the last valuable reading in case of signal loss (momentary). Select “No” and the value will be updated even in case of signal loss. Empty pipe setting: it is possible to set a level below which the device considers the pipe as empty.
- Page 54 After making the configuration, make sure to log the variables of interest correctly in the appropriate section. 12.1.2.2.1 Current configuration reading It is possible to read the current configuration of TTFM, tapping the dedicated button, as the App does by entering the configuration screen. 12.1.2.2.2 Mounting distance and installation check To make changes effective and have information regarding the installation distance of the transducers, it is necessary...
-
Page 55: Built-In Pressure Sensor
12.2 Built-in pressure sensor KAPTOR could be supplied with a built-in pressure sensor. Here are different pressure MINI sensors available, depending on ranges (from 6 to 60 bar) and on installation needs. It is also possible to use external pressure sensors to be connected to analog inputs. It is possible to enable or disable the pressure sensor. -
Page 56: Digital Inputs
Using the Calibration button you can access the additional functionality to calibrate the input and define the cut off value for noise (Cut Off). For calibration it is necessary to have a device generating the reference current and voltage. Calibration is performed on the start of the scale and the full scale. -
Page 57: Auto Cleaning
After making the configuration, make sure to log the variables of interest correctly in the appropriate section. By deactivating a digital input but activating its log, it is possible to use the same as a status and not as a counter. With this configuration, it will be possible to display in data view 0 or 1 based on the status (open/closed) and possibly set an alarm to record an event (for example, broken cable). -
Page 58: Warm Up Time
12.6 Warm up time In general, the warm up time is the waiting time between the activation of a sensor and the execution of the reading. For example, in the case of using a TTFM module, this is a time necessary for the propagation of ultrasound to stabilize so that the reading is as accurate as possible. -
Page 59: Data
Label: this is the label used for the variable, shown in the data display window. Decimals: it is the number of decimals used to format the read value. In some cases there are limitations on the number of decimals to set. Measure unit: this is the measuring unit of the variable. - Page 60 Starting the data download, a copying process is started starting from the data most recently stored by the instrument and going back in time. The waiting window provides evidence of the start and end dates of the currently copied data. The copying process can be stopped at any time. By downloading the data from KAPTOR into the App, they are copied and remain in the MINI...
-
Page 61: Communication
12.9 Communication This section contains all the settings relating to the connection of KAPTOR to the MINI Internet and the data transmission. The instrument, through the integrated modem, has the possibility of: ✓ Send historical data stored to the server via GPRS ✓... -
Page 62: Connection Parameters
12.9.1 Connection parameters In this section it is possible to configure the connection parameters for data transfer (logs, events, configuration) and the NTP server for date and time synchronization. ID: it is an identifier that is used in the data transmission phase to distinguish between multiple instruments installed. -
Page 63: Data Transmission
NTP IP: name or address of the server used. NTP port: serve port for the available service, usually it is port 123. NTP time out: time, in seconds, of inactivity necessary before considering connection closed or lost. UTC: used to set time depending on time zones. Internet has several free NTP servers, despite the one factory set in KAPTOR MINI 12.9.2 Data Transmission... - Page 64 Send SMS: allows the user to enable the sending of alarm SMS. In the case of sending enabled, various parameters can be configured. Max daily SMS: maximum number of SMS that can be sent during the day. Even in the event of alarms, once this number is exceeded, the instrument will not send any other SMS.
-
Page 65: Sim
12.9.3 SIM In this section it is possible to set the parameters relating to the SIM installed, to the access point (APN). Some modem commands are also available. SIM CCID: it is an uneditable value that indicates the SIM identification code. If not present or if the SIM is replaced, it is essential to use the appropriate button to read the correct value. -
Page 66: Functional Test
If a multi-operator SIM is used, KAPTOR independently excludes operators with whom MINI repeated transmission errors are obtained, to optimize transmission times. For this reason, with this type of SIM, the operator selection must be set to automatic. To correctly set the network type (2G or 3G) it is necessary to save the settings on the instrument (save and load) and then use the "Set network type"... -
Page 67: Alarms And Events
Some SIM cards allow the sending of only data and not SMS. In this case operators will not be able to receive any type of SMS. 12.10 Alarms and events In this section it is possible to set the thresholds that trigger alarms, users and numbers for sending warning SMS and managing digital events. -
Page 68: Users
The filter function is useful to prevent consecutive oscillations near the threshold value from creating the sending of different alarms. 12.10.2 Users In this menu it is possible to define a maximum of 3 users enabled to receive the warning SMS, sent by KAPTOR when exceeding one of the set MINI thresholds. -
Page 69: Download Events
Interrupt not triggered: it displays (cannot be changed) the sampling period in normal operating conditions. For the modification, the setting in “Variable Log” must be used. Interrupt triggered: allows the user to set a sampling period different from that normally used by the instrument when at least one of the digital events occurs. -
Page 70: Service Function
12.11 Service Function This section includes some advanced “service” function for the instrument’s management. 12.11.1 Reboot Device reboot is not usually necessary. If there are some anomalies, it is possible to do it. 12.11.2 Firmware Update The firmware of KAPTOR is constantly revised and improved in order to MINI guarantee optimal performance and new features. -
Page 71: Set Modem Profile
The password must contain at least 8 characters and a maximum of 14. It is advisable not to use easily identifiable passwords (such as company name, names and dates of birth in general), but to use an articulated sequence of lower and upper case letters, numbers and special characters. Characters allowed in the password are shown below: ✓... -
Page 72: Factory Settings
In this way a correction factor will be calculated and applied so that the instrument is able to read a correct voltage value. Calibration ensures that any alarm set to low battery voltage will trigger correctly. 12.11.6 Factory settings By resetting to factory settings, it is possible to restore the instrument to the initial settings. -
Page 73: Conformity Standards
13 Conformity standards Electrical Safety Directive 2014/35/UE "low Tension" EN 62368-1 Audio/video, technological devices for information and communication. Part 1: Safety Requirement Electromagnetic Compatibility Directive 2014/30/UE "Electromagnetic Compatibility (EMC) " EN 55011 Radiated Emissions Industrial, scientific and medical devices (ISM) - Radio disturbance features - Limits and methods of measurement ETSI EN 301489 Electromagnetic... -
Page 74: Conformity Certificates Of Manufacturer
14 Conformity certificates of manufacturer KAPTOR – User Manual – V0.1 - pg.73 MINI... - Page 75 KAPTOR – User Manual – V0.1 - pg.74 MINI...
-
Page 76: Maintenance
It is recommended to clean the contacts with specific antioxidant lubricant sprays for electrical contacts. 16 Service B.M. TECNOLOGIE INDUSTRIALI s.r.l. Via Dell’ Industria, 12- 35035 RUBANO (PD)- ITALY Tel. +39(0)49-8841651-int5 e-mail: bm@bmtecnologie.it web: www.bmtecologie.it 17 Warranty Warranty is 12 (twelve) months starting from date of receiveing the device. 18 Disposal Please start an environmentally friendly recycling for the tool, packaging and accessories. -
Page 77: Ordering Code
19 Ordering Code 1 1 - x x x x x - x x - x x - x - x - 0 - x - 0 Code KAPTOR MINI Version HW (11=V1R1) Not used Connectos (1: installed - 0: not installed) External Power supply RS485, aux1, aux2 2 Analog Inputs...
Need help?
Do you have a question about the KAPTOR MINI and is the answer not in the manual?
Questions and answers