Table of Contents
Advertisement
Available languages
Available languages
Quick Links
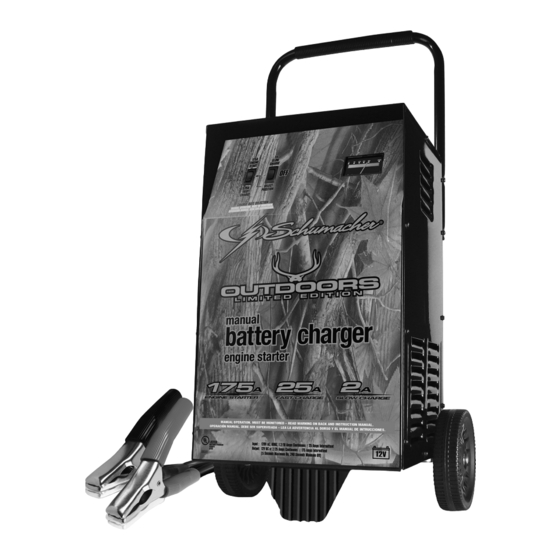
Model / Modelo:
SE-175
Manual Battery Charger
Cargador de baterías manual
PLEASE SAVE THIS OWNERS MANUAL AND READ BEFORE EACH USE.
This manual will explain how to use the battery charger safely and effectively.
Please read and follow these instructions and precautions carefully.
POR FAVOR CONSERVE ESTE MANUAL DEL USUARIO Y LEALO ANTES
DE CADA USO. En este manual le explica cómo utilizar el cargador de batería
de manera segura y confiable. Por favor, lea y siga las siguientes instrucciones
y precauciones.
OWNERS MANUAL
MANUAL DEL USUARIO
0099001722-00
Advertisement
Table of Contents

Related Manuals for Schumacher Electric SE-175


Summary of Contents for Schumacher Electric SE-175
- Page 1 OWNERS MANUAL MANUAL DEL USUARIO Model / Modelo: SE-175 Manual Battery Charger Cargador de baterías manual PLEASE SAVE THIS OWNERS MANUAL AND READ BEFORE EACH USE. This manual will explain how to use the battery charger safely and effectively. Please read and follow these instructions and precautions carefully.
-
Page 2: Table Of Contents
CONTENTS IMPORTANT SAFETY INSTRUCTIONS ..................4 PERSONAL SAFETY PRECAUTIONS ..................4 PREPARING TO CHARGE ......................5 CHARGER LOCATION ........................5 DC CONNECTION PRECAUTIONS ...................5 FOLLOW THESE STEPS WHEN BATTERY IS INSTALLED IN VEHICLE .......5 FOLLOW THESE STEPS WHEN BATTERY IS OUTSIDE VEHICLE ........6 GROUNDING AND AC POWER CORD CONNECTIONS ............6 ASSEMBLY INSTRUCTIONS ......................6 CONTROL PANEL ........................7 OPERATING INSTRUCTIONS ....................8... - Page 3 CONTENIDOS INSTRUCCIONES IMPORTANTES DE SEGURIDAD .............13 PRECAUCIONES DE SEGURIDAD PERSONAL ..............13 PREPARACIÓN PARA LA CARGA ..................14 UBICACIÓN DEL CARGADOR ....................14 PRECAUCIONES DE CONEXIÓN EN CC ................14 SIGA ESTOS PASOS CUANDO LA BATERÍA ESTÉ COLOCADA EN EL VEHÍCULO ..15 SIGA ESTOS PASOS CUANDO LA BATERÍA SE ENCUENTRE FUERA DEL VEHÍCULO ...15 CONEXIONES A TIERRA Y ENERGÍA DE CA .................16 INSTRUCCIONES DE MONTAJE .....................16 PANEL DE CONTROL .......................17...
-
Page 4: Important Safety Instructions
1. IMPORTANT SAFETY INSTRUCTIONS SAVE THESE INSTRUCTIONS. 1.1 SAVE THESE INSTRUCTIONS – 1.8 Do not operate charger if it has received This manual contains important safety a sharp blow, been dropped, or otherwise and operating instructions. damaged in any way; take it to a qualified serviceman. -
Page 5: Preparing To Charge
3. PREPARING TO CHARGE 3.1 If necessary to remove battery from battery without removable cell caps, such vehicle to charge, always remove as valve regulated lead acid batteries, grounded terminal from battery first. Make carefully follow manufacturer’s recharging sure all accessories in the vehicle are off, instructions. -
Page 6: Follow These Steps When Battery Is Outside Vehicle
7. FOLLOW THESE STEPS WHEN BATTERY IS OUTSIDE VEHICLE WARNING: A SPARK NEAR THE connect NEGATIVE (BLACK) charger clip BATTERY MAY CAUSE A BATTERY to free end of cable. EXPLOSION. TO REDUCE THE RISK OF 7.5 Do not face battery when making final A SPARK NEAR THE BATTERY: connection. -
Page 7: Control Panel
9.2 Attach the foot: Remove the charger 9.4 Mount the axle to the charger: Place from the packing materials and place one end of each bracket into the slot on upside down on the bottom of the charger. Place the axle a flat surface. -
Page 8: Operating Instructions
11. OPERATING INSTRUCTIONS WARNING: A spark near the battery may USING THE ENGINE START FEATURE cause an explosion. Your battery charger can be used to jump CHARGING A BATTERY start your car if the battery is low. Follow IN THE VEHICLE all safety instructions and precautions for charging your battery. -
Page 9: Calculating Charge Time
12. CALCULATING CHARGE TIME When you know the percent of charge and Example: the Amp hour (Ah) rating of your battery, Ah rating x % of charge needed x 1.25 = hrs of charge you can calculate the approximate time Charger Amp setting needed to bring your battery to a full charge. -
Page 10: Troubleshooting
14. TROUBLESHOOTING PROBLEM POSSIBLE CAUSE REASON/SOLUTION Charger will not turn AC outlet is dead. Check for open fuse or circuit on when properly breaker supplying AC outlet. connected. Poor electrical connection. Check power cord and extension cord for loose fitting plug. No reading on the Charger is not plugged in. -
Page 11: Before Returning For Repairs
1-800-621-5485 Monday-Friday 7:00 to 5:00 For REPAIR OR RETURN, contact Customer Service at 1-800-621-5485. DO NOT SHIP UNIT until you receive a RETURN MERCHANDISE AUTHORIZATION (RMA) number from Customer Service at Schumacher Electric Corporation. • 11 •... -
Page 12: Limited Warranty
Manufacturer does not provide any warranty for any accessories used with this product that are not manufactured by Schumacher Electric Corporation and approved for use with this product. This Limited Warranty is void if the product is misused, subjected to careless handling, repaired, or modified by anyone other than Manufacturer or if this unit is resold through an unauthorized retailer. -
Page 13: Instrucciones Importantes De Seguridad
1. INSTRUCCIONES IMPORTANTES DE SEGURIDAD GUARDE ESTAS INSTRUCCIONES. 1.1 GUARDE ESTAS INSTRUCCIONES – 1.8 No utilice el cargador si el mismo recibió Este manual contiene instrucciones un golpe fuerte, si se cayó o si sufrió operativas y de seguridad de importancia. daños de cualquier otra forma;... -
Page 14: Preparación Para La Carga
plomo-ácido. Una batería de plomo- cargador de batería para cargar baterías ácido puede producir una corriente de de pila seca que por lo general se utilizan cortocircuito lo suficientemente elevada con artefactos domésticos. Estas baterías como para soldar un anillo o provocar podrían explotar y provocar lesiones a efectos similares sobre el metal, personas o daño a la propiedad. -
Page 15: Siga Estos Pasos Cuando La Batería Esté Colocada En El Vehículo
6. SIGA ESTOS PASOS CUANDO LA BATERÍA ESTÉ COLOCADA EN EL VEHÍCULO ADVERTENCIA: UNA CHISPA batería al borne POSITIVO (POS, P, PROVOCADA CERCA DE LA BATERÍA +) sin descarga a tierra de la batería. PUEDE CAUSAR LA EXPLOSIÓN Conecte el gancho NEGATIVO DE LA BATERÍA. -
Page 16: Conexiones A Tierra Y Energía De Ca
8. CONEXIONES A TIERRA Y ENERGÍA DE CA 8.1 Este cargador de batería está destinado a El uso de un enchufe como adaptador un uso en un circuito con tensión nominal no se recomienda y no debe ser utilizado de 120 V y posee un enchufe con descarga Estados Unidos. -
Page 17: Panel De Control
9.4 Ensamble el eje al cargador: Ubique 9.5 Ajuste la agarradera: Vuelva a poner un extremo de cada abrazadera en la el cargador recto sobre su píe y ruedas. ranura que se encuentra en la parte Quite los dos tornillos superiores de cada inferior del cargador. -
Page 18: Instrucciones De Operación
11. INSTRUCCIONES DE OPERACIÓN ADVERTENCIA: Una chispa provocada MODO DE CARGA MANUAL cerca de la batería puede causar una Cuando se realiza una carga manual, explosión. el cargador continuará la carga y no se apagará. Supervisar el proceso de carga CARGA DE LA BATERÍA y deterla una vez cargada la batería. -
Page 19: Cálculo De Tiempo De Carga
NOTA: Si el motor gira, pero no enciende, FUNCIONAMIENTO DEL VENTILADOR no existe un problema con el sistema de Es normal que el ventilador funcione arranque, sino en cualquier otra parte continuamente. Mantener el área cerca del del vehículo. DEJE de darle arranque cargador sin obstrucciones para permitir al motor hasta que el otro problema se que el ventilador funcione eficazmente. -
Page 20: Localización Y Solución De Problemas
• Guarde el cargador desenchufado de la • Almacene en el interior, en un lugar toma de alimentación de CA en posición fresco y seco. No guarde las pinzas en el vertical. mango, unidas con un clip, en o alrededor del metal, o sujeta a los cables. - Page 21 PROBLEMA CAUSA POSIBLE SOLUCIÓN Se escucha un El disyuntor se resetea. Las configuraciones podrían sonido seco en el ser erróneas. Verifique las cargador (“clic”). configuraciones del cargador. Batería defectuosa. Haga revisar la batería. Cables o pinzas de la batería en Controle la posible presencia de cables cortocircuito.
-
Page 22: Antes De Devolver A Reparaciones
El Fabricante no presta garantía por lo accesorios utilizados con este producto que no sean los fabricados por Schumacher Electric Corporation y que no estén aprobados para su uso con este producto. La presente Garantía Limitada será nula si el producto se utiliza en forma errónea, se trata de manera inadecuada, es reparado o modificado... - Page 23 • 23 •...
-
Page 24: Warranty Card
ORIGINAL receipt because it will be required for any warranty claims. This warranty is not transferable. Send warranty card only. DO NOT SEND UNIT TO THIS ADDRESS FOR REPAIR. Mail this card to: Schumacher Electric Corporation 801 Business Center Drive Mount Prospect, IL 60056-2179 Name ______________________________________________________________...
Need help?
Do you have a question about the SE-175 and is the answer not in the manual?
Questions and answers