Table of Contents
Advertisement
Available languages
Available languages
Quick Links
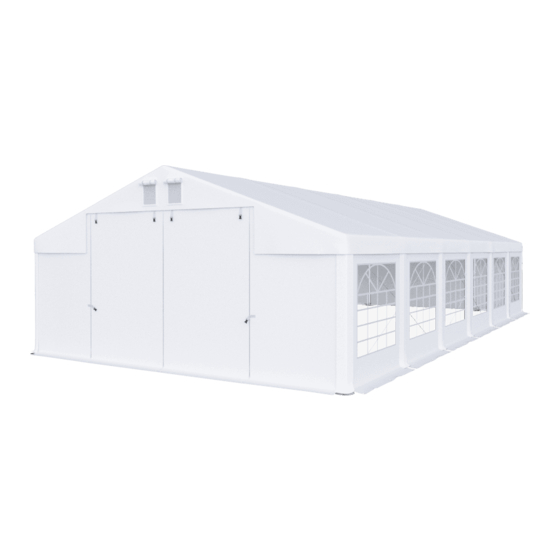
8m seria/série/series
PL Instrukcja montażu PVC Namioty
CZ Montážni instrukce PVC Stan
GB Assembly instruction PVC Tent
tel: +48 508 105 654; +48 571 397 986
Instrukcja do pobrania na telefon:
Stáhnout montážní návod na telefon:
Download the manual on the phone:
8x6m, 8x8m, 8x10m, 8x12m, 8x14m, 8x16m
e-mail: mptent@mptent.com
www.mptent.com
1
Advertisement
Table of Contents

Subscribe to Our Youtube Channel
Related Manuals for MPTent 8m Series

Summary of Contents for MPTent 8m Series
- Page 1 PL Instrukcja montażu PVC Namioty CZ Montážni instrukce PVC Stan GB Assembly instruction PVC Tent tel: +48 508 105 654; +48 571 397 986 e-mail: mptent@mptent.com www.mptent.com Instrukcja do pobrania na telefon: Stáhnout montážní návod na telefon: Download the manual on the phone:...
- Page 2 8m seria/série/series Instrukcja Wprowadzenie Gratulujemy zakupu naszego produktu i witamy w firmie MP-TENT. Nasz dział obsługi klienta chętnie udzieli Państwu odpowiedzi na pytania i cennych wskazówek. Dzięki nowemu namiotowi mają Państwo możliwość swobodnego planowania wielu działań. Można go wykorzystać podczas imprezy, jako ochronę przed słońcem, wiatrem, do składowania i w wielu innych celach. Prosimy o przestrzeganie zamieszczonych poniżej wskazówek.
-
Page 3: Czyszczenie I Przechowywanie
8m seria/série/series Uwaga! Do rozstawienia namiotu proszę znaleźć płaski i równy fragment terenu. Proszę używać tylko materiałów dostarczonych wraz z namiotem. Proszę zwrócić uwagę, czy podłoże nadaje sie do przewidzianego przez Państwa celu. Namiot nadaje się do użytku także podczas lekkiego mrozu. Plandeki muszą być jednak przedtem wystarczająco długo składowane w temperaturze przynajmniej 10°C i rozwijane przy tej właśnie lub wyższej temperaturze. -
Page 4: Bezpečnostní Upozornění
8m seria/série/series Bezpečnostní upozornění Úvod Blahopřejeme vám k nákupu vašeho nového stanu. V případě dotazů se můžete kdykoliv obrátit na tým našeho zákaznického servisu nebo na některého z našich autorizovaných prodejních partnerů. Stan nyní můžete flexibilně využívat: na oslavy, prostě jako ochranu před slunečním svitem, jako přístřešek, na skladování... - Page 5 Přispějte k ochraně životního prostředí: Nevyhazujte stan ani jeho části do komunálního odpadu. Doneste je k recyk- laci na oficiální sběrné místo nebo se obraťte na výrobce, příp. autorizovaného prodejce. Záruka a zákaznický servis Budete-li potřebovat další informace nebo pokud se vyskytnou problémy, napište prosím e-mail na adresu mptent@mptent.com. 8x6m, 8x8m, 8x10m, 8x12m, 8x14m, 8x16m...
-
Page 6: Assembly Instruction
Assembly Instruction Introductio Congratulations on the purchase of your new product and welcome to MPTENT. Our customer service department or authorised sales representative will be happy to answer your questions and give any valuable instructions. Your new tent will give you freedom to plan many activities. It can be used at a party, to screen you from the sunlight, as a shelter, for storage and in many other ways. -
Page 7: Cleaning And Storage
If in doubt, please ask the manufacturer. We will be happy to help you recycle the tent correctly. Guarantee and customer services If you need any information or have any problems, please contact us at the following email address: mptent@mptent.com, or contact MPTENT. 8x6m, 8x8m, 8x10m, 8x12m, 8x14m, 8x16m... - Page 8 8m seria/série/series Zawartość / Obsah / Contents Opis 8x6m 8x8m 8x10m artykułu 31476 Rura 1972 mm 38-38 31108 Rura 1930 mm 38-38 31461 Rura 1895 mm 38-38 z otworami 31149 Rura 2005 mm z podstawą dachową poziomą 31150 Rura 735 mm z podstawą...
- Page 9 8m seria/série/series Zawartość / Obsah / Contents Artikel Beschreibung 8x6m 8x8m 8x10m 30046 Szpilka 6x180 mm 30047 Szpilka 4x160 mm 31106 Śruba 50 mm z nakrętką 30384 Śruba 30 mm 30052 Nakrętka 31459 Klucz imbusowy 30430 Łącznik gumowy 14 cm 30429 Łącznik gumowy 5 cm...
- Page 10 8m seria/série/series Zawartość / Obsah / Contents Artikel Beschreibung 8x12m 8x14m 8x16m 31476 Rura 1972 mm 38-38 31108 Stange 1930 mm 38-38 31461 Stange 1895 mm 38-38 mit Löchern 31149 Stange 2005 mm Dachstrebe horizontal 31150 Stange 735 mm Dachstrebe vertikal 31110 3er Eckverbinder...
- Page 11 8m seria/série/series Zawartość / Obsah / Contents Artikel Beschreibung 8x12m 8x14m 8x16m 30046 Erdnagel 6x180 30047 Erdnagel 4x160 31106 Schraube 50 mm mit Flügelmutter 30384 Schraube 30 mm 30052 Flügelmutter 31459 Inbusschlüssel 30430 Gummischlaufe 14 cm 30429 Gummischlaufe 5 cm 30050 Spannleine 3 m 30051...
-
Page 12: Instrukcja Montażu
8m seria/série/series Instrukcja montażu Znajdź płaską powierzchnię do rozstawienia namiotu. Rozpakuj kartony i sprawdź, czy zawierają one wszystkie wymienione elementy. Przed rozpoczęciem montażu, usuń śćiereczką lekkie ślady oleju z rur konstrukcji. Przy niższych temperaturach polecamy ogżanie plandeki namiotu do temperatury pokojowej. Zmontuj ramę... - Page 13 8m seria/série/series Za pomocą śrub (19) i nakrętek skrzydełkowych (20) zamocuj wsporniki wzmacniające (elementy 4 i 5). 8x6m, 8x8m, 8x10m, 8x12m, 8x14m, 8x16m...
- Page 14 8m seria/série/series Podnieś jedną stronę stelażu namiotu i zamocuj nogi (3). Nałóż dach (26) na ramę i przymocuj go za pomocą gumowych pętelek (22). Uważaj, aby pętelki nie były za bardzo naprężone, ponieważ mogłoby to utrudnić montaż drugiej strony namiotu. 8x6m, 8x8m, 8x10m, 8x12m, 8x14m, 8x16m...
- Page 15 8m seria/série/series Po przeciwnej stronie namiotu zamontuj nogi a na ich dolnym końcu zamontuj stopki (12, 12a i 13). Nogi namiotu postaw prostopadle aby uniknąć wiekszego napreżenia na ścianach szczytowych. Szlufki dachu przymocuj do drążków (3) za pomocą haków (25). Następnie zmontuj ramę podstawy namiotu, używając odpowiednich drążków (2) i łączników (14).
- Page 16 8m seria/série/series Rozłóż ściany boczne (27) i ściany szczytowe (28). Ściany boczne zamocuj za pomocą gumowych pętelek (22) do stelaża a ściany szczytowe za pomocą krótszych gumowych pętelek (23) bezpośrednio do dachu. Za pomocą krótszych szpilek (17) przymocuj ściany szczytowe do podłoża. Naciągnij linkę...
-
Page 17: Návod K Použití
8m seria/série/series Návod k použití Vyhledejte rovný poklad, na nějž stan umístíte. Vybalte kartony a zkontrolujte, zda obsahují veškeré zde uvedené díly. Před montáží otřete hadříkem z trubek zbytky tenké olejové vrstvy. V chladnějším počasí doporučujeme nechat stanovou plachtu nejprve dosáhnout pokojové teploty. Složte rám střechy: díly 6 až... - Page 18 8m seria/série/series Instructions Select a flat surface for the tent. Unpack the boxes and check if all listed parts are included. with a cloth. In colder weather conditions we suggest to bring the roof to room temperature before installing. Assemble the roof frame by mounting parts 6 to 11 on the pipes (parts 1 and 2). Use the screws to attach the parts.
Need help?
Do you have a question about the 8m Series and is the answer not in the manual?
Questions and answers