Table of Contents
Advertisement
Advertisement
Table of Contents

Subscribe to Our Youtube Channel
Summary of Contents for ROCK JAM RJ-661
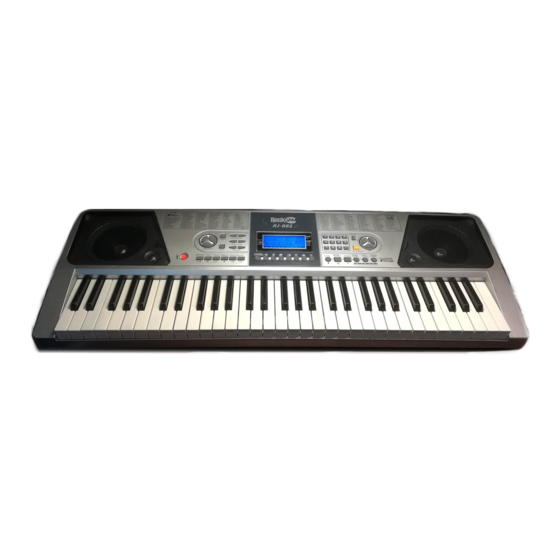
- Page 1 RJ-661 Multi-function Keyboard User Guide...
- Page 2 Important Information Be sure to obey the following information so as not to harm yourself or others or damage this instrument or other external equipment. Power adapter: Please use only the specified AC adapter supplied with the product. An incorrect or faulty •...
-
Page 3: Table Of Contents
Contents Front Panel and External Connections .................. 4 Front Panel ........................4 External Connections ...................... 4 LCD Display ........................5 Preparation Before First Use ....................5 Power ..........................5 Use of AC/DC power adapter: ..................5 Battery operation: ....................... 6 Jacks and Accessories .................... - Page 4 Sync: ........................11 Fill in:........................11 Accompaniment Volume Adjustment: .................11 Tempo Adjustment: ....................12 Chord Accompaniment ....................12 Single Finger Chords: ....................12 Fingered Chords: ......................13 Chord Tones: ......................13 Chord Off: ........................13 Recording Function .......................14 Demo Song Playback ....................15 Teaching Modes ......................15 Single Key Course: ....................15 Synchronised Course: ....................15 Concert Course: .......................16 Progressive Learning: ....................16...
-
Page 5: Front Panel And External Connections
Front Panel and External Connections Front Panel 1. Speaker 17. Demo Songs 2. Power Switch 18. Start/Stop 3. Single Finger 19. Rhythm Sync 4. Fingered Chord 20. Fill In 5. Chord Tones 21. Chord Off 6. Sustain 22. Tempo [Slow/Fast] 7. -
Page 6: Lcd Display
LCD Display 1. Metronome for rhythm and song 2. Speed value of rhythm and song (bpm) 3. Digital display of song, rhythm and tone number 4. TONE, RHYTHM or DEMO song 5. Volume level display 6. Playing chord indication 7. Staff display Preparation Before First Use Power Use of AC/DC power adapter:... -
Page 7: Battery Operation
Battery operation: Open the battery lid on the underneath of the electronic keyboard and insert 6 x 1.5V Size D alkaline batteries. Ensure the batteries are inserted the correct way round and replace the battery lid. Caution: Do not mix old and new batteries. Do not leave batteries in the keyboard if the keyboard is not going to be used for any length of time. -
Page 8: Basic Operation
Basic Operation Power and Volume Power control: Press the [POWER] button to turn the power on and again to turn the power off. MASTER VOLUME VIBRATO ACCOMP VOLUME SUSTAIN TRANSPOSE START/STOP SYNC FILL IN CHORD OFF SLOW TEMPO FAST Adjustment of the Master Volume: The keyboard has 10 levels of volume from 1 -10. -
Page 9: Effect & Control
Effect & Control Dual Keyboard: To switch on Dual Keyboard mode press the [Dual Keyboard] button. The LCD display will show a flag next to [DUAL KEYS]. The keyboard will split into a dual voice keyboard at the 24th key from the left. You can adjust the voice of the left hand side of the keyboard by pressing the corresponding digits 0-9 on the numerical keypad. -
Page 10: Transpose
Transpose: Pressing the [Transpose +/-] button alters the musical scale of the note being played. You can adjust the scale by 6 levels upwards or downwards. Pressing both the [Transpose +/-] buttons at the same time will make the musical scale revert to 0. MASTER VOLUME VIBRATO ACCOMP VOLUME... -
Page 11: Keyboard Percussion
Keyboard Percussion: Press the [KEYBOARD PERCUSSION] button so that percussion sounds can be played by the black and white keys of the keyboard. There are 12 different percussion sounds that can be made. Press the button again to exit keyboard percussion mode. KEYBOARD PERCUSSION Rhythm... -
Page 12: Sync
Sync: Press the [SYNC] button to select the sync accompaniment function. The LCD display will show a flag next to [SYNC]. Pressing any of the first 19 keys on the left hand side of the keyboard will start the rhythm playing. Press the [START / STOP] button to stop the rhythm and exit the sync function. START/STOP SYNC FILL IN CHORD OFF SLOW TEMPO FAST... -
Page 13: Tempo Adjustment
Tempo Adjustment: Press the [TEMPO SLOW/FAST] buttons to adjust the playing tempo of the rhythm, metronome and demo song. The adjustment range is 30-240 bpm. Pressing both the [TEMPO SLOW/FAST] buttons at the same time will make the tempo revert to the default tempo for the rhythm selected or 120 bpm for the metronome. -
Page 14: Fingered Chords
Fingered Chords: ress the [FINGERED] button to enter the fingered auto chord mode A flag is displayed on the LCD next to [FINGERED CHORD]. By pressing certain keys in the chord area on the left hand side of the keyboard (keys 1-19) you can hear different chord accompaniments. The finger patterns required are shown in Appendix V. -
Page 15: Recording Function
Recording Function Press the [RECORD] button to enter the recording mode. The LCD display will show a flag next to [PROGRAM RECORD]. Press any key to start recording. The maximum recording capacity is 85 notes. When the recording capacity is full the LCD display will show [FL]. Each time you press the [RECORDING] button, the previous memory will be cleared and the keyboard will enter the recording mode again. -
Page 16: Demo Song Playback
Demo Song Playback Press the [DEMO] button to play a demo song. The LCD display will show SONG [XX] where xx is the number of the demo song. By pressing the + and - button on the numerical keypad you can choose the demo song you require. -
Page 17: Concert Course
Concert Course: Press the [CONCERT COURSE] button to enter the Concert course teaching mode. A flag next to [TEACHING COURSE] will be displayed on the LCD. This mode is suitable for more advanced users. The LCD display will show SONG [XX] where xx is the number of the demo song selected. Select a different song using the +/- or number keys. -
Page 18: Appendix I. Rhythm Table
Appendix I. Rhythm Table Name of Name of Name of Name of Rhythm Rhythm Rhythm Rhythm Club Pop 16 Beat Shuffle Club Latin Samba 2 Rock'n Roll 1 8 Beat Adria Disco Chocolate Schlager Rock 1 Rock'n Roll 2 Big Band Shuffle Disco Fox Schlager Rock 2 Waltz... -
Page 19: Appendix Ii. Tone Table
Appendix II. Tone Table Name of Name of Name of Name of Tone Tone Tone Tone Acoustic Grand Acoustic Guitar 2 Synth Strings 2 Blown Bottle Piano Bright Acoustic Electric Guitar 1 Choir Aahs Shakuhachi Piano Electric Grand Electric Guitar 2 Voice Oohs Whistle Piano... -
Page 20: Appendix Iii. Demo Song Table
Appendix III. Demo Song Table Name of Song Name of Song Lotus Pond Moonlight Chopin Nocturnes Sweet Honey The Four Seasons - Spring Love You A Million Years Carmen Overture Spring Flowers Tea Butterfly Flutter New Mandarin Butterfly Dream Mozart Symphony Unfortunately, Not You Spanish Bullfighter Blue Apple Paradise... -
Page 21: Appendix Iv. Troubleshooting
Appendix IV. Troubleshooting Trouble Possible Reason / Solution A slight noise is heard when turning the This is normal and nothing to worry about. power on or off. After turning the power on to the keyboard Check the master volume is set to the there was no sound when the keys were correct volume. -
Page 22: Single Finger Chords
Appendix V. Chord Tables Single Finger Chords Page | 21... -
Page 23: Fingered Chords
Fingered Chords Page | 22... -
Page 24: Appendix Vi. Technical Specification
Appendix VI. Technical Specification Display • LCD Display with Staff and Key Indication Tone • 200 tones Rhythm • 200 rhythms Demo • 50 different demo songs Effect Control • Dual Voice, Sustain, Vibrato, Transpose Recording and Programming • 85 Note Record Memory, Playback, 32 Beat Rhythm Programming Percussion •... -
Page 25: Product Disposal Instructions
Product Disposal Instructions The symbol shown here and on the product means that the product is classed as Electrical or Electronic Equipment and should not be disposed with other household or commercial waste at the end of its working life. The Waste Electrical and Electronic Equipment (WEEE) Directive (2002/96/EC) has been put in place to encourage the recycling of products using best available recovery and recycling techniques to minimise the impact on the environment,...
Need help?
Do you have a question about the RJ-661 and is the answer not in the manual?
Questions and answers
Where is the keyboard mute button