Table of Contents
Advertisement
Quick Links
Advertisement
Table of Contents

Summary of Contents for AAVIX AGT314
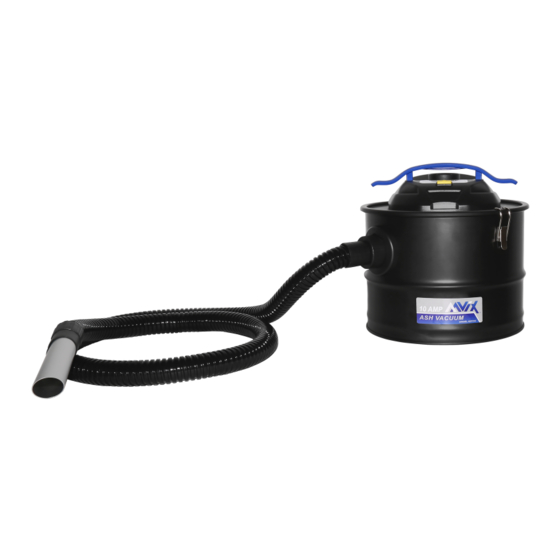
- Page 1 A A V I X O U T D O O R S ASH VACCUM FOR SERVICE CALL: 1-866-591-8921 WARNING : To reduce the risk of injury, user must read this manual before assembling, operating and maintaining this unit, You are responsible for operating the product properly & safely. Version: V1.20161115...
-
Page 2: Table Of Contents
TABLE OF CONTENTS Safety Instructions--------------------------------------------------------------2 Product Specifications---------------------------------------------------------7 Know Your Ash Vacuum------------------------------------------------------8 Assembly--------------------------------------------------------------------------8 Operation-------------------------------------------------------------------------11 Maintenance---------------------------------------------------------------------16 Troubleshooting-----------------------------------------------------------------19 Part List----------------------------------------------------------------------------20 Exploded View-------------------------------------------------------------------21 SAFETY INSTRUCTIONS IMPORTANT! READ AND UNDERSTAND ALL WARNINGS, CAUTIONS AND Failure to follow all OPERATING INSTRUCTIONS BEFORE USING THIS EQUIPMENT. instructions listed below may result in electric shock, fire and/or serious personal injury. - Page 3 up other types of material. • NEVER vacuum liquids with this product. Use this machine to vacuum dry material only. • To reduce the risk of hearing damage, wear hearing protection when using for extended periods or in noisy work area. WARNING: TO REDUCE THE RISK OF FIRE, ELECTRIC SHOCK OR PERSONAL INJURY • Keep children away from this vacuum. Do not allow vacuum to be used as a toy. • Do not run this vacuum unattended at anytime. • Keep hair, loose clothing and all parts of the body away from openings and moving parts. • Always wear safety goggles (complying with ANSI Z87.1 (or in Canada CSAZ94.3) when operating the vacuum. Operation of vacuum can result in foreign objects being blown into your eyes, which may cause eye injury. • Do not use in wet environments or expose to rain. Store unit indoors or other dry location. • Do not touch or handle the plug, cord or the vacuum with wet hands. • Do not vacuum up or operate the vacuum near flammable liquids, gases, toxic or explosive vapors given off by gasoline or other fuels, paint thinner, oil based paint, lighter fluids, hydrogen, natural gas, etc or explosive dusts like coal dust, magnesium dust, grain dust or gun powder Sparks from arcing motor brushes inside the motor can ignite flammable vapors or dust. 3 ...
- Page 4 • Do not vacuum toxic, carcinogenic, combustible or other hazardous materials (e.g. asbestos, arsenic, barium, lead, pesticides, insecticides,) or other health endangering materials. • Do not vacuum anything that is burning or smoking, e.g. embers, cigarettes, matches, pellets, etc. • Do not abuse the cord. Never carry or pull the vacuum by the cord, use as a handle or pull the cord to disconnect from power outlet. To unplug from power outlet, grasp the plug, not the cord. • Keep cord from heated surfaces, oil and sharp edges. Do not close doors on the cord or pull around corners with sharp edges. • Cords can become trip hazards. Do not leave the cord lying on floor. Pick up the cord when you have completed cleaning work. • Do not leave the vacuum plugged in when unattended or not in use. Unplug from power source when not in use and before servicing. • Do not drive or run over the cord. • Do not use with damaged cord, plug or other parts or if vacuum is not functioning as it should, has been dropped, damaged, left outdoors, or dropped in water, return it to a service center. • Do not use the Ash Vacuum with a torn filter or without the filter installed. • Turn the machine off before unplugging. • Unplug the product from the power source before changing or cleaning the filter to reduce the risk of injury from accidental starting. 4 ...
- Page 5 • Do not place, drop or insert any object into ventilation openings. Do not operate the vacuum with any ventilation openings blocked; keep free of dust, lint, hair or anything else that may reduce airflow. • Do not store the vacuum immediately after ash removal or other use in a confined area or enclosed space. Allow the motor to cool and remove ash from canister before storage. • When using as a blower ‐ Direct air discharge only at work area. ‐ Keep children away when blowing. ‐ Do not direct air at bystanders. ‐ Do not use blower for any job except blowing dirt and debris. ‐ Do not use blower as a sprayer. ‐ Wear safety eye wear. ‐ For dusty operations, wear a dust mask. FIRE HAZARD WARNING • The Ash Vacuum is intended for vacuuming cold or warm ashes only. Using the vacuum as a shop vacuum or for general household use could increase the risk of fire by depositing combustible material into the canister prior to vacuuming ashes. • Use caution when vacuuming materials that appear to have cooled, but may actually still be hot inside. Airflow created during vacuuming may cause hot ash to ignite again. As you vacuum, constantly check the nozzle, hose, canister, filter and motor for excessive temperatures. If you notice an increase in temperature, turn off the vacuum 5 ...
- Page 6 immediately. Unplug the vacuum and remove the vacuumed material from the canister and filter bag. Allow the vacuum and the material to be vacuumed to cool before continuing to vacuum. EXTENSION CORDS Double insulated equipment can use either a two or three wire extension cord. As the distance from the power supply outlet increases, you must use a heavier gauge extension cord. Using extension cords with inadequately sized wire causes a serious drop in voltage, resulting in loss of power and possible tool damage. Refer to the table shown below to determine the required minimum wire size. Guidelines for Using Extension Cords • If you are using an extension cord outdoors, be sure it is marked with the suffix “W‐A” (“W” in Canada) to indicate that it is acceptable for outdoor use. • Be sure your extension cord is properly wired and in good electrical condition. Always replace a damaged extension cord or have it repaired by a qualified person before using it. • Protect your extension cords from sharp objects, excessive heat, and damp or wet areas. Recommended Minimum Wire Gauge for Extension Cords (120 Volt) Nameplate Extension Cord Length Amperes 25 Feet 50 Feet 75 Feet 100 Feet 150 Feet 200 Feet 0 – 2.0 18 18 18 18 16 16 2.1–3.4 18 18 18 16 ...
-
Page 7: Product Specifications
DOUBLE-INSULATED INSTRUCTIONS WARNING: In a double‐insulated vacuum, two systems of insulation are provided instead of grounding. No means of grounding is provided on a double‐ insulated appliance, nor should a means for grounding be added. Servicing a double‐ insulated Vacuum requires extreme care and knowledge of the system, and should be done only by qualified service personnel. Replacement parts for a double‐insulated Vacuum must be identical to the parts they replace. Your double‐insulated Vacuum is marked with the words (square within a square) may also be marked "DOUBLE INSULATED" and the symbol on the appliance. POLARIZED PLUG Double insulated products are equipped with a polarized plug (one blade is wider than the other). This plug will fit in a polarized outlet only one way. If the plug does not fit fully in the outlet, reverse the plug. If it still does not fit, contact a qualified electrician to install a polarized outlet. Do not change the plug in any way. Double insulation eliminates the need for the three wire grounded power cord and grounded power supply system. SPECIFICATIONS Model: AGT314 Motor: 120V AC, 60Hz, 10A Tank Capacity: 15L/4gals Plug power cord: 1.5m/5ft Hose: 2m/6.6ft Weight: 4.3kg/9.5lbs 7 ... -
Page 8: Know Your Ash Vacuum
KNOW YOUR ASH VACUUM 1 Exhaust port 8 Vacuum port 2 Carrying handle 9 Tank Cover 3 On/Off switch 10 Pre‐filter 4 Clamp 11 Velcro strap 5 Ash canister 12 Extension tupes 6 Metal nozzle 13 Crevice Hose 7 14 Carpet/floor attachment ASSEMBLY For your own ... - Page 9 operation instructions. Do not operate the vacuum with any parts damaged or missing. UNPACKING IMPORTANT! Due to modern mass production techniques, it is unlikely the tool is faulty or that a part is missing. If you find anything wrong, do not operate the tool until the parts have been replaced or the fault has been rectified. Failure to do so could result in serious personal injury. INSTALLING THE VELCRO STRAP 1. Locate the velcro strap around the upper edge of ash canister like photo below. INSTALLING THE PRE-FILTER, MOTOR AND HOSE The pre-filter is made of a specially designed glass fabric cloth that effectively filters approximately 95% of coarse-dust particles.
-
Page 10: Exhaust Port
2. Lower the pre‐filter until the rubber gasket rests evenly on the lip of the metal canister. 3. If necessary, adjust the rubber gasket so it completely covers the canister lip without any gaps. 4. Insert the motor housing into the canister so it rests on top of the rubber gasket with the on/off switch and FULL indicator above the canister vacuum port. Be sure each clamp end is aligned over a clamp landing on the motor IMPORTANT housing as shown below. 6. Secure the motor housing in place by locking down the clamps. 7. Align the raised boss on the large hose end with the gap at the top of the canister vacuum port. Push the hose end inward and rotate clockwise to lock in place. See photo below. 8. Insert the metal intake nozzle into the other end of the hose. Turning the nozzle clockwise while pushing it into the hose end will help to securely seat the metal nozzle. 10 ... -
Page 11: Operation
ACCESSORY STORAGE 1. Use the Velcro strap to hold each accessories as photo below. Make sure that each of them is fixed well. OPERATION Although the Ash Vacuum has special features for vacuuming cool ashes from fireplaces, stoves, and BBQ’s, it may also be used for dry vacuuming as a shop/garage vacuum, a household vacuum, or as a blower. In the Operation section are special instructions for various ash vacuum uses. WARNING: Be sure to read, understand and apply all safety instructions and warnings. Safety is a combination of common sense, staying alert, and knowing how your Ash Vacuum works. WARNING: To reduce the risk of fire or explosion, do not operate this vacuum in areas with flammable gases, vapors or explosive dust in the air. Flammable gases or vapors include but not limited to: lighter fluid, solvent type cleaners, oil‐base paints, 11 ... -
Page 12: On/Off Switch
gasoline, alcohol or aerosol sprays. Explosive dusts include but are not limited to: coal, magnesium, aluminum, grain or gunpowder. Do not vacuum explosive dust, flammable or combustible liquids or hot ashes. To reduce the risk of health hazards from vapors or dusts, do not vacuum toxic materials. ON/OFF SWITCH After plugging the power cord into an outlet, the unit is turned on by pushing the switch from up position (OFF)to low position (ON). NOTE: Static shocks are common in dry areas or when the relative humidity of the air is low. Vacuuming fine debris with your Ash Vacuum can cause static charge on the hose or on the vacuum. The best remedy to reduce the frequency of static shocks in your home when using this vacuum is to add moisture to the air with a humidifier. ASH VACUUM USE 1. Before connecting the power cord to power source, check that the vacuum is properly assembled with the metal nozzle installed. NEVER use the ash vacuum without the metal nozzle in place. CAUTION 2. Ensure the On/Off switch is in the up (OFF) position. 3. Place the Ash Vacuum near the fireplace or stove you are cleaning and make sure the ash inside is cool. 4. Insert the power cord plug into an outlet near your work area and push the switch to the low (ON) position. 12 ... -
Page 13: Clamp
5. Using the metal nozzle only, begin vacuuming the ash. 6. As you vacuum, constantly check the nozzle, hose, canister, filters and motor for excessive temperatures. If you notice an increase in temperature, turn off the vacuum immediately. Unplug the vacuum and remove the vacuumed material from the canister and filter bag. Allow the vacuum and the material to be vacuum to cool before continuing to vacuum. The FULL indicator area will gradually become RED as the canister fills with IMPORTANT! ash. It CAN NOT confirm that the vacuum canister is full. Check it regularly to see if the vacuum canister is full. When suction performance deteriorates, it needs to clean the pre‐filter and cartridge filter(see “MAINTENANCE”). 7. Continue to run the vacuum for about 30 seconds after cleaning is complete to be sure any material remaining in the hose is safely deposited into the canister. Press the vacuum switch to the OFF position, then unplug from the outlet. 8. Allow the vacuum to cool, then remove ash from the canister and clean the filters as explained in the manual’s “MAINTENANCE” instructions before storing the vacuum. Usage Hints • Do not shove or bury the nozzle in the ash; doing so will cause nozzle & hose to more easily clog with debris. • Rest the nozzle tip on the firebrick at roughly a 45° angle to minimize larger pieces from clogging the nozzle & hose. • Move the nozzle on the firebrick in a circular or back & forth motion. This will help scrap off ash stuck to the firebrick and allow ash to be removed quickly through the nozzle & hose without clogging. 13 ... -
Page 14: Ash Canister
• Move larger chucks of debris to the side to break apart between the metal nozzle and firebrick as necessary. DRY SHOP VACUUM USE Empty all ash from the canister and clean ash from filters before using to CAUTION: vacuum up other types of material. Not doing so could increase the risk of fire by depositing combustible material into the canister. 1. Before connecting the power cord to power source, check that the canister & filters have been cleaned of ash and the vacuum is properly assembled with the metal nozzle in place. 2. Ensure the On/Off switch is in the up (OFF) position. 3. Insert the power cord plug into an outlet near the area to be vacuumed, then push the switch to the low (ON) position. 4. Occasionally check the FULL indicator during use. 5. Run the vacuum for about 30 seconds after cleaning is complete to be sure any material remaining in the hose is safely deposited into the canister. Turn off the vacuum by pushing the switch to the up(OFF) position, then unplug from the outlet. 6. Clean the canister and filters as explained in the manual’s “MAINTENANCE” instructions before storing the vacuum. BLOWER USE WARNING: Always wear safety eye wear complying with ANSI Z87.1 (or in Canada, CSA Z94.3) before • using as a blower. 14 ... -
Page 15: Metal Nozzle
• To reduce the risk of injury to bystanders, keep them clear of blowing debris. • Wear a dust mask if blowing creates dust that might be inhaled. • To reduce the risks of hearing damage wear hearing protectors when using the vacuum/blower for extended hours or when using in a noisy area. 1. Before connecting the power cord to power source, check that the canister & filters have been cleaned of ash and the vacuum is properly assembled. 2. Ensure the On/Off switch is in the up (OFF) position. 3. Locate the exhaust port. Install the large hose end and rotate clockwise to lock in place. When using Ash Vacuum as a blower, the hose can be used with or without the NOTE: metal nozzle or extension tube(s) installed 4. Insert the power cord plug into an outlet near the area to be vacuumed, then push the switch to the low (ON) position. FLOOR/CARPET TOOL USE The Floor Carpet Tool can only be used when attached to an extension tube. With vacuum set up for dry vacuuming 15 ... -
Page 16: Maintenance
1. Connect the extension tubes to one another; then, attach the floor/carpet tool to the narrow extension tube end. 2. Slide the wide end of the extension tube into the hose. 3. Located on the left side of the floor/carpet tool is the brush position lever. ‐ Push down the lever’s front edge to retract the brush for vacuuming floors. ‐ Push down the lever’s back edge to lower the brush for vacuuming carpets. CREVICE TOOL Use the Crevice Tool to vacuum material from narrow areas more effectively then the nozzle alone. The narrow tip of the crevice tool also increases suction, which aids in vacuuming material in deeper cracks & tight areas. ‐ Attach the crevice tool the narrow end of an extension tube to access hard to reach areas. ‐ Rotate the tools tip as the arrow indicates to position the brush end for use. MAINTENANCE Always disconnect the plug from the power outlet before performing WARNING: 16 ... - Page 17 all maintenance procedures and when removing the motor housing. All cleaning and maintenance procedures should not be done indoors IMPORTANT! in or near living areas. CLEANING THE CANISTER AND FILTERS 1.Unplug the vacuum from the power outlet. 2.Remove the hose from the vacuum port by rotating the hose coupling counter‐clockwise. 3.Unclamp the motor housing and remove it from top of the canister. Pre‐filter Cleaning 1. To minimize airborne dust, tap the inside of the pre‐filter bag with your fingertips to knock collected dust into the canister. 2. Remove the pre‐filter bag from the canister and remove remaining dust by tapping the filter’s interior or lightly brushing off the outside of the bag. If necessary, the pre‐filter may be hand washed with cool water & mild detergent, NOTE: then gently hand wring to remove excess water and set aside to air dry. Be sure the pre‐filter is dry before use. machine wash/dry the pre‐filter! DO NOT Do not use compressed air to clean the filter. NOTE: Cartridge Filter Cleaning 1. Clean cartridge Filter by shaking off the ash. If necessary, remove any debris with a clean and dry paintbrush or hand brush. 17 ...
- Page 18 DO NOT the cartridge filter in water! NOTE: AAVIX™ Ash Vacuum can only use AAVIX™ specially designed Ash Vacuum Filter. Canister Cleaning 1. Dump the cold ash from the canister into an appropriate disposable container such as a plastic or paper trash bag. 2. To remove ash clinging to the canister interior, light wipe off the dust with paper towels or cloth rag. If necessary, a slightly moist towel or rag may be used to wipe off the canister interior & exterior. 3. Do not wash the canister with water, cleaning agent, or other liquid. Inspect the filter for tears or holes; if any are found, replace the filter before reassembly of the Ash Vacuum. Do not use the vacuum with a damaged filter or without a properly IMPORTANT! installed filter; doing so will result in dust blowing out the vents & exhaust port. Following canister & filters cleaning, and then filters inspection and filters replacement, if necessary, reassemble the Ash Vacuum before storage. 18 ...
-
Page 19: Troubleshooting
TROUBLESHOOTING Always disconnect the plug from the power outlet before trouble hooting. WARNING: SYMPTON POSSIBLE CAUSES REMEDY ‐ Plug into power outlet ‐ Check power supply for blown Vacuum does not No power to motor breakers/fuses – replace if operate needed. ‐ Call customer service help line. 1. Pre‐filter not installed 1. Install the pre‐filter 2. Holes or torn pre‐filter 2. Replace the pre‐filter 3. Pre‐filter gasket not Dust escaping 3. Check and reinstall the laying flush on canister top pre‐filter. edge 4. Motor housing not 4. Reinstall motor housing. Or, seated or secured lock down both clamps. Metal nozzle, hose or Allow ash to cool before ... -
Page 20: Partlist
PARTLIST 20 ... - Page 21 21 ...
-
Page 22: Exploded View
EXPLODED VIEW 22 ... - Page 23 23 ...
Need help?
Do you have a question about the AGT314 and is the answer not in the manual?
Questions and answers