Table of Contents

Related Manuals for Wine Cell'R WC1958PLBC


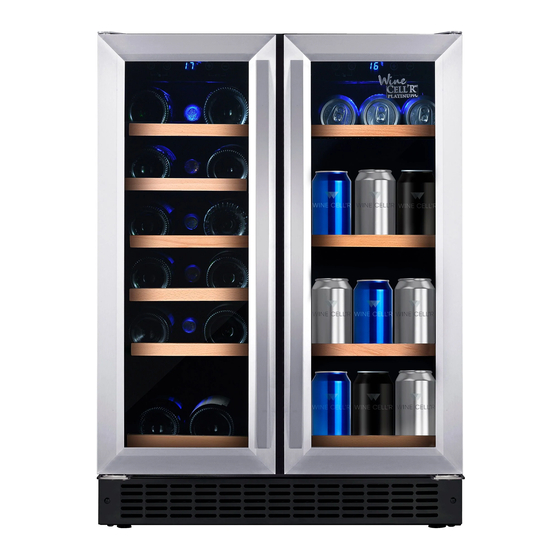
Summary of Contents for Wine Cell'R WC1958PLBC
- Page 1 Instruction manual Models: WC34PLSZ5 (1 zone) WC38SSTBC5 (2 zones wine/beverages) WC1958PLBC (2 zones wine/beverages) WC46PLSZ5 (1 zone) WC46PLDZ5 (2 zones) PLEASE READ THIS MANUAL CAREFULLY BEFORE INSTALLATION AND USE. VERSION FRANÇAISE P.21...
-
Page 3: Table Of Contents
Table des matières INFORMATION/SAFETY INSTRUCTIONS 4 to 5 Before using your device Important safety instructions Pre-installation tips INSTALLATION 6 to 10 Measurements and dimensions Installing the handle Reversing the door Bottle layout and storage OPERATION 11 to 15 Wine cabinet operation •... -
Page 4: Information/Safety Instructions
INFORMATION/SAFETY INSTRUCTIONS Before using your device Remove inner and outer packing material. • Allow the appliance to stand upright for approximately 24 hours before plugging it • in to avoid complications in the cooling system. Use a soft cloth with warm water to clean the inside and outside. •... -
Page 5: Pre-Installation Tips
Pre-installation tips This appliance is designed for flush-mounted or freestanding installation • The appliance is intended to be used exclusively for the storage of wine. • Place your wine cabinet on a flat floor strong enough to support it when fully loaded. It is important that the appliance is level to operate properly (check with a level •... -
Page 6: Installation
INSTALLATION Measurements and dimensions The cut-out dimensions shown below allow door clearance and access to the sliding shelves when the wine cabinet is installed as a flush-mounted appliance. Your wine cabinet has been manufactured with a zero-clearance door, so no additional space is required to accommodate door swing when building your cabinets. - Page 7 / WC46PLSZ5 / WC46PLDZ5 WC38SSTBC5 WC1958PLBC...
-
Page 8: Installing The Handle
Installing the handle 1. Move the door seal behind the handle with your finger. In some models, plastic caps cover the screws; remove them to expose the screws. 2. Insert the screws into the pre-drilled holes in the handle. 3. Install the handle and tighten the screws. 4. - Page 9 2. Remove the door from the top hinge, remove the metal pin and remove it. 3. Use a small flat head screwdriver to lift and remove the plastic cap on the upper center (locking hole) of the door and insert it into the lower center hole, rotate the door 180 degrees (counterclockwise) so that the top becomes the bottom.
-
Page 10: Bottle Layout And Storage
7. Screw the metal pin under the door, then install the door by retracting it into the upper hinge and then into the lower hinge. Replace the screws of the support bar at the bottom to secure the door. Bottle layout and storage Your wine cabinet has been designed to safely store a maximum number of bottles. -
Page 11: Wine Cabinet Operation
1 zone model (Including WC1958PLBC & WC38SSTBC5) 2 zones model ON & OFF button Switches the wine cabinet on or off. -
Page 12: Display Panel (A)
Temperature increase (+) Increases the set temperature. Decrease in temperature (-) Reduces the set temperature. Temperature in Celsius or Fahrenheit By simultaneously pressing the + and - controls with the locked panel changes the temperature display to Fahrenheit or Celsius. Zone selection (Dual zone only) Press to select the upper zone (left digits) or the lower zone (right digits) when setting temperatures. -
Page 13: Temperature Setting (C)
Temperature setting NOTE: The temperature reading indicates the actual temperature of the wine cabinet, it temporarily displays the temperature set during the adjustments, then returns to the temperature read inside after 5 seconds. 1. Make sure the power cord is properly connected to a grounded outlet. 2. -
Page 14: Ideal Temperature For Serving Your Wine
Lock • This appliance comes with a key lock (except model WC1958PLBC & WC38SSTBC5). • The keys are located inside the plastic bag containing the user manual. To unlock the door, insert the key into the lock and turn counterclockwise. -
Page 15: How To Remove A Telescopic Shelf
How to remove a telescopic shelf 1. Remove all bottles. 2. Pull the shelf out as far as it will go 3. Hold one of the telescopic shelves with one hand and with the other hand, gently lift the front of the shelf by the front tab, then push backwards to unlock the rear hook. 4. -
Page 16: Filter Change
• Vacuum the front grille and the back of the appliance twice a year. Make sure the power is turned off before cleaning. • It is recommended to clean the appliance thoroughly inside and out once a year to • maximize the longevity of the wine cabinet and the finish of the various materials. -
Page 17: Troubleshooting
TROUBLESHOOTING Many common problems can be solved very easily. Follow the troubleshooting tips below if you encounter any problem: PROBLEM CAUSES & SOLUTIONS Check if it is plugged in. The cellar is not turned ON. The circuit is closed or a fuse is blown. My cellar is not working. - Page 18 PROBLEM CAUSES & SOLUTIONS Noise can come from the coolant, which is normal. At the end of each cycle, you can hear a gurgling sound caused by the coolant. The expansion and contraction of the interior walls can cause creaking noises. My cellar seems to be making The unit is not level.
-
Page 19: Your Wine Cell'r Warranty
2-year limited warranty on parts and labour Wine Cell'R will provide, at its discretion, all parts that prove to be defective due to a defect in material or workmanship and will also provide, free of charge, labour and repair services to replace said defective parts, and this, 2 years from the date of purchase. - Page 20 • A perforated evaporator voids the warranty on the entire sealing system. • Repairs made by technicians not authorized by Wine Cell'R. • Any damage incurred during transport or movement of the appliance. • Expenses related to the removal or reinstallation of the product that is not accessible to the technician.
-
Page 21: Contact Us
Contact us Thank you for purchasing a Wine Cell'R quality appliance. We advise you to activate your warranty now. Simply fill out the attached registration form and return it to us by mail or by email at service@eurocelcanada.com or by fax at 450 688-2324.
Need help?
Do you have a question about the WC1958PLBC and is the answer not in the manual?
Questions and answers
What is the recommended temperature setting for a wine cooler
The optimal storage temperature for wine in the Wine Cell'R WC1958PLBC wine cooler is generally between 53-57°F (12-14°C). However, the recommended serving temperatures vary by wine type:
- Red wines: 59-65°F (15-18°C)
- White wines: 45-52°F (7-11°C)
- Champagnes: 40-45°F (4-7°C)
This answer is automatically generated
Wine Celler is running but not cooling
The Wine Cell'R WC1958PLBC may be running but not cooling due to several possible reasons:
1. Temperature Sensor Issue – If the digital display shows "HH" or "LL" with a continuous beep, the temperature sensor is non-functional and needs replacement.
2. Door Not Sealing Properly – If the door does not close well, cool air may be escaping.
3. Room Temperature Too Warm – If the surrounding temperature is higher than normal, it may affect cooling efficiency.
4. Frequent Door Opening – Opening the door too often or adding a lot of content at once can cause temperature fluctuations.
5. Power Supply Issues – Ensure the unit is plugged in and that the circuit is not tripped or a fuse blown.
6. Installation Problems – If the unit is not level or there is too much space around it, it may not function properly.
Checking these factors can help determine the cause of inadequate cooling.
This answer is automatically generated